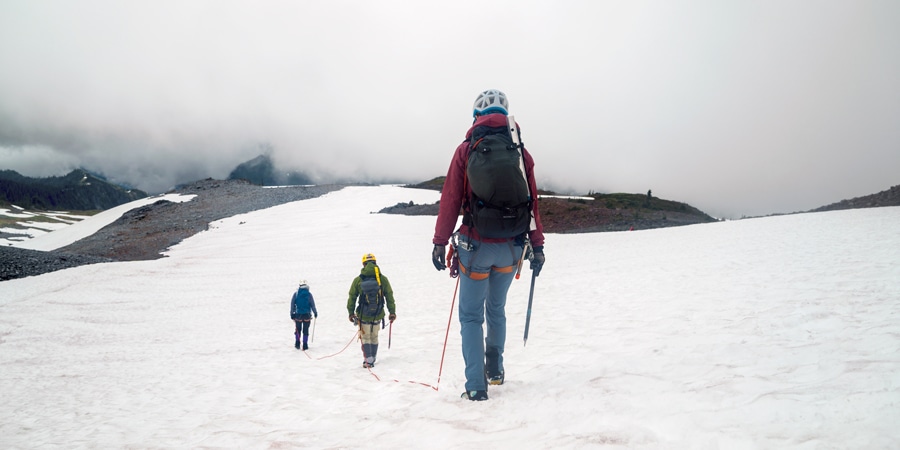
If you have dreams of scaling a glaciated peak like Mount Rainier or Denali, you'll need to know how to travel across a glacier as safely as you can to reach the summit. Glaciers are masses of slow-moving ice and getting a glimpse of their deep blue cracks and icy fissures is one of the thrills of mountaineering. But glaciers can pose hazards, from crevasses to falling ice to weak snow bridges.
What is roped travel? When mountaineering, you'll rope up with others for safety and travel as a team when tackling challenging terrain such as crossing a glacier or ascending a steep snow slope on your way to the summit. If someone slips on a slope or falls into a crevasse, others on the team self-arrest and act as the human anchor to stop the fall. Team members then work together to rescue the fallen climber, a skill we'll discuss further in Crevasse Rescue Skills.
In this article, we'll introduce some of the most important rope travel skills you'll need for mountaineering, including:
- When to rope up
- Rope team considerations
- How to rope up
- Tips for traveling on a rope team
- Belaying on snow
Climbing safety is your responsibility. No article or video can replace qualified instruction and experience.
Find a Mountaineering Class Near You
When do you rope up?
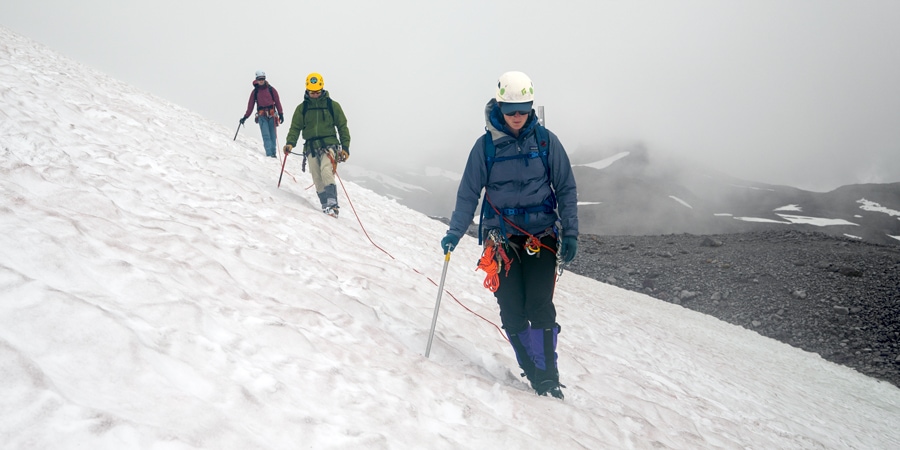
You'll typically rope up whenever you're traveling on a glacier. You may also want to rope up when crossing a steep section where you'll need extra protection that you can't get from footwork, self-arrest skills or crampons. Remember, the rope itself doesn't protect you against a fall; it's having it attached to other climbers (who can self-arrest) or pieces of anchors that you place in the snow for protection.
Rope Team Considerations
Party size: As you're planning your mountaineering trip, you'll decide how many people will be on your rope team. If you're new to mountaineering, a typical setup is to have at least three people on a rope. If one climber is injured, the others can assist with the rescue. A two-person rope team can move more quickly and efficiently on a glacier, but it's very challenging for one person to stop another climber's fall and then rescue the fallen climber on their own.
For more tips on how to research and create a route plan, read How to Plan a Mountaineering Trip.
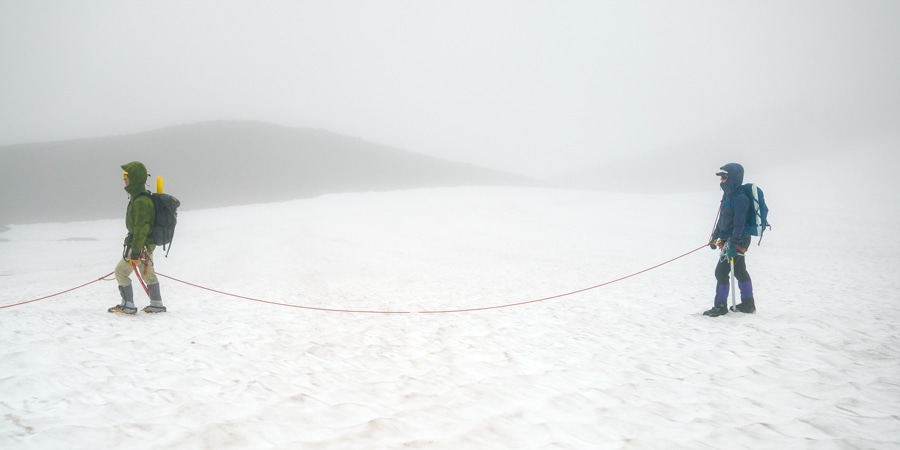
Spacing on the rope: Next, decide how much space to leave between climbers on the rope. This will depend on the size of the crevasses you'll encounter and how many people will be on the rope. You'll want enough space between climbers to bridge those crevasses. (This is information you'll gather as you research and plan your route, which includes getting beta from rangers and other climbers.)
It's a judgment call. Too much space makes it more difficult to stop a fall and harder to communicate among climbers. Too close and you run the risk that two people are pulled into a crevasse at the same time. If you can't see the crevasses or you're unfamiliar with the area, you'll probably need to increase the spacing between climbers.
For a three-person team, depending on conditions, you may choose to leave five arms' length, or roughly 30 feet, between climbers.
Order on the Rope: The order of climbers on the rope will depend on a variety of important factors, including the person's size, weight and experience. Here are some things to keep in mind, though you'll have to balance the factors within your group:
- The least experienced person should be in the middle of the rope.
- Typically, the biggest person should be on the uphill (leading) as the team ascends the mountain and should be the last person as the team descends the glacier.
- Those with the most route-finding and navigation experience should be out front to navigate around crevasses and watch for other potential hazards.
For more information on route-finding, read our article on Route-Finding and Navigation for Mountaineering.
How to Rope Up
Now that you've decided spacing and order, it's time to rope up. For a three- or four-person team, all of the climbers will tie into the rope using a knot such as a figure eight on a bight or butterfly knot. (For a knots refresher, read and watch videos of Climbing Knots and Hitches).
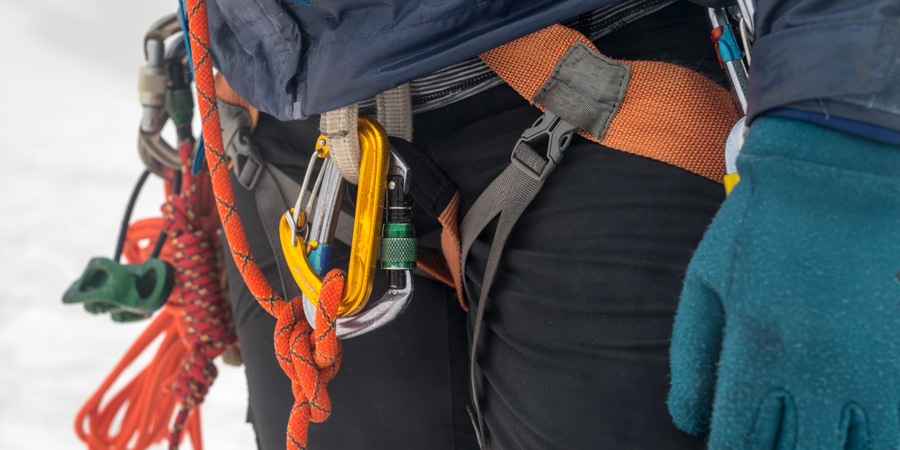
Whatever knot you choose, you should use both a locking carabiner and a nonlocking carabiner to clip the rope to the belay loop of your harness. The carabiners should be in opposite and opposed directions—where the gates aren't matched up. If you have a triple-action carabiner, you can use that. Using this system increases safety because it requires multiple steps for the rope to be released from the carabiners.
Here's a sample of how three climbers would tie into a rope:
- The middle person ties into the center of the rope using a figure eight on a bight and clips the knot into the belay loop of their harness using a nonlocking and locking carabiner (as described above).
- Measure about five or six arms' length in each direction of the middle climber. The end climbers will use the same process as the middle climber to tie into the rope. They'll have excess rope at each end to use for a potential rescue.
- The end climbers coil the remaining rope using a butterfly coil (see technique below) and store the rope inside their backpacks.
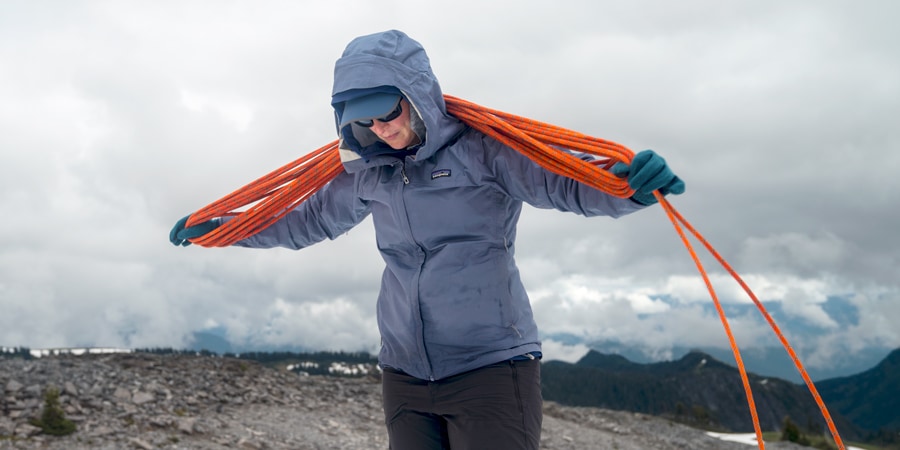
How to Butterfly Coil a Rope: One way to butterfly coil a rope is to use your shoulders and neck to help form the loops of the coil. (You can coil the rope while holding it in your hands.)
Here are the steps:
- Measuring out about two full arms' length of rope from the tail end. (You'll use this to tie the coil together in step 5.)
- From the point you marked out, stretch out the rope in both hands about a full arm span.
- Bring the rope behind your neck and rest it on your shoulders. Your neck will be the midpoint of the rope as you form loops.
- Take the long end of the rope and begin forming a loop in one hand. Loop the rope back and forth behind your neck, forming even loops on each side of your body.
- When you're out of rope, take the coil off your shoulders. Use the tail end of the rope to wrap the coil together and tie it off.
Pre-rigging for glacier travel: Opinions differ on whether you should "pre-rig" your rope for glacier travel. To pre-rig means you set up additional prusiks on your rope to more quickly aid crevasse rescue. For example, some climbers will hitch two slings (foot prusik and waist prusik) on the rope so it's ready if they fall into a crevasse and need to ascend. Others carry the necessary cords on their harness and set up the slings when they actually need it, keeping the gear free for a wider range of uses. The advantage of a pre-rig is that it saves time, but some don't pre-rig because the slings can get in the way as you're walking and add to the number of things you have to manage.
Traveling on a Rope Team
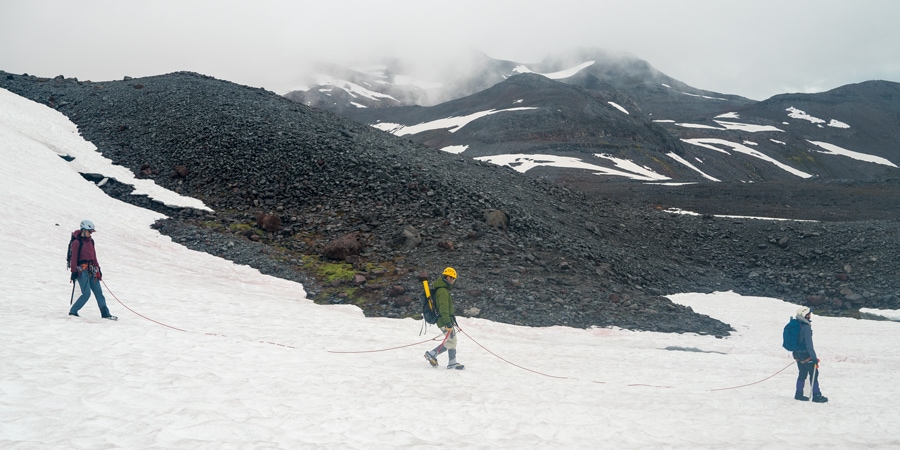
Now that you're secured to a rope, you'll need to know how to move across the glacier as a team. It's important to keep slack out of the rope by matching the pace of your teammates. Too much loose rope and it'll take longer to stop the fall. Not enough slack makes for jerky movements as you walk. Keeping a good rope interval between climbers is essential to safer, smoother travel. This takes practice! The rope should hang at about a 45-degree angle from your harness and just slightly touch the ground.
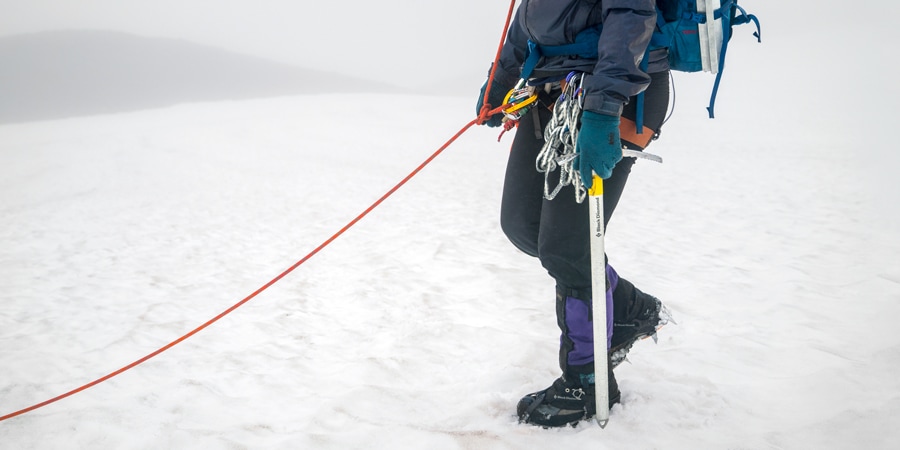
Other travel tips:
- The lead climber should set a pace that others can follow.
- Cross a crevasse at a right angle (perpendicular) to it rather than parallel.
- Communicate with your team members. If you slip, yell "falling!"
- When reaching a switchback, carefully step over the rope (watch your crampons!) so the rope is on your uphill slope.
- Find a safe spot to take breaks. You can remain spread out on the rope. If it's a safe spot, the leader could coil the others in one by one.
- If there's a significant fall hazard or you anticipate using a running belay (described below), keep the rope on your uphill side. (In low-consequence terrain, it doesn't matter which side the rope is on.)
Belaying on Snow
When you travel roped together, you may encounter hazards or situations when team arrest isn't possible, when you need extra protection on an extended steep section, or when you're worried that one person's fall, however short, may take others down.
Running belay: One quick way to add security is to set up a running belay - which allows the team to move together at the same time while the rope is secured to one or more snow anchors. In a running belay, the lead climber will place one or more individual pieces of protection (typically a snow picket or an ice screw) that the rope is secured to. The anchor holds the rope and team in case of a fall. If one anchor isn't enough protection for the running belay, use multiple individual anchors. The running belay allows for the team to move more efficiently than setting up a stationary belay, as you would in rock climbing.
To learn more about how to build snow anchors, see our article Snow Anchors for Mountaineering.
To set up a running belay:
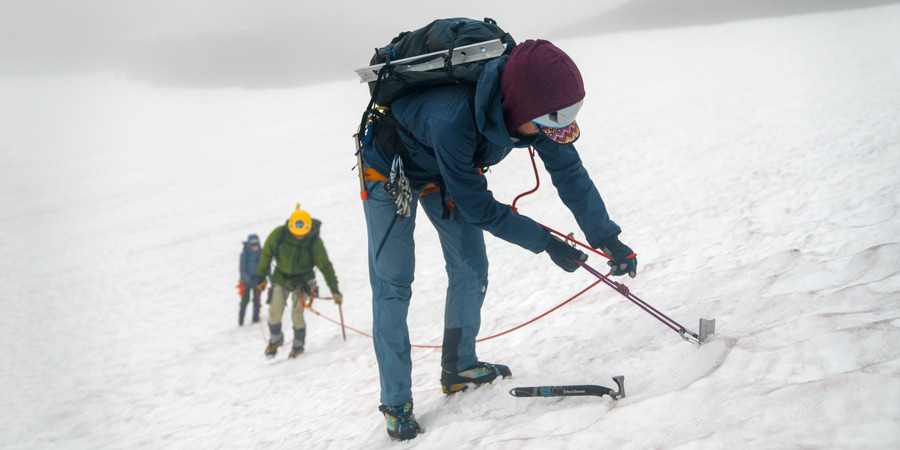
The lead climber places a piece of protection (see Snow Anchors article) and clips the rope to a carabiner that's on a sling. The leader may decide to place several pieces of protection at certain intervals depending on the potential hazards.
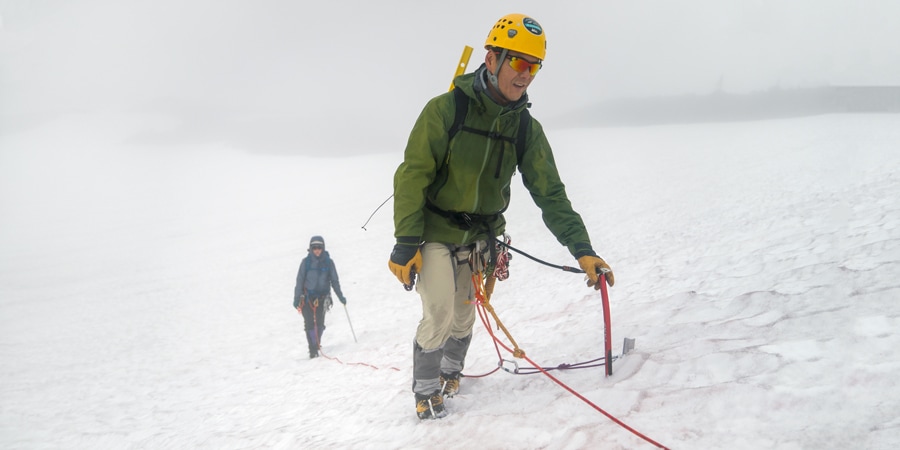
If you're the middle climber, as you pass through the rope, you'll unclip the rope in front of you and clip it again once you've moved past the anchor.
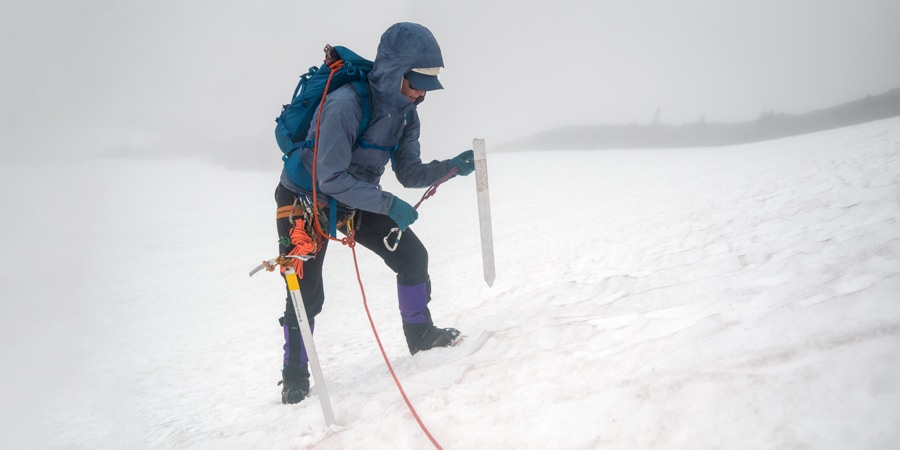
The last climber removes the anchor and stashes it.
Belaying: There may be times when a running belay isn't sufficient protection and you want a full-on belay. In such cases, you'll stop and build an equalized anchor and use the rope to belay individual climbers across a steep section in the same way you would in rock climbing.
