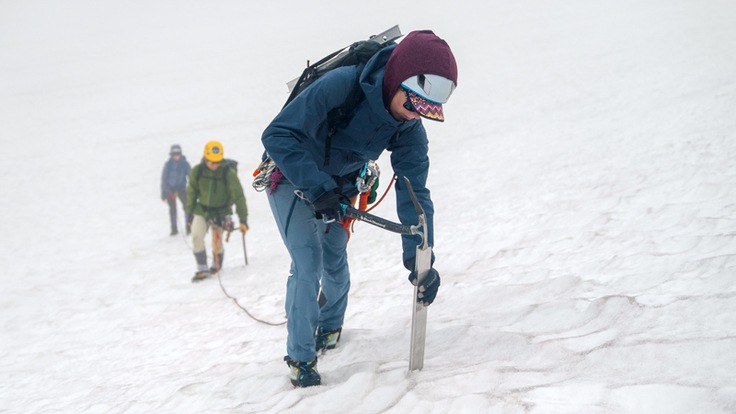
When you're mountaineering, you'll build snow anchors for added protection when traveling on a glacier, crossing steep slopes, or to aid in crevasse rescues. Snow anchors can be built using a variety of objects, such as an ice axe or ski, but a snow picket is the standard piece of equipment that many mountaineers carry. Pickets can be used in different ways to build an anchor. You can hammer it upright into the snow or bury it horizontally; you can attach a sling to the top or midpoint.
In this article, we'll cover the different ways to use pickets for protection in snow:
- Vertical top-clip picket: Quick to set up and ideal for running belays.
- Vertical mid-clip picket: Considerably stronger than the vertical top-clip and should be used in most cases.
- T-trench anchor: One of the strongest anchors and should be part of any anchor system you build to aid crevasse rescue.
- Using two anchors to distribute the load.
Climbing safety is your responsibility. No article or video can replace qualified instruction and experience.
Find a Mountaineering Class Near You
How to Set up a Snow Anchor Using a Vertical Picket
A picket driven upright into the snow like a stake is one of the quickest ways to build an anchor.
There are two types of vertical pickets: the top-clip and the mid-clip. You drive both into the snow in the same way, but the difference is whether you attach a sling/cable at the top of the picket or in the middle.
How to Set Up a Vertical Top-Clip Picket
Because they're quick and easy to set up, top-clip pickets are ideal to use for a running belay, which allows a roped team to move together at the same time while the rope is secured to one or more snow anchors. But in other cases, the mid-clip vertical is the preferred choice because it's considerably stronger.
To place a vertical top-clip picket:
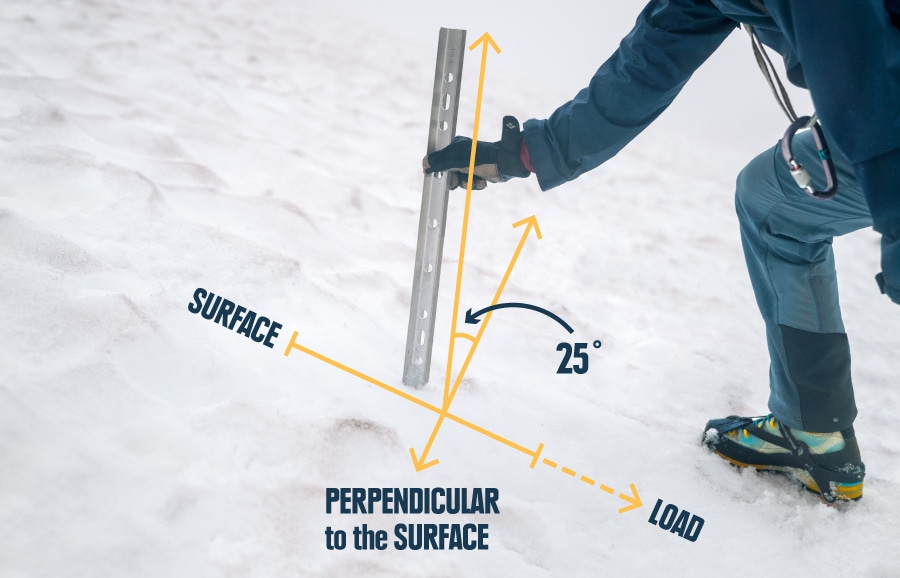
1. Drive the pointed end of the picket into the snow leaning about 25 degrees back from perpendicular to the surface. It should be leaning away from the load.
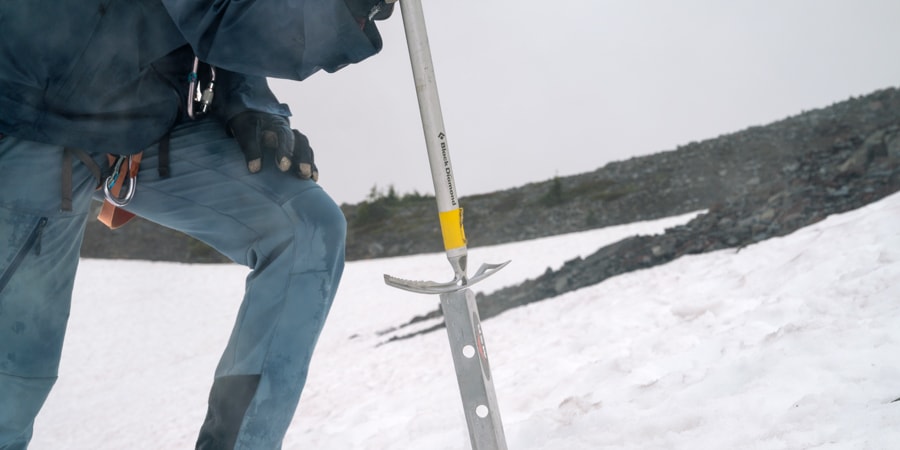
2. Use the top flat surface of your ice axe adze to hammer it in. Get as much of the picket as deep as possible.
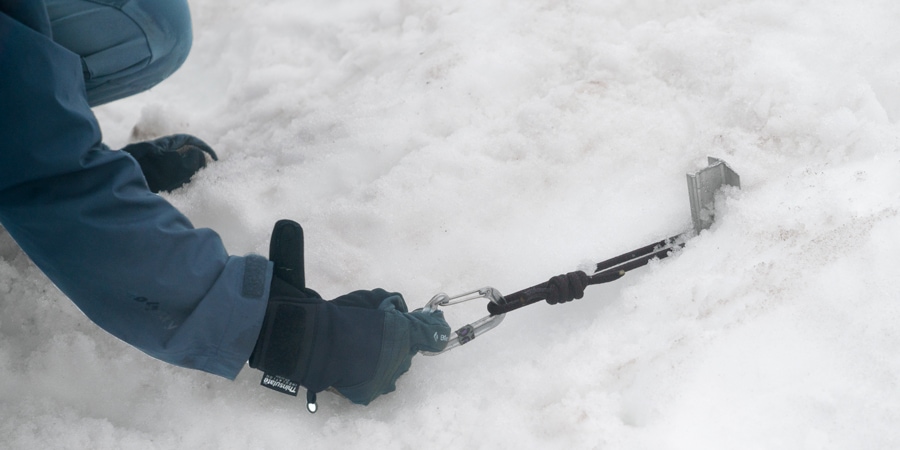
3. Clip a carabiner into the top hole and run a sling through it. Add another carabiner to the end of the sling, through which you'll clip the rope in a running belay.
How to Set Up a Vertical Mid-Clip Picket
Unlike the top-clip picket, in this scenario your sling or cable is affixed at the midpoint of the picket. Generally, this is the preferred anchor to use because it's considerably stronger than the top-clip, but it's less practical because it takes a little more time to set up. Some snow pickets come with a cable already affixed to the midpoint.
To place a vertical mid-clip picket:
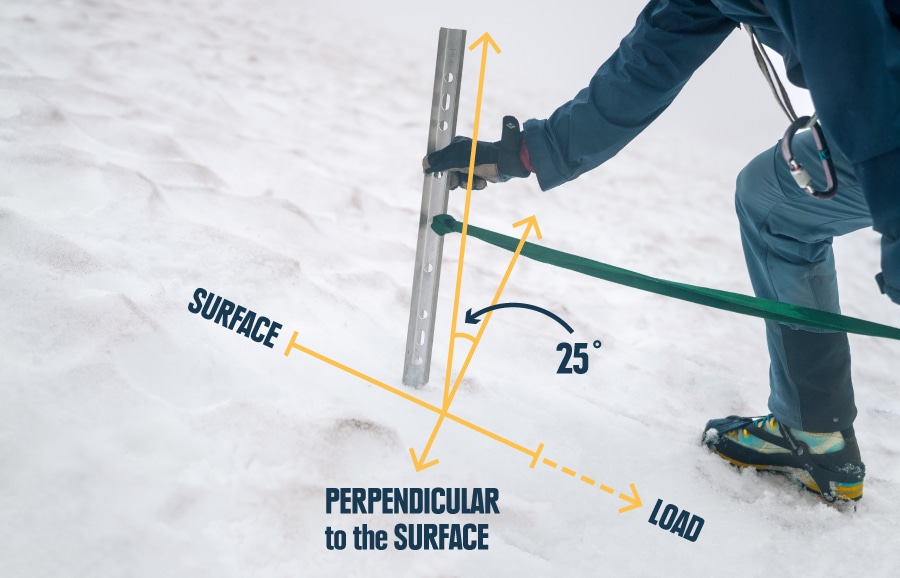
1. Attach a sling to the midpoint of your picket (some come with a cable attached). Drive the pointed end of the picket into the snow leaning about 25 degrees back from perpendicular to the surface. It should be leaning away from the load.

2. Use the top flat surface of your ice axe adze to hammer it in. Get as much of the picket as deep as possible.
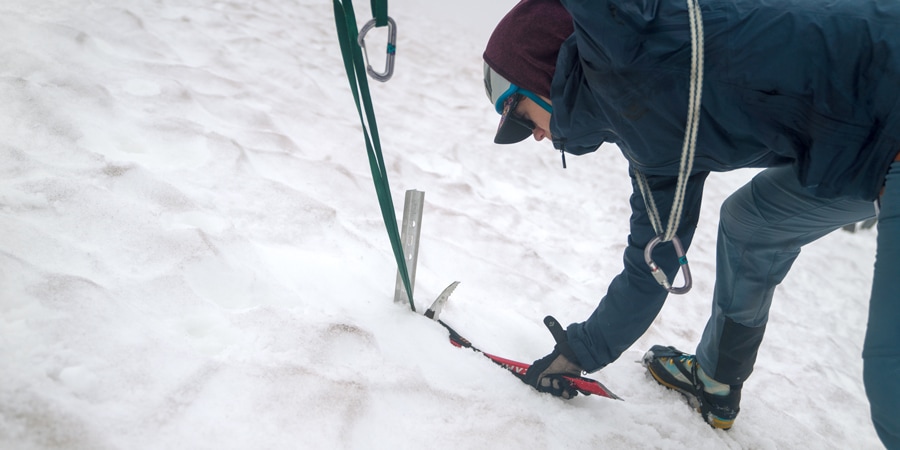
3. Use your ice axe to dig a slot for the cable or sling. Make sure it cuts through the snow and pulls in the direction of the load.
Other Tips:
- In softer snow, stomp down on the area to compact and harden the snow.
- How deep should the picket be? The softer the snow, the deeper down you should drive the picket. It'll take time and experience to learn what works in varying snow conditions. If there's soft snow (you can't make a snowball without it crumbling), drive the picket down so it hits the previous layer of snow or until you hit hard snow.
- Always test the picket. One way to do this is to clip a carabiner to your belay loop, lean back and bounce to test whether it comes out.
How to Set up a T-Trench Snow Anchor
Also called a horizontal mid-clip or a T-slot (because it resembles the letter "T"), the T-trench is one of the strongest anchors you can build in many snow conditions. Unlike the vertical anchors described above, the T-trench picket is buried horizontally in the snow; a cable or sling is attached at the midpoint so that it points in the direction of the load. Because it takes time to set up, it's not ideal for running belays where you want to move quickly and more efficiently. But the T-trench should be a part of any anchor system you build for crevasse rescue.
To place a T-trench anchor:
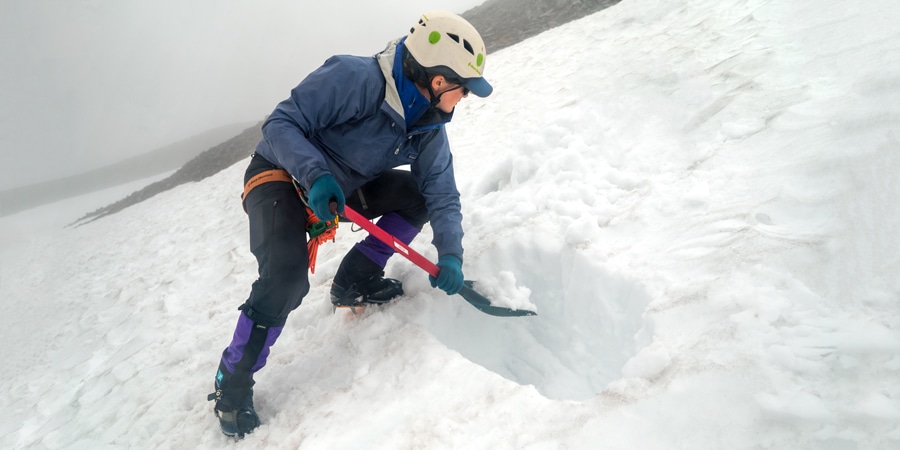
1. Attach a sling to the midpoint of your snow picket (some come with a cable attached). Use your ice axe or snow shovel to dig a trench for the picket. This forms the horizontal part of the letter "T." The trench should be as deep in the snow as the length of the picket.
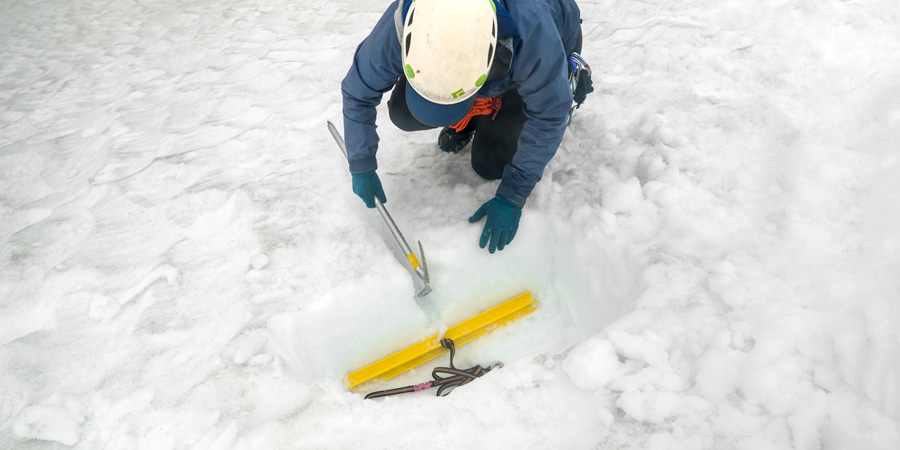
2. Now, dig the base of the "T" for the sling, running in the direction of the load. Place your picket in the trench to determine where to dig and try to keep the slot for the sling narrow. This slot should be as deep or deeper than the initial trench.
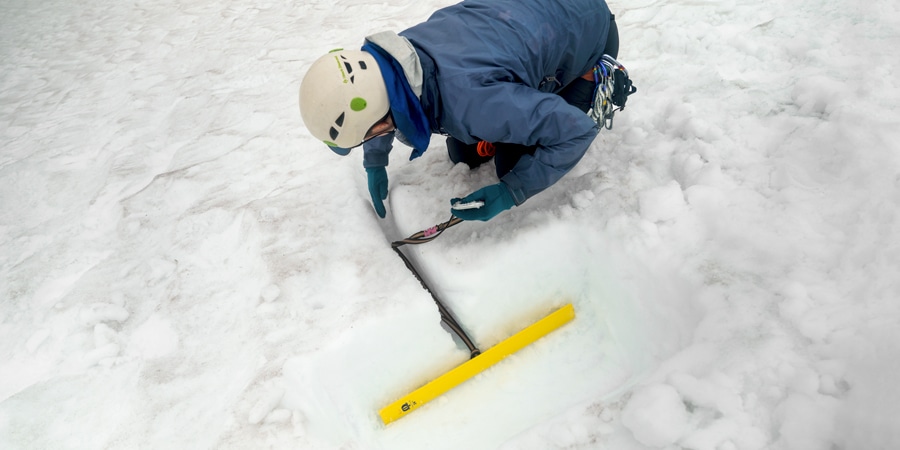
3. The sling (or cable) should come straight from the midpoint of your picket and down to the load without bends or twists.
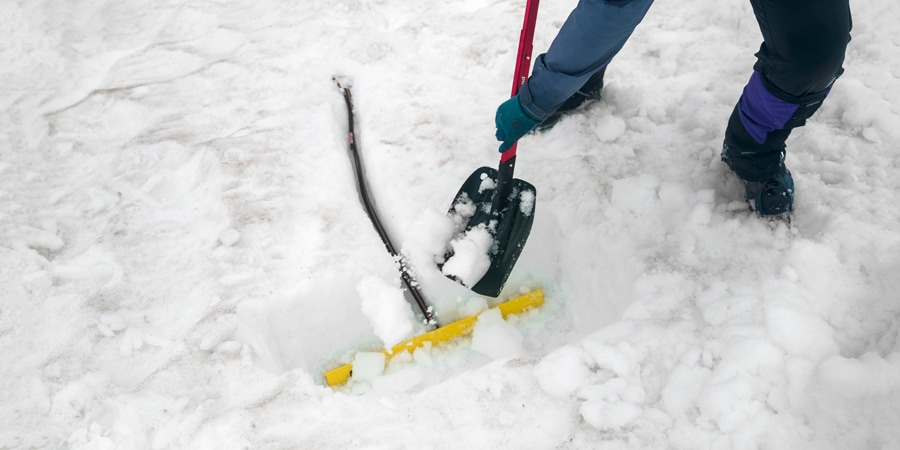
4. Being careful not to disturb the snow in the area of the sling, bury the picket using snow from above the trench. Step on the snow to prevent the picket from being pulled up and out.
Using Two or More Anchors
A single piece of snow protection (such as a picket) may be sufficient to provide a roped team some safety while moving together, as in a running belay. But there may be times when you'll want to use a stronger anchor to belay team members one by one across a sketchy section, to rappel or to aid in crevasse rescue. In such cases, you'll build a solid anchor in the snow, preferably with at least two pieces of protection and distribute the load over those anchors. Having at least two anchors ensures you have redundancy should one anchor fail. One of those anchors should be a T-trench.
Many of the same principles of building anchors in rock apply to snow, so be sure to review our article: How to Build Anchors for Climbing
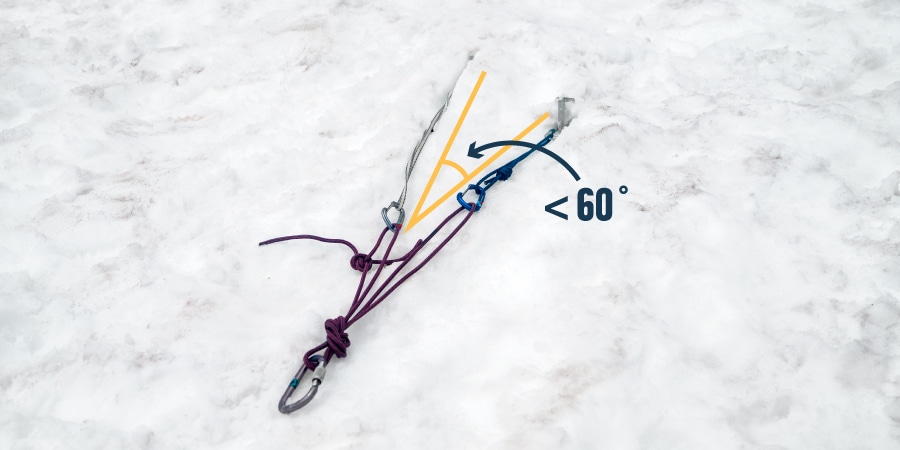
Here are some things to keep in mind when distributing the load between two anchors:
- Make sure the anchors are placed in different zones so that if one were to fail, the affected snow would not also cause the other anchor to fail. Usually a backup is upslope and to the side of the original anchor.
- Keep the angle formed by the attachment between the two pieces less than 60 degrees.
