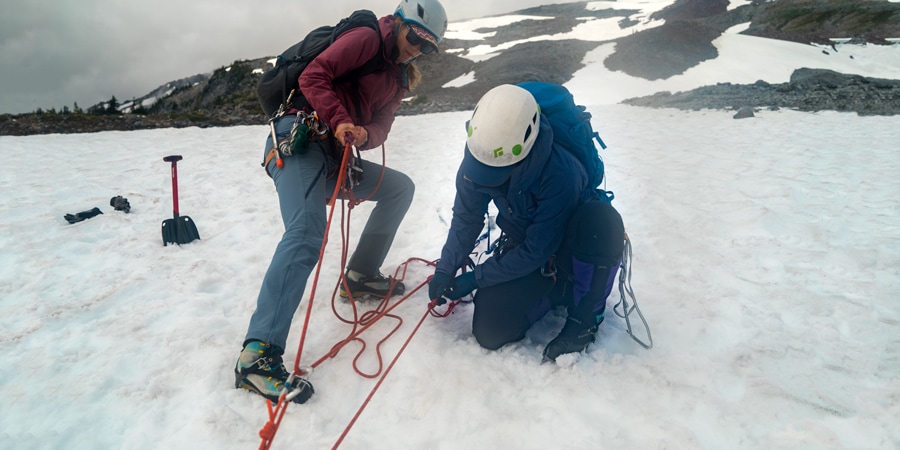
Rescue skills are critical in mountaineering. As you're traveling on glaciated terrain, there's always a risk that you or your partners could fall into a crevasse. Knowing how to team-arrest and how to haul others out of a crevasse are skills you need to learn and practice before setting foot on a glacier.
Crevasse rescue is complicated and challenging to execute in emergency situations; it's much better to make decisions that prevent a fall from happening in the first place. Most mountaineers will probably never have to use rescue skills, but the one time you might need those skills, it's absolutely critical that you're competent in them.
When a climber on your team falls into a crevasse, your goal is to help them get out. In some cases, that person may be able get out on their own using an ascending system in a technique known as self-rescue. In other cases, you'll have to pull them out using one of many hauling techniques.
In this article, we'll introduce the rescue gear you'll need and the basic steps in one crevasse rescue scenario for a three-person rope team. That said, you should get instruction and practice several different rescue techniques before venturing out on your first mountaineering trip.
Climbing safety is your responsibility. No article or video can replace qualified instruction and experience.
Find a Mountaineering Class Near You
Crevasse Rescue Gear
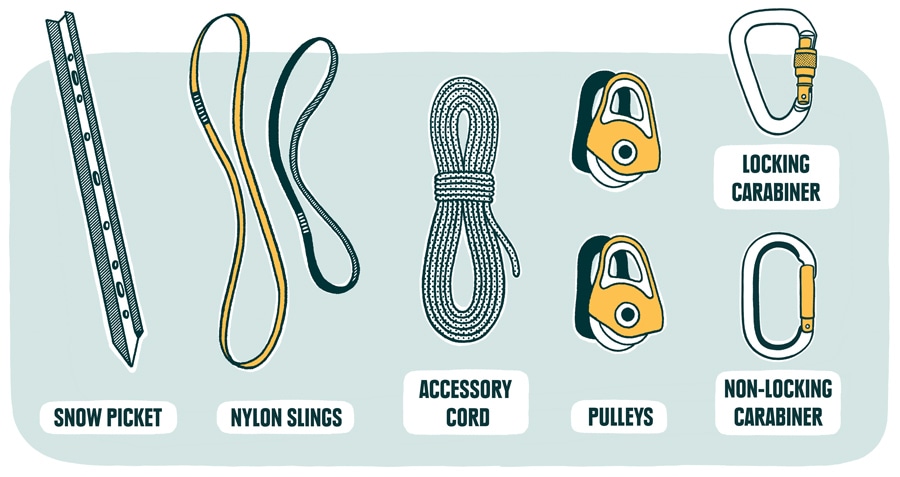
At a minimum, you'll need the following equipment for crevasse rescue:
- 1 snow picket per person to build an anchor; potentially you'll have access to other teammates' pickets as well
- Single and double nylon slings to build anchors
- 20 feet of 5-7 mm accessory cord for making prusik slings
- 2 pulleys (or carabiners acting as pulleys) for your hauling system
- 4 locking and 5 non-locking carabiners for multiple uses, including building an anchor, setting up a hauling system, prusiking, tethering to an anchor, etc. That's in addition to the carabiners you use to attach yourself to the rope. The carabiners should be a combination of round stock and other types.
For more on equipment, see: Mountaineering Gear Essentials and Mountaineering Checklist.
How to Set Up a Crevasse Rescue
There are many possible rescue scenarios that you might encounter on a climb depending on how many climbers are roped together, which climber in your group needs rescue and what the conditions of the rescue dictate. Regardless of the specifics, the main steps of setting up a rescue remain consistent until you determine the specific hauling solution to get the person out. The basic steps are the following:
- Arrest the fall
- Build an anchor
- Transfer the weight of the climber onto the anchor
- Assess the situation
- Prepare the lip of the crevasse
- Set up a hauling system
Below we'll illustrate just one possible scenario to provide a sense of what may be involved in a rescue. It assumes that the last person on a three-person rope team falls into a crevasse.
Step 1: Arrest the Fall
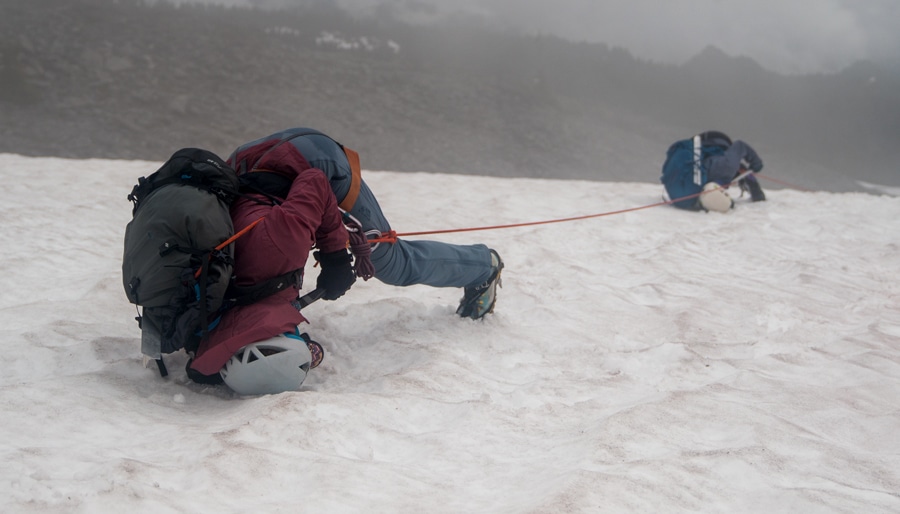
If someone on the rope team slips, your immediate goal is to stop the fall so the climber doesn't slide farther into the crevasse or other hazard. Here are the steps:
1. Everyone yells "falling" and immediately goes into self-arrest, planting their ice axes into the snow and using their bodies to stop the fall.
2. Climbers should kick their feet into the snow to secure themselves.
3. Climbers should then straddle the rope, with their feet in the direction of the fallen climber.
For a refresher on self-arrest, see our article and videos.
Step 2: Build an Anchor
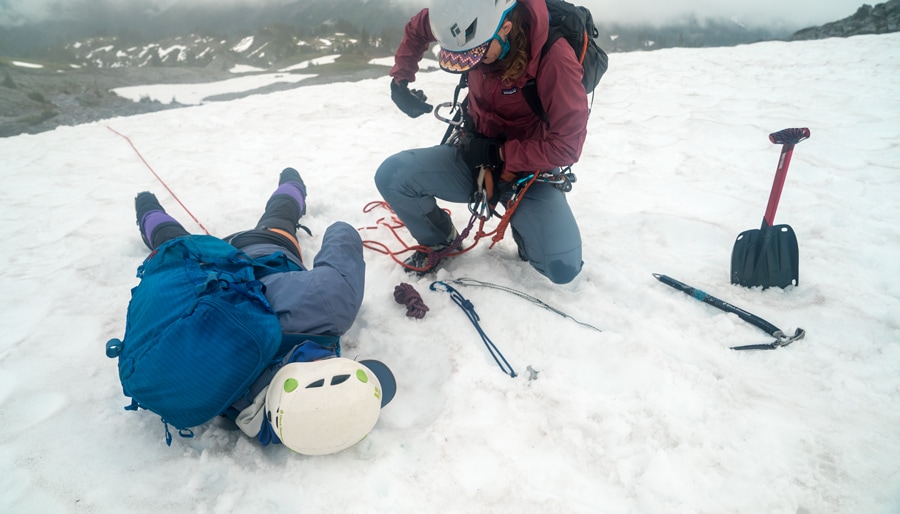
Once the team has stopped the fall, the next step is for the rescuers to set up an anchor that is solid enough to hold the weight of the fallen climber and aid in hauling them out of the crevasse. The rescuers will communicate with each other and decide who is in the best position to set up the anchor; one climber will continue to hold the fall while the others will work to build that anchor using at least two individual pieces of protection.
Here are the steps Climber 1 will take to build the anchor while Climber 2 remains in self-arrest:
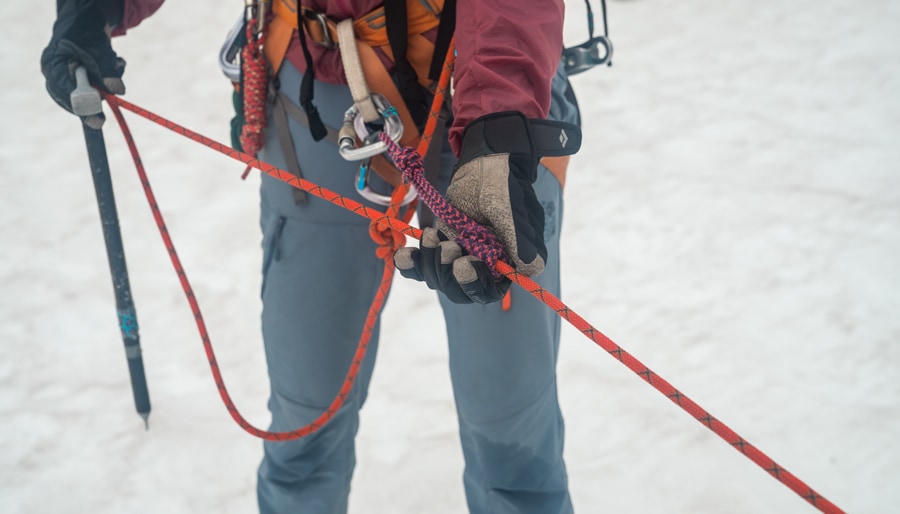
1. First, Climber 1 will move with caution toward Climber 2 using a friction hitch (e.g., prusik or klemheist) to self-belay along the rope. Climber 1 will be ready to arrest if needed.
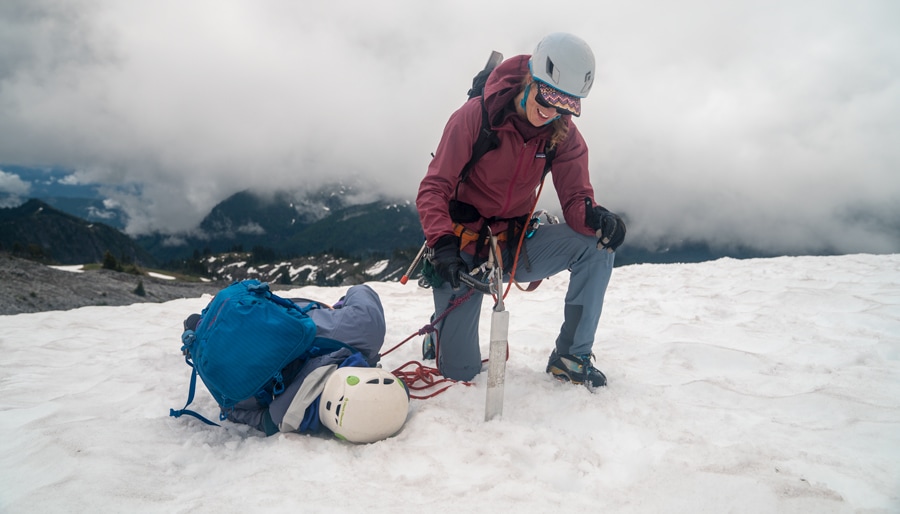
2. Climber 1 builds an equalized anchor near climber 2 using at least two pieces of protection. The type of snow anchors used (e.g., T-slot, vertical top-clip picket, vertical mid-clip picket) will depend on snow conditions and available equipment.
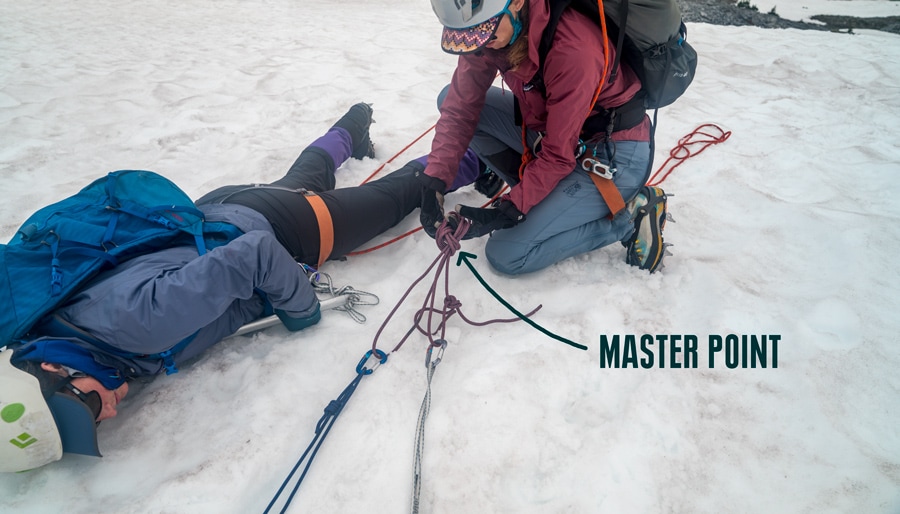
3. Climber 1 creates a master point (a knot or other focal point that distributes the load between the anchors) to which they'll later secure the main rope.
Step 3: Transfer the Weight of the Climber onto the Anchor
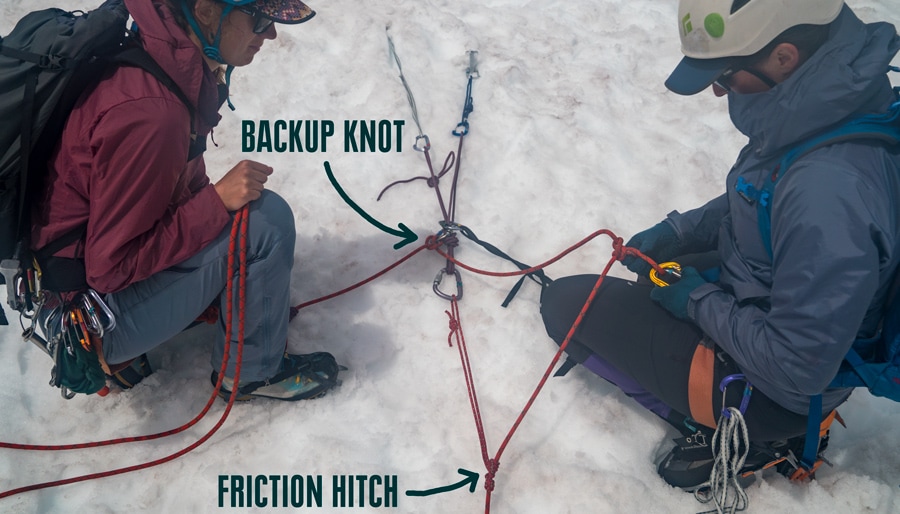
Once a solid anchor is built, the next step is to transfer the weight of the fallen climber onto that anchor so Climber 2, who is holding the fall, can come out of self-arrest. The goal here is to secure the fallen climber to the anchor at two points: a friction hitch and a second backup knot.
Here are the steps:
1. Climber 1 sets up a friction hitch (e.g., prusik, klemheist) on the rope leading to the fallen climber and connects it to the anchor master point using a locking carabiner.
2. Climber 1 ties a backup knot (e.g., clove hitch) and clips it to the main anchor using a locking carabiner.
3. The fallen climber is now attached to the anchor with the friction hitch and backup knot.
4. Climber 2 comes out of self-arrest, unties from the rope and tethers to the anchor using a sling and carabiner for added safety.
Step 4: Assess the Situation
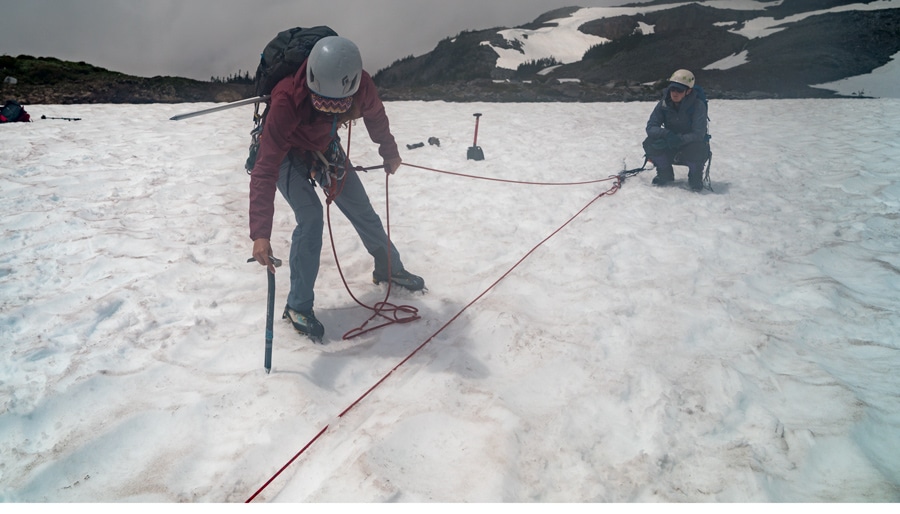
With the fallen climber now secured to the anchor, you'll next communicate with the fallen teammate and assess the situation.
1. Climber 1 self-belays to the lip of the crevasse to check on the fallen climber, using the ice axe to probe for crevasses.
2. Climber 1 assesses the teammate's condition and determines whether they can climb out on their own. If they can, they'll ascend using prusiks under the self-rescue method.
3. If the climber can't get out on their own, the team must decide what kind of hauling system to use.
Step 5: Prepare the Lip of the Crevasse
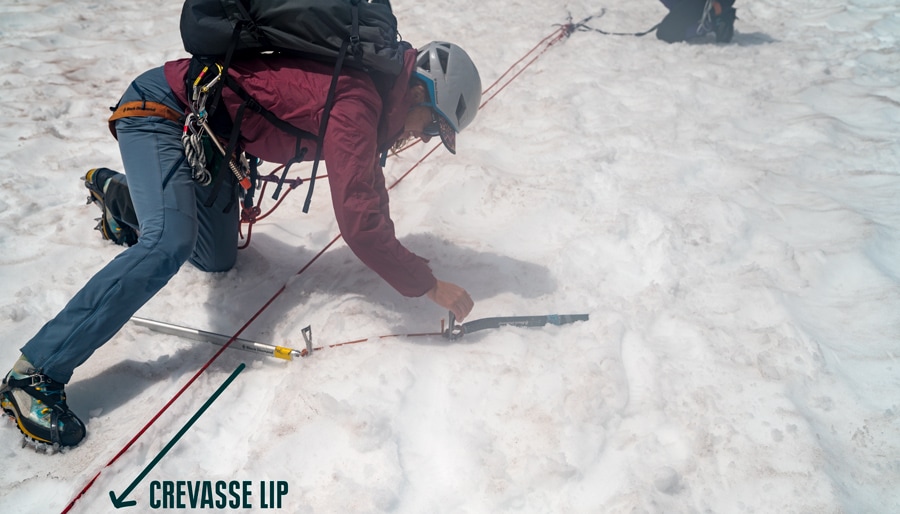
To ensure that the rope doesn't cut deeper into the edge of the crevasse when you're hauling the climber out, you'll need to pad the lip of the crevasse by placing an object such as an ice axe, backpack or ski poles underneath the rope.
1. Assess the crevasse lip. Is it overhung? Has the rope cut into the lip, and how deeply?
2. Clear excess snow from the lip and pat it down, being careful not to drop snow on the climber below.
3. Pad the lip of the crevasse so the rope doesn't cut into the snow. Do this by placing an ice axe, trekking pole or a backpack under the rope at the lip. Whatever object you use, be sure to secure it in the snow so it doesn't fall.
Step 6: Set Up a Hauling System
Hauling a climber out of a crevasse requires a lot of power. Using a rope and pulley system enables one or two people to pull more than their own weight. There are many options to haul someone out, and which system you use will depend on many factors such as the number of people who can haul, available rescue gear, how entrenched the rope is in the snow and snow conditions. You should learn and practice different hauling systems and scenarios before taking your first mountaineering trip.
The 3:1 Z-pulley is one common hauling system, which works well for a team with three or more people. The ratio refers to how much force you can leverage using the rope and pulley. In this 3:1 system, for every unit of force that you pull on the rope, the haul system pulls with three times as much force.
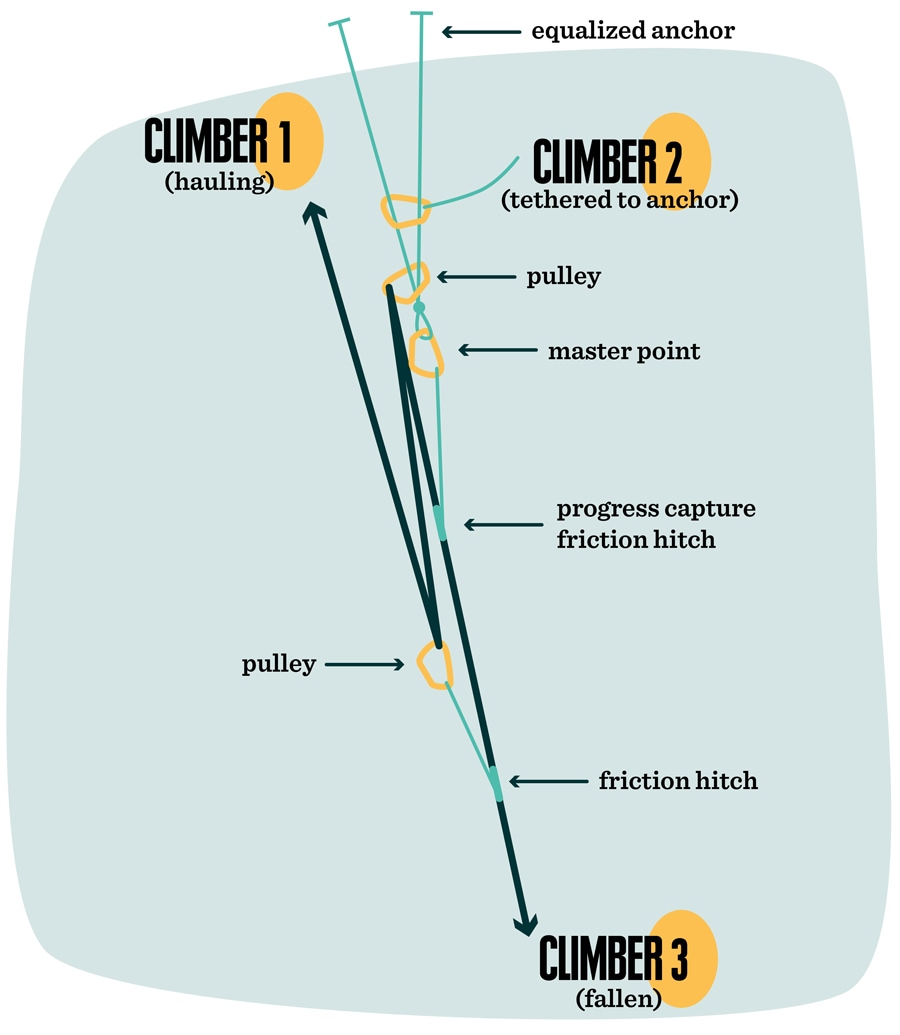
The Z-pulley system
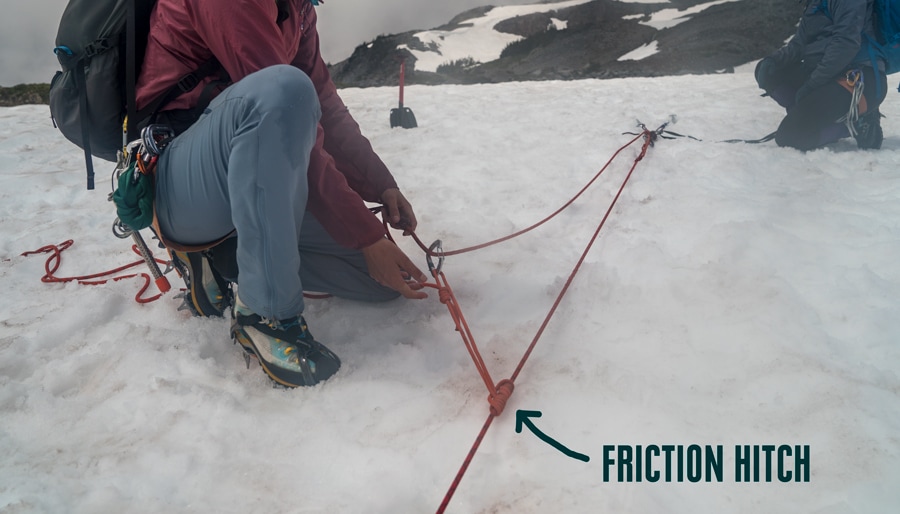
1. To set up the Z-pulley, attach a friction hitch (e.g., prusik) on the rope leading to the fallen climber, near the crevasse lip. Use a pulley and carabiner (or carabiner acting as a pulley) to connect that hitch to the rope leading to the hauler.
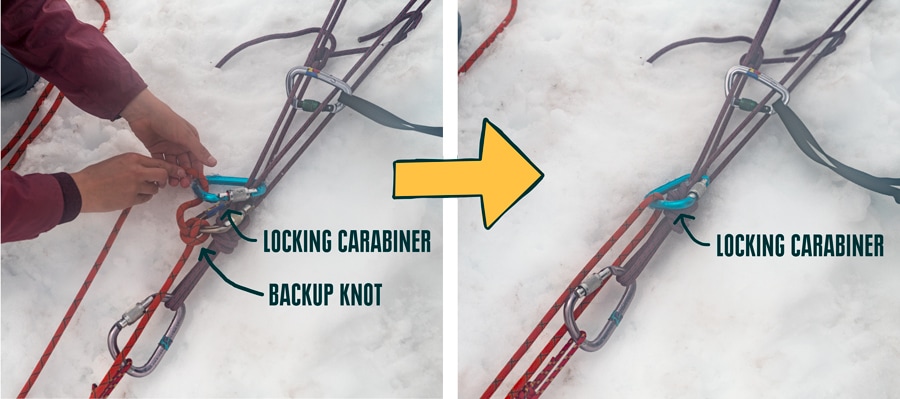
2. Replace the backup knot (that you earlier tied when transferring the load) with a locking carabiner. Undo the knot so the rope can move freely through the carabiner.
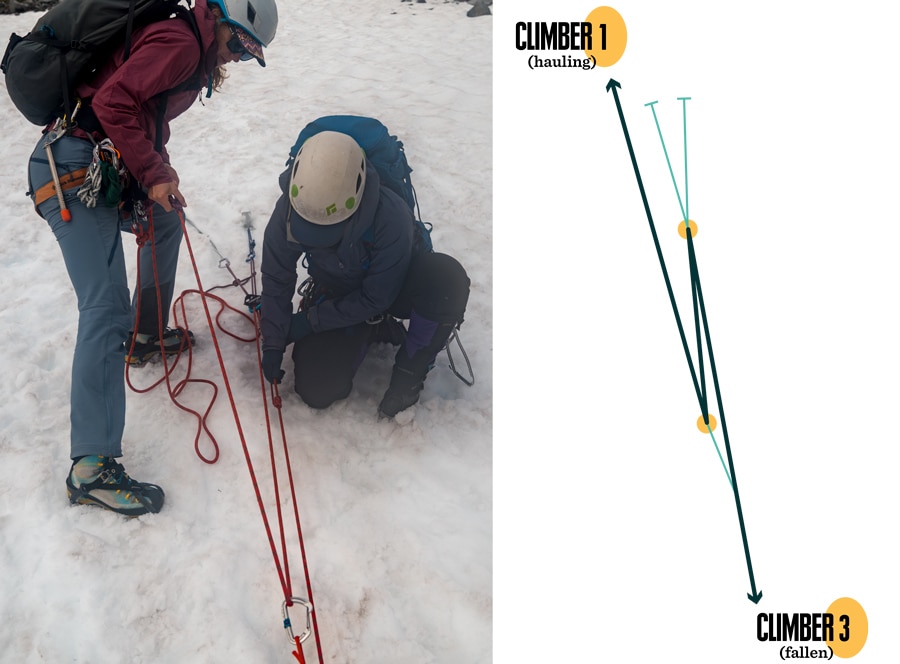
3. The rope should run from the fallen climber up to the pulley (or a carabiner acting as a pulley ) at the anchor, back down to the second carabiner/pulley and up again to the hauling climber in the shape of a backward "z."
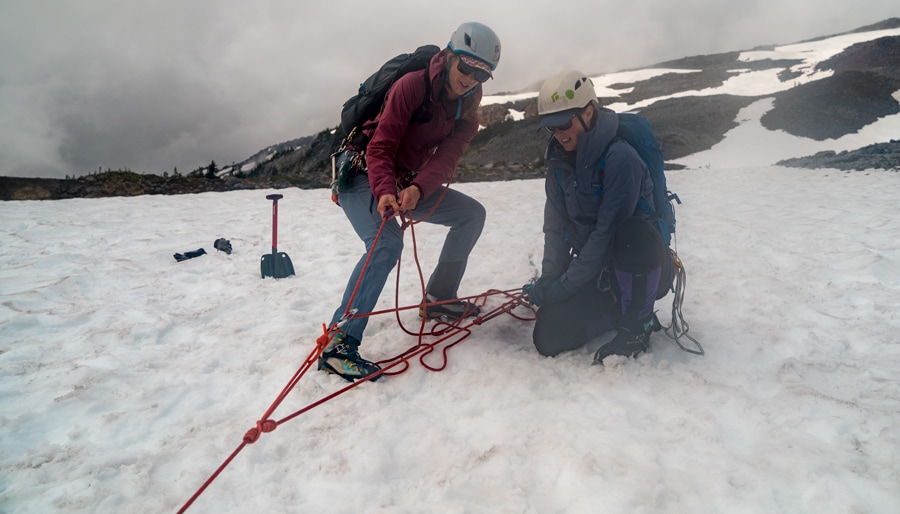
4. Climber 1 now pulls on the rope (in the direction of the anchor) until the hauling prusik gets close to the anchor.
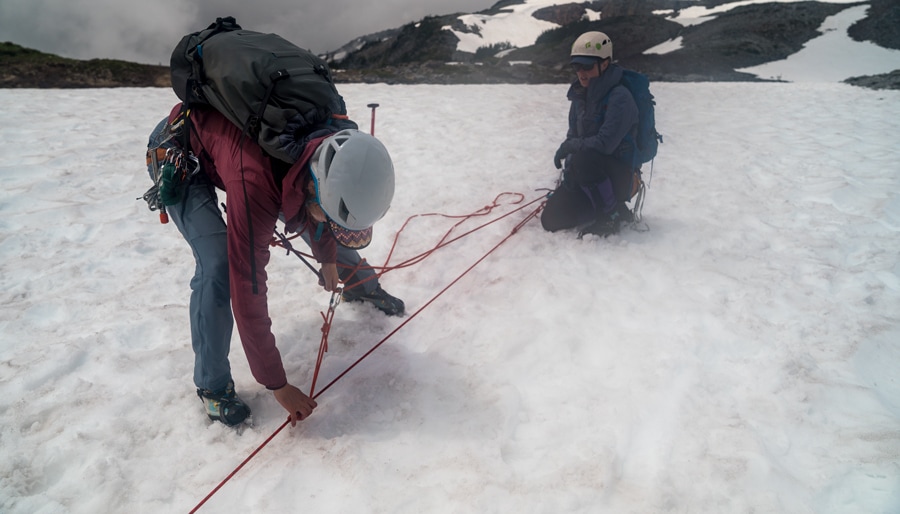
5. Then reset the system by sliding the hauling prusik back down toward the fallen climber. Haul again, repeating as needed.
