Catching air on a mountain bike not only lets you take on more challenging trails, but it's also a bunch of fun. However, before you can jump you need to work through a series of steps:
- Step one: Learn to manual (lift the front wheel off the ground)
- Step two: Learn to bunny hop (lift both wheels off the ground)
- Step three: Combine a manual with a bunny hop while working on the three parts of a jump—the takeoff, the air and the landing.
Mountain Bike Jumping Essentials
Get prepped for manuals, bunny hops and jumping by following these guidelines.
First, brush up on basics: If you need to review some fundamental mountain bike skills check out Mountain Biking: Basic Techniques and Mountain Biking: Clearing Obstacles.
Assess your skills: Before you attempt to get your wheels off the ground, you need to take an honest assessment of your skills and decide if you're ready.
Every rider progresses at a different rate, but generally you'll want to have been mountain biking for a couple years prior to venturing into jumping. By that point you should be very comfortable on your bike and have been riding intermediate-level trails.
Check your bike: It's important to make sure you have a mountain bike that's designed to handle jumping. While suspension is not absolutely necessary, most riders enjoy either front or full suspension to absorb the impact of landing a jump. Avoid department-store brand bikes with cheap components that aren't built tough enough for jumping.
It's also a good idea to make sure your mountain bike is in good working order before you head out. Always check the ABCs (Air, Brakes, Chain) before every ride. Learn more: Bike Basics: Pre-Ride Inspection.
Scout it out: Scouting the trail ahead of time is always a smart move, especially if your skills are still coming along or if it's your first time on a trail.
- Is that a tabletop or a gap? Be sure to scout the trail for jumps so you know what's ahead. You don't want to ride up what you think is a tabletop that you can roll over only to find out at the last second that it's a gap.
- Visualize: Before attempting a jump for the first time, try running up the approach without your bike and visualize yourself going off the jump and sticking the landing.
- Measure a jump: It can be helpful to pace out the distance of a jump from lip to lip before trying it. If you know you can successfully clear a gap that's 10 heel-to-toe steps long on your home trail, then you can use that knowledge to inform your decision about trying a new jump.
Progress slowly: Don't expect to learn how to jump in an afternoon. Slowly progressing from simple, low-consequence jumps to larger objectives is a good way to keep from getting hurt.
When starting out, draw a line in the dirt in a flat, open area and practice clearing the line. When you're comfortable with that, lay down a stick and then a log and so on.
Listen to yourself: Err on the side of caution and don't do something you're not ready for. If a jump doesn't feel right, don't do it. Rather than feeling defeated, think about what steps you need to take to complete that jump and make a plan for getting there.
Step One: Learn to Manual

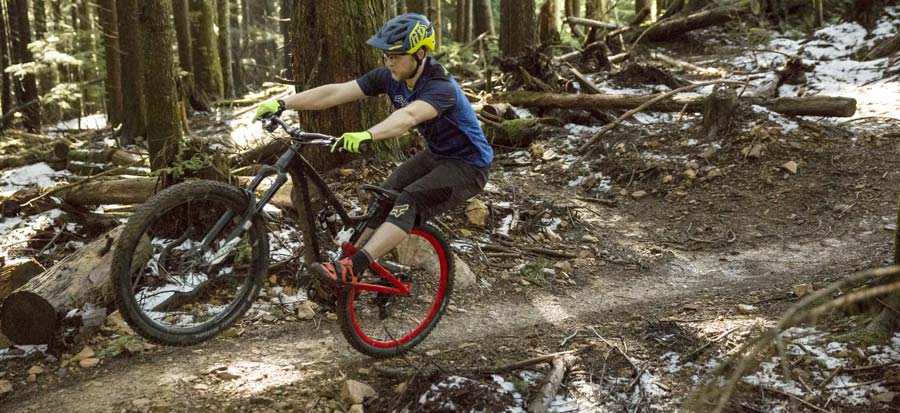
A manual, like a wheelie, is a way to keep the front wheel off the ground while you roll on the rear wheel. It differs from a wheelie in that you don't pedal while doing a manual.
Manuals can be used on their own to get over bumps like water bars or little roots while maintaining speed, but they're also a key step in initiating a jump.
Manual Technique
There are two parts to the manual: getting the front wheel in the air and finding the balance point to keep it there. The key to both parts is using your body weight.
Getting the Front Wheel Up
To get the front wheel off the ground, you need to preload and punch.
- Preload: The preload part is pretty straightforward. Push your weight down into the bike to preload the suspension. This'll give you some rebounding energy that'll help get the wheel up.
- Punch: As soon as you're low over the seat, it's time for the punch. As quick as you can, push your feet and arms forward and throw your weight back. You want to keep your arms locked straight so that it's your weight that brings that wheel up rather than pulling the wheel up with your arms.
Keep even pressure on both sides of the handlebar and on both pedals to keep the bike in balance. If you try to lift the bars with just your arms, you'll drop your chest forward, which forces the wheel down.
Balancing
Now that the wheel's up, you can work on holding it there by balancing.
- It's all in the hips: The key to balancing a manual is in your hips. Keep your hips low and over the back wheel, and move them forward and back to stay in balance.
- Keep a finger on the brakes: Keep your finger on the rear brake—if you feel like you're going to tip too far back, all it takes is one tap on the brake and your front wheel will drop down.
Step Two: Learn to Bunny Hop

Bunny hops — lifting both wheels off the ground — are an essential skill for getting over rocks, roots and obstacles without slowing down.
When you're practicing your bunny hops, work on each wheel individually. Start nice and slow, and draw a line on the ground and work on your timing to make sure both wheels clear it. Keep at it and slowly increase your speed until both wheels are in the air at the same time. When you've nailed that, add a small stick and practice clearing that. Once you can clear the stick, take your skills to the trail.
Video: Mountain Biking: How to Bunny Hop
Bunny Hop Technique
You can break down bunny hops into two parts: the front wheel and the back wheel.
Front Wheel
- Getting the front wheel off the ground requires similar technique to a manual: preload and punch. Preload down into the bike, and then punch it forward with your arms and legs. The key is to use your weight to get the wheel up.
Back Wheel
- Spring up and forward: As the front wheel is almost to its peak, it's time to get the back wheel off the ground. Your manual has shifted your weight over the rear wheel and preloaded the back of the bike. Now quickly spring up and just a little forward. This sudden weight shift will get the rear wheel moving up and off the ground.
Step Three: Jumping

There's no way around it: jumps are just plain fun. Once you've been riding for quite a while, you can start hitting small tabletop jumps to get comfortable in the air.
All the skills you have from manuals and bunny hops will come in handy, so make sure those are dialed before you start hitting jumps.
Video: Mountain Biking: Jumping
Jumping Technique
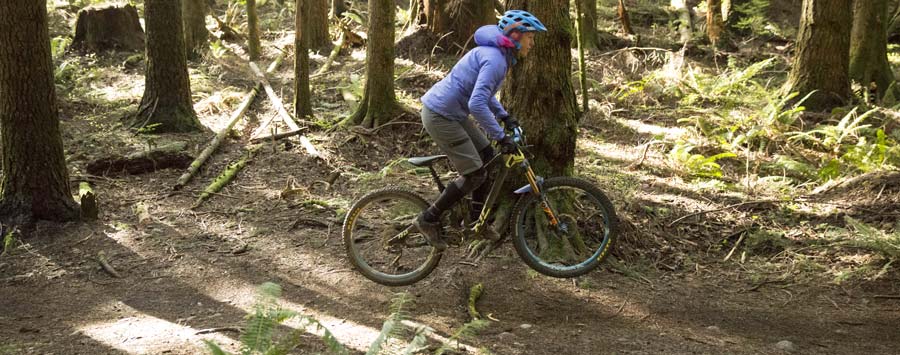
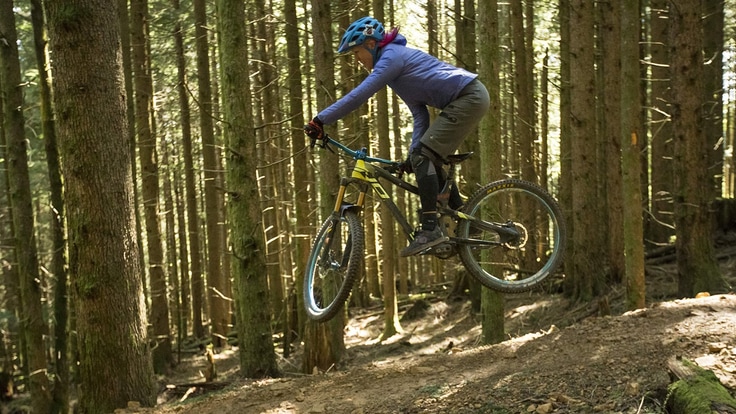
Think of jumping as three parts: the takeoff, the air and the landing.
Takeoff
- Pumping: The key to the takeoff is pumping, and that means you're going to press your body weight into the bike through your feet. You want to pump the trail just before the angle of the slope changes so you accelerate into the jump. Remember to compress from the hips and keep your chest up to leave room for the bike to come through the jump.
- Spring up: As the front wheel is about to leave the ground, start extending your legs and stand up fast. You want your legs to be fully extended as your back wheel hits the lip of the jump, so your bike will come with you into the air. Your pump at the base of the takeoff will preload the bike so it rebounds off the ground with some force.
- Timing is key: When it comes to the back wheel, timing is key. If you start to spring up too early before your front wheel is at the lip, you'll waste some of the preload and you might come up short on your jump. If you extend after the lip, there's nothing for your wheels to push off of.
The Air
- Stay calm: Once you're in the air, breathe and relax. If you can stay loose, your bike will stay balanced, your landing will be smoother and you'll be able to adjust the bike underneath you if you have to.
- Look ahead: You also want to look ahead to the landing. Find your line and pay special attention to the angle of the slope.
The Landing
- Match your tires to the slope: As you come down, you need to make sure the tires are going to hit at the same time. If you come down with too much weight on either wheel, you could go over the bars or lose control. If it's a steep landing, drop the bars, and scoop the back wheel up.
- Stretch out: As you're maneuvering the bike, you're also extending your arms and legs so that when you land you can suck up that energy, just like a shock. If you're too low over your bike, you won't be able to absorb that impact energy and you could lose control.
- Point where you want to go: Make sure that your front wheel is pointed in the direction you want to go. Even if your landing is a little crooked, if your front wheel is pointed straight, the rest of your bike will follow.
- Look ahead: As always make sure to look ahead down the trail. You don't want to land a perfect jump and forget there's another one just ahead.
Equipment Tips for Jumping
Before hitting the jumps, there are a handful of equipment considerations.
Drop your saddle: Lowering your saddle allows your bike to move freely underneath you and gives you plenty of room to absorb landings with your body. It also reduces the chance of your rear end slamming into the seat when you land a jump, which can buck you off the bike.
If you don't have one, consider buying a dropper seatpost that lets you adjust saddle height on the fly via a bar-mounted control. If you plan to ride a lot of technical terrain, the hefty price tag can be worth every penny.
Ride with platform pedals: When you're learning to jump, start with platform pedals. This will force you to learn how to jump without relying on lifting the bike with clipless pedals that attach to bike shoes. Also, platform pedals let you quickly escape the bike if you get out of control.
Add some PSI: Adding a little air to your tires will help you get a little more speed as you approach a jump, and it can keep your tires from rolling off the rims if you land a little sideways.
Stiffen your suspension: Running your suspension a tad stiffer than normal can help you get more pop off the lip of a jump. You can stiffen your suspension by adding a bit more air or switching your suspension fork and rear shock into "Trail" mode.
Put on your armor: A reality of learning to jump is that you'll occasionally crash. Do your body a favor and get some knee and elbow pads before attempting to jump.
Off course, it's absolutely essential that you wear a helmet. Some riders prefer a full-face helmet that adds protection with a wraparound chin bar.
Mountain bike gloves are also a worthy investment. In addition to providing grip while riding, they protect your hands from scrapes if you hit the ground.
Related Articles

