Before you jump on your brand-new mountain bike, you need to be sure it's properly set up. Riding with components in less-than-optimum positions can give you sore knees, arms, shoulders and back muscles. You'll have a much better riding experience if follow the simple steps outlined in this article.
Before you get started: If you purchased your bike from an REI store or REI.com, you can take it to any REI shop for 30 minutes of free setup time. If you bought your bike from another quality bike shop, they should offer a similar service.
Make sure you have the right tools for the job: Most adjustments can be done with a standard bike multi-tool. To do a proper job tightening things back up, though, you need a torque wrench. That's especially true for carbon components. Sometimes specified torque settings are stamped on a component; if not, consult the component manufacturer's website.
Your bike might adjust differently: If you're unsure about how to do any of these procedures, head for your local bike shop.
Adjusting Saddle Height
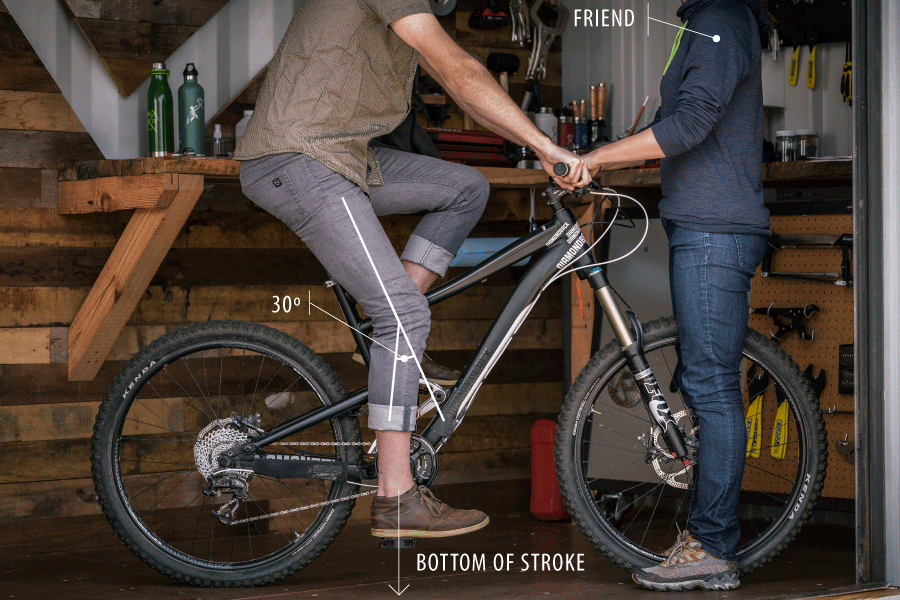
To adjust saddle height, you need a way to hold the bike upright while you hop on. One option is to have a friend face you, straddle the front wheel and hold the handlebar. You can also lean against a tree, wall or a workbench.
Your goal: You want a 25- to 30-degree bend in your knee. Check this by putting the balls of your feet on the pedals and extending one leg to the bottom of the pedal stroke.
How to adjust: Use an Allen wrench (or quick-release lever if that's what secures the seatpost) to loosen the binder bolt and slide the seatpost up or down. Make sure the "minimum insertion mark" etched on the seatpost is not showing after you're done. After verifying that the saddle is at the correct height, retighten the binder bolt to the specified torque or retighten the quick-release lever.
Adjusting Saddle Position and Angle
Saddle Position
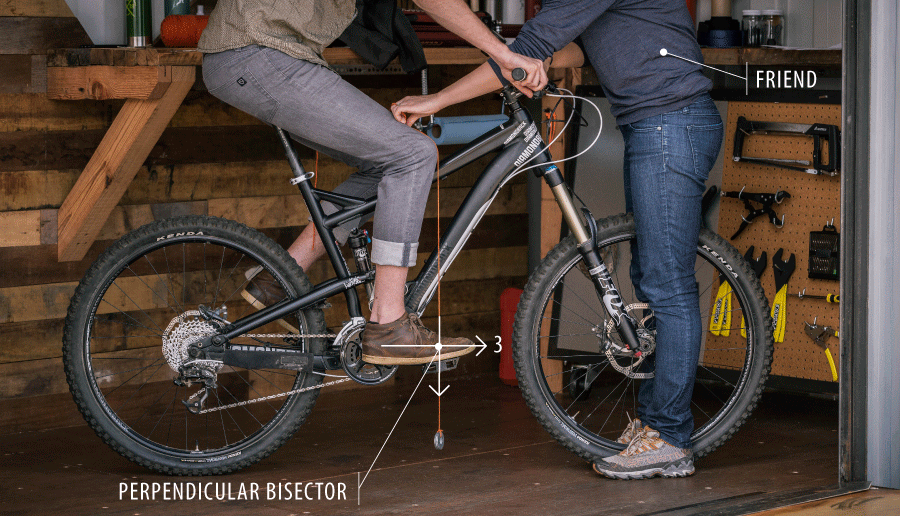
Your front/back position goal: To check this, you need a simple plumb bob—a string with a weight (like a metal nut) tied on the end. With your saddle at the proper height and one peddle in the 3 o'clock position, center the ball of your foot over the axle of that peddle.
Dangle the plumb bob off the front of your knee so that the weight dangles just above your foot. If the saddle is in the right position, an imaginary line that runs along the plumb bob's string will bisect the axle on your bike pedal. For a more precise check, have someone stand next to you verify this.
Saddle Angle
Your angle goal: You want a level saddle. A tilted saddle can cause hip and back pain and require you to expend energy to keep from sliding off the front or back. To be precise you can use a simple bubble level to check this.
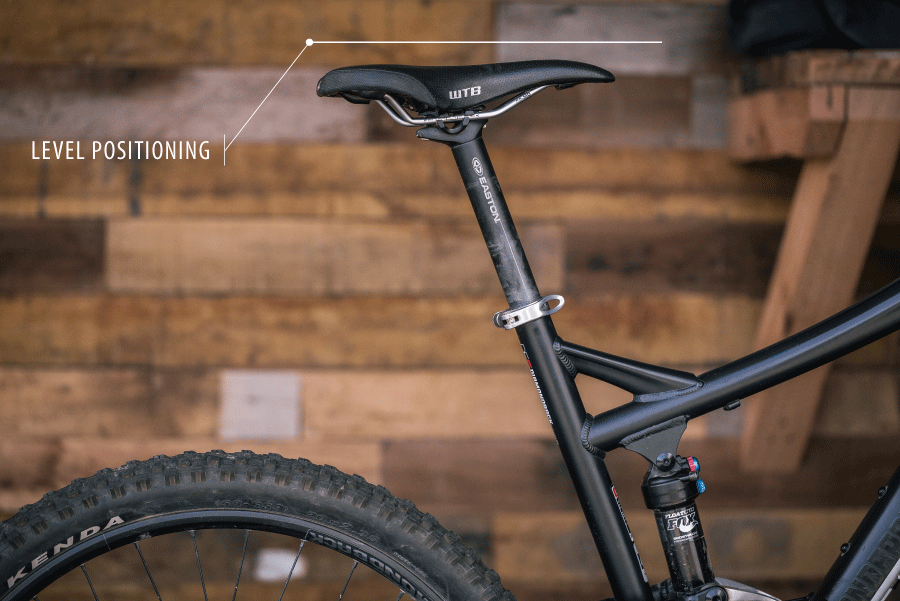
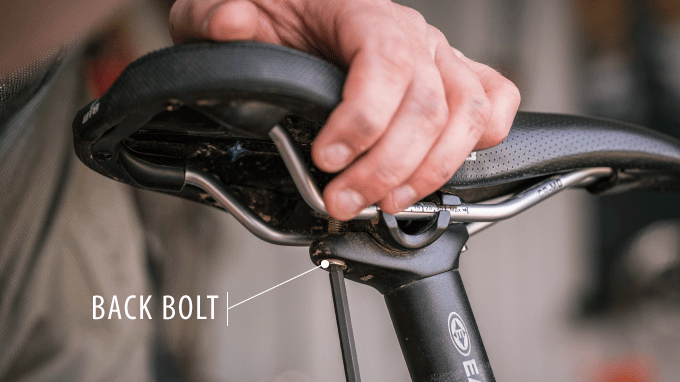
How to adjust seat position and angle: Loosen the Allen bolts securing the clamp that holds the rails under your saddle (on different saddles the clamp design might vary). Slide the saddle forward or backward while simultaneously rotating it into a level position.
Once the saddle is repositioned, retighten the bolts and recheck things with the plumb bob and level. After verifying that everything is where it should be, retighten the saddle to the specified torque.
Adjusting Brake Levers
Getting brake levers set up correctly helps with your reaction time and control, and it helps keep you in a riding position that's nicely balanced when you're braking.
Adjusting Brake-Lever Angle
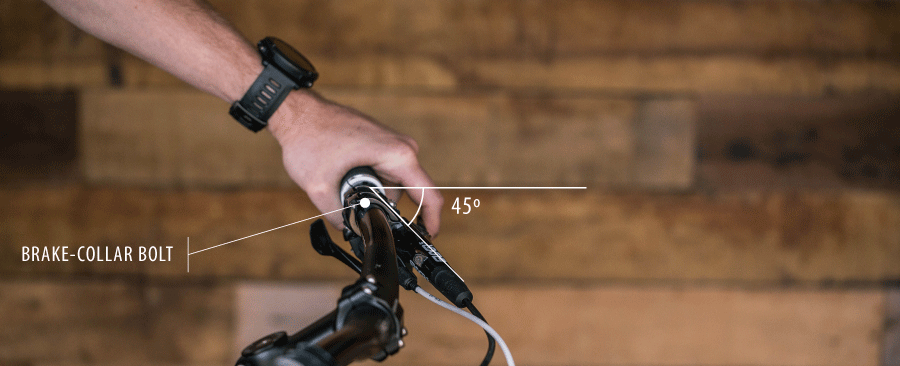
Your goal: When the levers are at the correct angle, your wrists will be straight. If your wrists have to rotate up to grab the brake lever, you tend to lean too far forward as you ride. If your wrists have to rotate down to grab the brake lever, you tend to drop your elbows and lose stability.
How to adjust: Loosen the Allen bolt on the brake lever clamp and rotate it until the levers are at a 45° angle. Then retighten the bolt to the specified torque.
Adjusting Brake-Lever Position on the Handlebar
While many riders like to have three fingers on their grip and one on the brake lever, most disc brakes are designed to be controlled with a two-finger lever. That leaves two fingers and a thumb to firmly grip the handlebar as you negotiate rugged terrain.
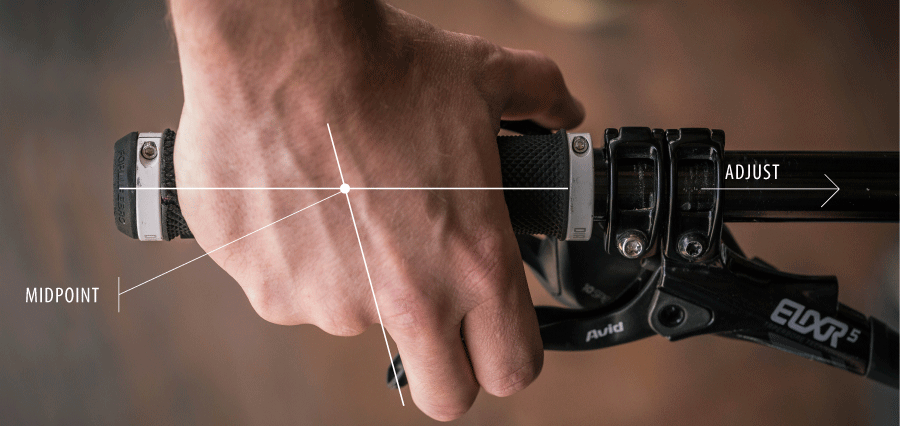
Your goal: To set up a two-finger lever, you want your middle finger to nestle against the curved end of the lever.
How to adjust: Adjusting lever position on the bar is simple. Simply loosen the Allen bolt on the brake lever clamp and slide the clamp inward or outward. Then recheck lever alignment. When it's where you want, simply retighten the bolt to the specified torque.
Adjusting Brake Lever Reach
The goal here is to have the outermost knuckle(s) of your braking finger(s) cradling the brake lever. If you have to overextend, you lose responsiveness because your hands have to dance off the grip when you brake hard. If the lever is too close to the grip, you lose leverage—and stopping power—when you squeeze.
This is one adjustment where steps often vary from bike to bike. Some basic bikes don't offer reach adjustment. Generally, though, you turn a single screw on the brake lever that moves the lever closer or further from the handlebar grip. When it's at the desired position, you're done—no torque wrench is needed.
Adjusting Your Shifters
This subtle adjustment is very much a matter of personal preference. In addition, you might not have much room to move your shifters after your brake levers have been properly set up. (Note: If you haven't already adjusted your brake levers, then do that first because that's the more important adjustment.)
Your goal: You want to avoid having to rotate your wrists when you shift. Place your hands in a natural position on the bar grips, with fingers cradling the brake levers. Next check to see if you can operate the shift levers comfortably with your thumbs.
How to adjust: Shift levers adjust the same way as brake levers: via the Allen bolt that holds their clamps. Loosen the bolts and move the shifters, twisting them and/or sliding them inward or outward until they reach your most comfortable shifting position. Then retighten the Allen bolts in the clamps to the specified torque.

Adjusting Tire Inflation
Unlike many of the other setup adjustments, inflation is something to check before every ride. Changing air temperatures affect tire pressure, and tires tend to lose a small amount of pressure over time.
Your goal: Generally, you want to run your tire pressure as low as possible. Recommended tire PSI, stated as a range, is found on the sidewall of your tire. While you don't want to risk a pinch flat (in a tubed tire) or having your tire distort too severely in a turn, running a low PSI offers noticeable performance advantages. It will provide a softer, more forgiving ride and give you better traction.

How to adjust: The tools needed are straightforward: You need a pressure gauge and a pump that fit your valve type (Presta or Schrader). Most gauges and pumps adapt to fit both types. You can also buy a separate valve adapter to get the correct fit.
Use the inflation guidelines below for now. You may develop preferences that differ from these after you become more experienced with your bike. Where a range of PSI is stated, adjust proportionally in relation to where you are within the weight range:
If you weigh 100-160 lbs.: Use the minimum PSI.
If you weigh 160-200 lbs.: Add 0 to 5 PSI to the minimum.
If you weigh 200 lbs. or more: Add 5 to 10 PSI to the minimum.
Basic Suspension Adjustments

A key adjustment on air-spring suspensions is setting "sag," which is the amount that your fork or rear shock compresses when you sit on the bike. Setting sag correctly dials in your suspension's available range of travel. Sag also affects how harshly or smoothly your suspension reacts to bumps.
See our Mountain Bike Suspension: Setting Sag video to see how to do this.
If you have coil-spring suspension instead, you might have a preload adjustment dial on top of your fork. Setting it is a matter of personal preference. Increasing preload stiffens your ride, which can increase pedaling efficiency and minimize bounciness. If things feel too harsh, though, you can decrease preload to soften your ride.
For a more comprehensive look at suspension, see our Bike Suspensions Basics article.
