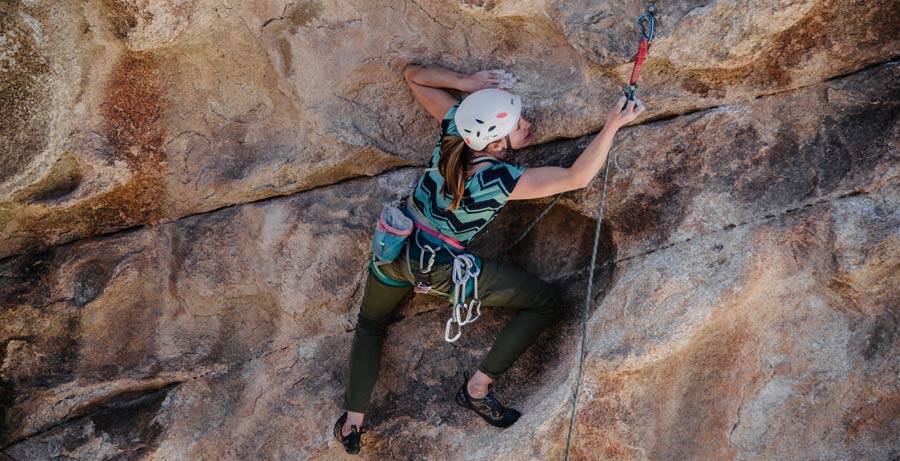
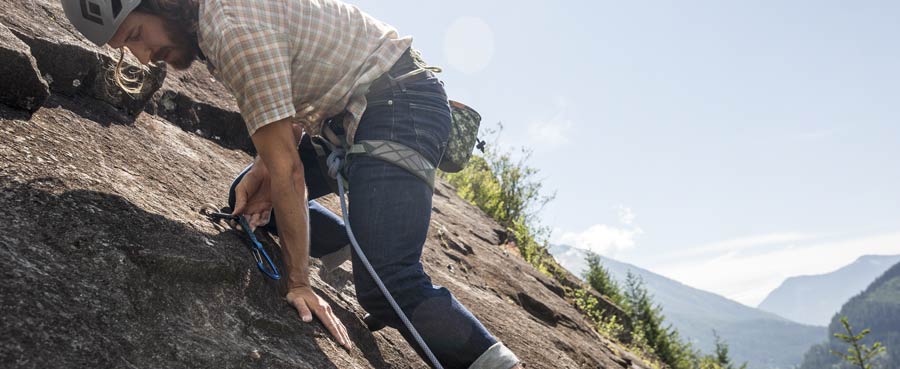
If you're getting into lead climbing, you know you'll use quickdraws to connect your rope to protection when you're leading a climb. There are two steps to clipping quickdraws:
- Step one: Clip the quickdraw to the bolt hanger.
- Step two: Clip the rope to the quickdraw.
Being able to move through these steps quickly and efficiently not only conserves your energy but also improves safety by limiting the amount of time that you're faced with taking a fall from above your last point of protection.
Just getting into sport climbing? See our Sport Climbing Basics article.
Clipping a Quickdraw to a Bolt Hanger

Clipping a quickdraw to a piece of protection is simple: Open the carabiner gate with your thumb and forefinger (or simply press the gate against the bolt) and clip it to the bolt hanger. As you do this there are several things to consider:
When to Clip

Before clipping a bolt, strive to find a stable stance and a secure hold for your non-clipping hand.
Ideally, the bolt that you're going to clip is somewhere between your head and waist in order to introduce the least amount of slack into the system. If you have to climb above the bolt or make a very long reach to clip it, there will be more slack and therefore potential for a longer fall.
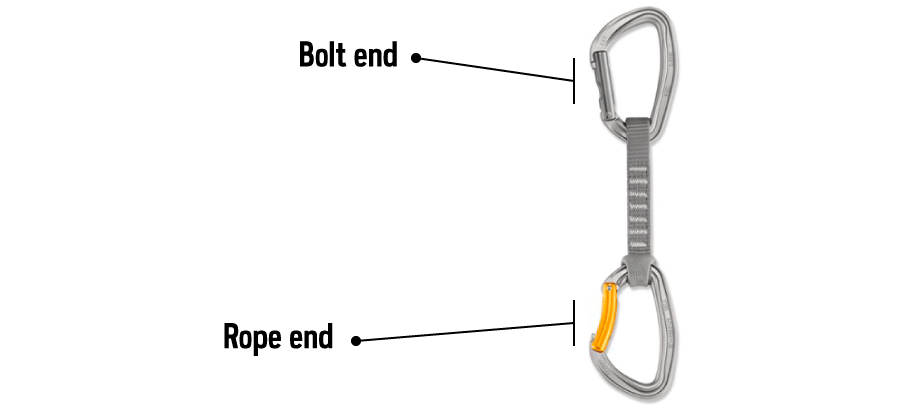
Bolt End and Rope End

Pre-made quickdraws are typically sold with one straight-gate carabiner and one bent-gate carabiner. The straight-gate carabiner is used for clipping the bolt, while the bent-gate carabiner is shaped to make clipping the rope easier. Be sure to follow this at all times to keep the rope-end carabiner free of sharp edges that can develop when you clip a carabiner to a bolt hanger.
The bent-gate carabiner also often includes a rubber sleeve that stiffens the connection between the sling and the carabiner. This keeps the carabiner properly oriented for easier clipping and maximum strength.
Direction of Travel
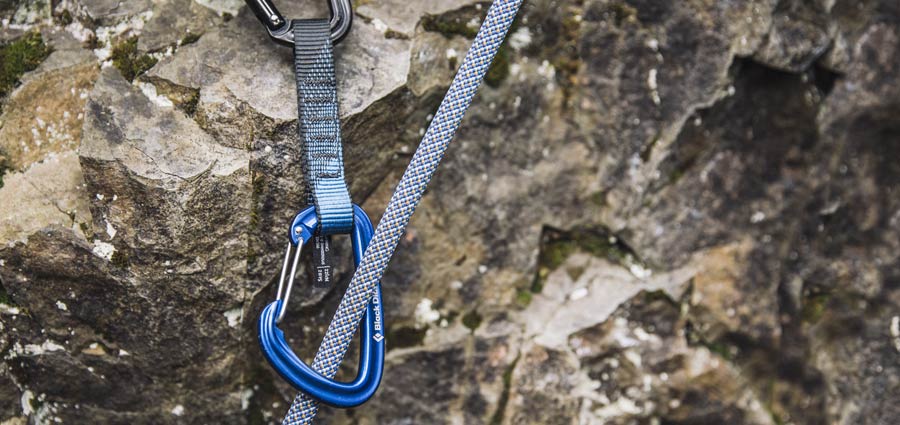
It's important to pay attention to the direction that the climbing route travels and to keep this in mind when you're clipping your quickdraws to bolts. The gate of the carabiner on the rope-end of the quickdraw must always face away from the direction of travel. This allows the rope to travel over the spine of the carabiner rather than the gate. If you take a fall with the rope traveling over the gate, it is possible for the rope to open the gate and unclip.
Contact with the Rock

After clipping, observe how the rope-end carabiner on the quickdraw contacts the rock. You want to avoid clipping a quickdraw so that the bottom carabiner hangs partway over an edge. If you take a fall, the carabiner will pry against the edge and the carabiner could possibly break.
To solve for this, carry a selection of two different length quickdraws and use a longer quickdraw that allows the bottom carabiner to hang completely over the edge.
Also consider how the gate of the carabiner will contact the rock during a fall. Is there a bulge in the rock that will force the gate open during a fall? It only takes a momentary opening of the gate to considerably weaken a carabiner, so much so that the carabiner could break under the force of a fall. Using a longer or shorter quickdraw can prevent this from happening.
Clipping the Rope to a Quickdraw
Getting quick at clipping the rope to a quickdraw can save you a lot of energy over the course of a climb and keep you well protected against a fall. There are quite a few different techniques for clipping the rope; below we show two popular ways. The key with clipping the rope is to find a couple ways that work for you and practice them until the movement becomes natural.
For the sake of this lesson, imagine the rope-end carabiner gate is facing to the right and you're using your right hand in the first technique and your left hand in the second technique.

Pinch Clip Technique
- Starting from your tie-in knot at your harness, slide your hand down the rope to grab a length of rope.
- As you bring the rope up to the quickdraw, let it run over your pointer finger.
- Use your thumb on the spine of the rope-end carabiner to stabilize the carabiner.
- Push the rope and your pointer finger into and through the gate of the carabiner to clip the rope.

Snap Clip Technique
- Starting from your tie-in knot at your harness, slide your hand down the rope to grab a length of rope.
- As you bring the rope up to the quickdraw, grab the rope between your thumb and forefinger.
- Take your middle finger and hook it in the rope-end carabiner to stabilize the carabiner.
- Push the rope through the gate using your thumb and forefinger.
Whether you use the pinch or snap technique largely depends on the direction the rope-end carabiner is facing and which hand you are clipping with.
| Clipping with right hand | Clipping with left hand |
Rope-end carabiner faces right
| Pinch technique | Snap technique |
Rope-end carabiner faces left
| Snap technique | Pinch technique |
Things to Avoid When Clipping the Rope
Back clipping: When you clip the rope into the rope-end carabiner on a quickdraw, pay particular attention to the path the rope travels through the carabiner. The rope must pass through the carabiner from the cliff side to the outside.
A dangerous mistake that is too common among beginner climbers is to clip the rope so that it travels from the outside into the cliff. This is called back clipping. In a fall, the rope can cause the carabiner gate to open and unclip from the carabiner.
Z-clipping: Closely spaced bolts usually calm the nerves of lead climbers, but they can sometimes lead to what's called Z-clipping. Z-clipping occurs when you accidently grab rope from below the previous quickdraw rather than from above it. Chances are if you do this you'll discover the error quickly because the rope drag created by Z-clipping will prevent you from moving very far. However, if you are able to continue climbing, you'll have created a situation that sets you up for a longer-than-necessary fall. The piece that you just clipped is not the one that will catch your fall, but rather the one below it that will.
Remember: Safety is your responsibility. No article or video can replace proper instruction and experience. Make sure you practice proper techniques and safety requirements before you climb.


