If you're a proficient top-rope belayer, you're ready to learn how to belay a lead climber. The big difference between lead and top-rope belaying is that you spend most of your time paying out rope slack, rather than taking it in.
Beyond slack management, you also have to master additional techniques. Catching lead falls, for example, is a skill that requires quick thinking and reflexes.
Just as with top-rope belaying, gyms require you to pass a lead belay certification test, and climbing classes teach this skill as part of the lead climbing progression. This article covers lead belaying techniques, but is not meant to replace hands-on instruction.
REI Outdoor School offers classes that teach all types of belay, along with a wide range of additional climbing fundamentals.
Find a Climbing Class at REI Outdoor School
Gear Needed for Lead Belaying
Though a lead climber needs additional gear, like quickdraws and slings, your gear needs for lead belaying are the same as for top-rope belaying. As always, doublecheck with your class instructor to see what is required, but typically gear will be provided.
Any belay device for top-rope belaying is also appropriate for lead belaying. Note that belaying a lead climber is quite different between a tubular and a brake-assist device, so you need to learn and master the technique for your device. We cover lead belay with a tubular device in this article.
For more details about different types of belay devices, check out How to Choose Belay Devices.
Video: How to Belay a Lead Climber
Universal Belay Principles
Whether you're belaying a top-rope climber or a lead climber, these principles remain unchanged:
- Always keep your brake hand(s) on the rope. ALWAYS.
- Only slide a hand when the rope is firmly held in the braking position.
- Always orient brake hands in their strongest natural position.
- Always maintain attention on your climber, and be watchful for any hazards in your surroundings.
Setting Up the Belay
Your initial steps are the same as in setting up a top-rope belay:
- The climber ties into the harness with a figure 8 knot.
- You close the system by tying off the end of the rope with a stopper knot.
When the climber is much heavier than you, also consider tying in to a ground anchor. Ground anchors are worth considering, too, whenever you're forced to belay in a place where you have an obstruction between you and the wall.
Unique Steps to Setting Up a Lead Belay
In top-rope climbing most of the rope is initially running up the wall or cliff to a top anchor and back down to the climber. In a lead belay, though, most of the rope is on the ground and the lead climber clips into bolts on the way up. Thus some steps differ from top-rope belay procedures:
- Double-check that your rope length is comfortably more than twice as long as the distance to the top anchor. If it's shorter than this, you'll run out of rope before the climber can be lowered all the way back to the ground. That would require you and your partner to set up a plan for top-site belaying instead.
- Set up your belay device the same as in a top-rope belay, but your attachment point along the rope is close to the climber. Be sure the climber has enough free rope, though, to be able to reach the first bolt along the route.
- Flake out the rope to make sure there aren't any knots or kinks that might hang up as rope pays out through the belay device.
Performing the Safety Check

Just as in top-rope belaying, the climber and belayer always double-check each other's setup before climbing begins:
- Knots: Is the climber's figure 8 tied correctly and did the belayer close the system correctly with a stopper knot at the end of the rope?
- Buckles: Are both harnesses snug with buckles securely fastened? Whether it's inherent in the buckle design or (on older harnesses) the climber must perform the task, straps must double back through buckles to secure them.
- Belay Device: Is it properly threaded? Does the carabiner pass through the rope, belay-device cable and harness belay loop? Is the carabiner locked?
- Command Check: Because terms can vary, run through your communication to review terminology and to be sure you agree on every term you will use.
Spotting the Climber
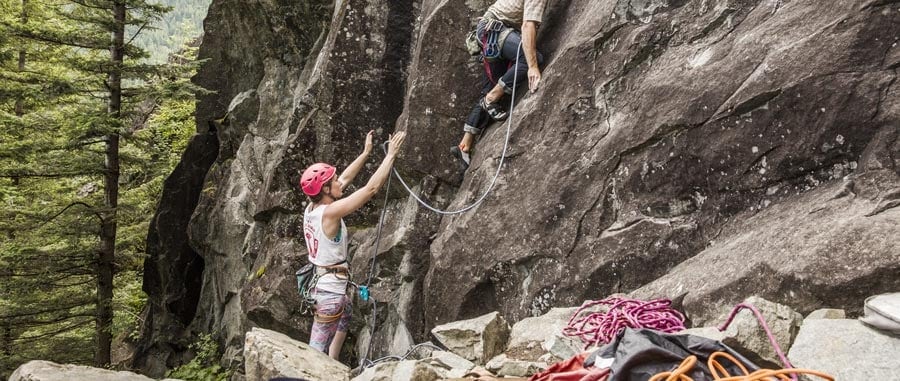
Belaying doesn't begin until the climber clips into the first bolt. So you begin by spotting the climber during the ascent to that bolt. This bouldering skill requires you to adopt a balanced stance with arms up and fingers together. Focus on the center of the climber. If a fall occurs, your job is to keep the climber upright and ensure the person's head doesn't hit the ground.
Before the climber begins the ascent to the first bolt, run through your initial belay commands:
- Climber: On Belay? Belayer: Belay On!
- Climber: Climbing! Belayer: Climb On!
Getting in the Proper Belay Stance
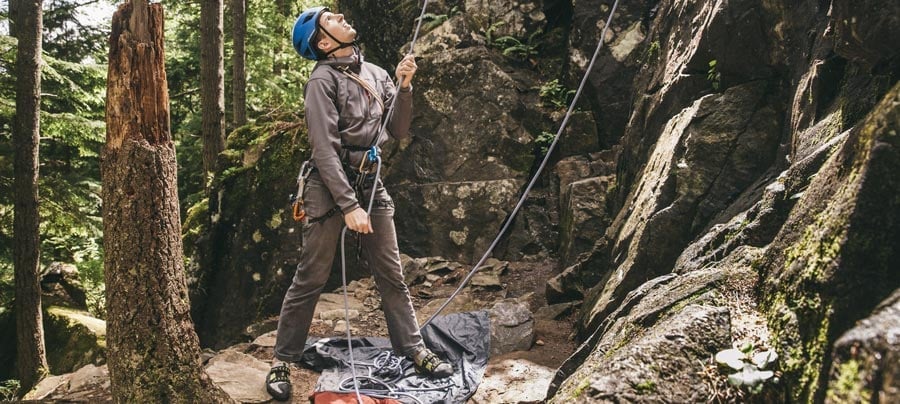
Once the first bolt is clipped, quickly get ready to belay in earnest. You assume the standard belay stance, with your non-dominant foot forward, your knees bent and your whole body relaxed yet ready.
Because climber falls can be far more forceful in lead belay than in top-rope belay, proper position is also more critical:
- You sometimes get yanked forcefully into the wall, so having a clear path to it is essential to ensure nothing trips you up.
- Also, don't set up too far from the wall or you risk injury from impact. Even if you brace properly, an overly long swing into the wall can sprain an ankle.
- Finally, just as you do for top-rope belay, set up at least a step away from being directly under the climber's route.
- After each clip point, be prepared to reposition yourself in alignment with the direction of pull should the climber fall.
Belay Communication
Commands are the same as top-rope climbing, although a belayer hears "Slack!" far more frequently. As always, add your partner's name to avoid confusion with other climbing teams. And shout loudly so your partner is certain about your command.
The Belay Process
Because you spend most of your time paying out rope, rather than taking in slack, your beginning hand placement and motions will differ from top-rope belaying.
- Grip the rope directly above the belay device with your guide hand.
- Slide your brake hand out away from the belay device and grip the rope.
Lead Belay Technique

- Give slack by feeding the rope up with your guide hand.
- Simultaneously, your brake hand gripping the rope will be pulled in close to the belay device
- Next, slide your guide hand back down so it's directly above the device again; then regrip the rope.
- Then, slide your brake hand out away from the device and regrip the rope.
- Repeat the above sequence continuously, as long as the lead climber continues to ascend.
Monitoring Rope Slack
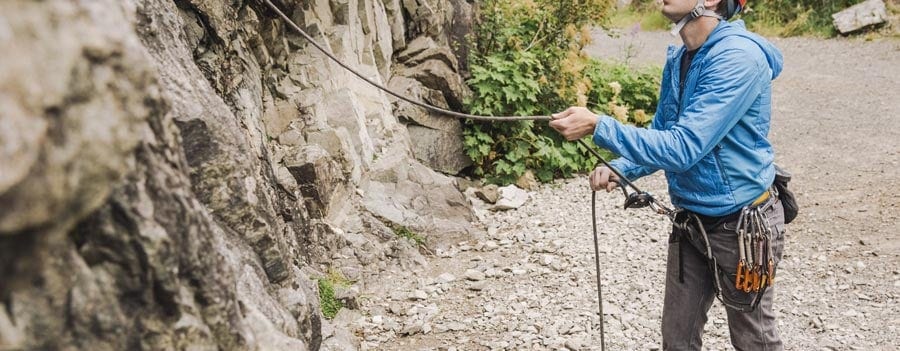
Pay close attention to the amount of rope slack. Too little slack impedes progress and can pull a climber off the wall. Too much slack can set the climber up for a long and painful fall. Watch the amount of rope droop coming out of the belay device:
- If the rope is wire-straight out of the device, you have too little slack.
- If the rope droops below the device, you have too much slack.
Just as you do for a top-rope belay, watch and listen closely to your climber's progress and commands. When the climber pauses, you pause. When a climber yells "Clipping," quickly pull rope up to provide slack. Do it faster by stepping forward as you work, but be careful not to lose your footing.
Assessing Fall Risks
Because a leader falls twice as far as that climber has ascended above the last clip-in point, falls can be long and consequential. When a fall happens, you must react fast. As the climber is ascending you should be determining the risk of a fall at every point along the route:
- If an obstruction like a ledge or the ground is directly in the climber's fall line, you'll have to do a quick, hard catch (see below).
- If the climber will instead drop down from an overhang into free space or swing into the wall, you have to do a soft catch (see below).
Making a Hard Catch
Whenever the climber is within falling distance of an obstruction, take a step or two closer to the wall so that you can more rapidly brake and hold.
- Fight the fall, performing a top-rope style catch by pulling your brake hand down hard while tightening your grip; your body, harness, rope and belay device must work together to absorb the force of the fall.
- The force of the fall is likely to be greater than a top-rope fall, though, so you'll be pulled toward the wall or all the way up against it; be prepared to bend your knees and brace your feet against the wall.
Making a Soft Catch
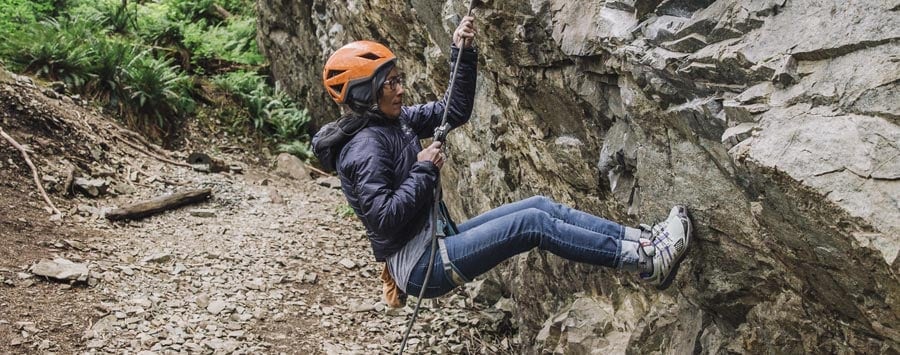
When the climber is not in peril of hitting an obstruction, stay put or step back to the original position so you'll have room to maneuver as you get pulled toward the wall. You'll be using your movement and the natural stretch of the rope to soften the effect of the fall when the climber bottoms out.
- Pull your brake hand down and tighten your grip, just as you would to catch a top-rope fall.
- Get ready to fly, especially if the fall is a long one—taking a quick hop toward the wall helps you direct where you'll end up.
- Let the fall's force pull you into the air, keeping knees bent and feet forward to brace as you plant them against the wall, several feet off the ground.
Lowering a Climber
Not all lead climbers get down via this method, but lowering is a common practice. If that is the agreed-upon plan, the climber needs time, and might ask for some rope slack, in order to set this up. When ready, the climber yells, "tension!" After you remove all rope slack, you respond with "Gotcha!" The climber then leans back into a sitting position and yells, "Lower me!"
- Bring your guide hand under your brake hand.
- Keep both hands on the rope.
- Yell "Lowering!"
- Let the rope slowly feed through the belay device, lowering the climber.
- Maintain a steady pace, adjusting speed if the climber requests it.
- Slow up or stop when the climber nears a bolt and needs to clean (remove) the quickdraw; also slow up near obstructions and near the ground.
When the climber is standing on the ground, safely balanced on two feet, the climber says, "off belay." You respond by paying out plenty of slack and saying, "belay off."
Remember: Safety is your responsibility. No internet article or video can replace proper instruction and experience—this article is intended solely as supplemental information. Be sure you're practiced in proper techniques and safety requirements before you climb.
