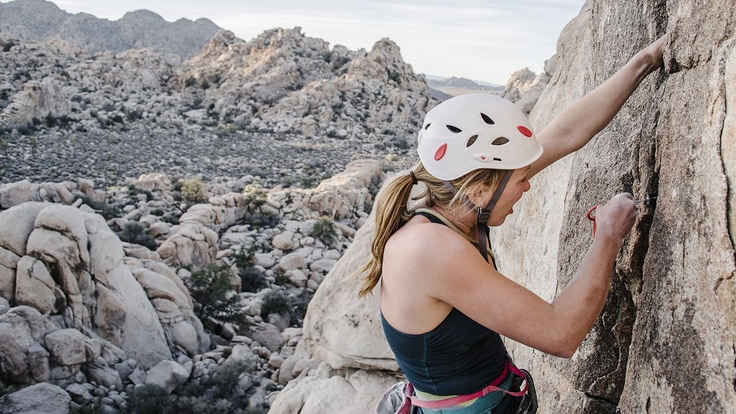
Learning to properly place protection is an essential skill as you progress as a trad climber. There are many different types of trad pro, including cams, nuts, hexes, Tricams, Ballnuts and more. The common denominator is that they are removable, as opposed to fixed gear that is permanently secured to the rock (such as bolts).
In order to place trad gear efficiently and securely, you must develop a good eye for where on the route to place the gear, and you need to be skilled at discerning a secure placement from a dangerous one.
In this article, we'll focus on placing two of the most common types of gear: nuts (also called stoppers or tapers) and cams.
Gear Placement Principles
There are a handful of guiding principles to follow when you're learning to place trad gear:
- A gear placement is only as strong as the rock around it. Examine the rock and make sure it's solid. Don't place gear in contact with loose blocks or flakes that might pull out or break.
- Get efficient at choosing the right size gear for a placement. Use your fingers and hands to measure the crack, then choose the piece that corresponds with that measurement.
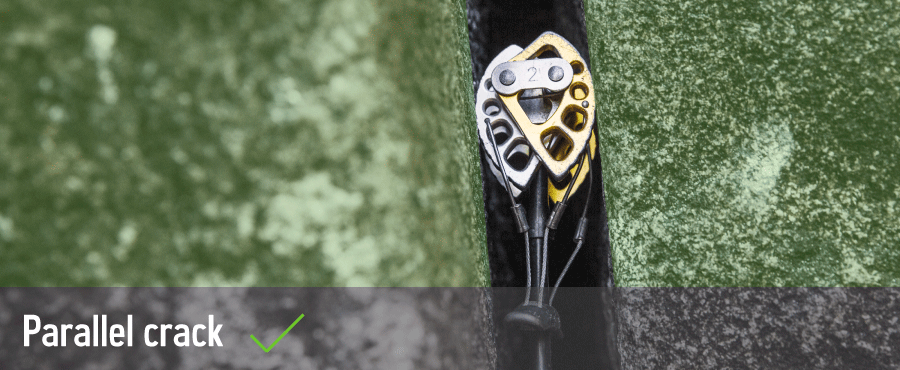
- Cams generally work best in parallel cracks while nuts generally work best in constricting cracks.
- Avoid shallow placements where the piece can easily pull out of the crack.
- Place gear so it is secure, but also think about how difficult it will be to remove.
- Placing a piece too deep in a crack or wedged too tightly will be difficult for a seconding climber to remove.
How to Place Nuts
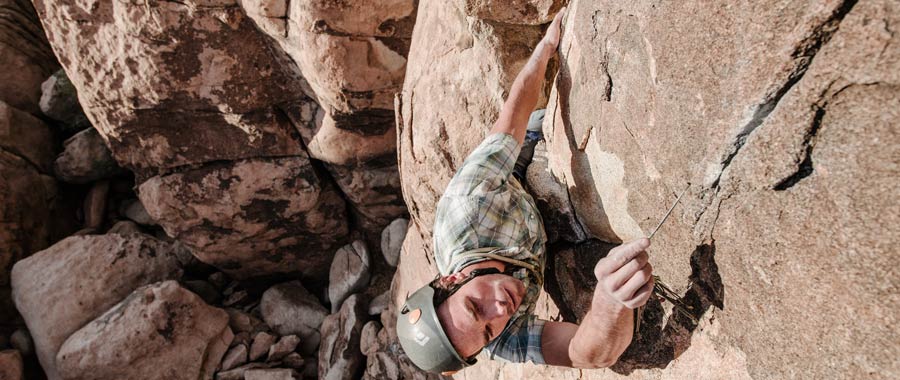
Nuts are metal wedges of various sizes and shapes, strung with cables, and designed to fit in constrictions in the rock. While not as glamorous as cams, these industrious passive pieces should not to be overlooked. They are relatively inexpensive and lightweight, and when placed well they are very reliable. Long before cams existed, climbers were summiting peaks with nothing but nuts on their rack.
Racking Nuts
Nuts are often sold in a set that includes about a dozen pieces, ranging from small to large. It's common practice to split the set up into two groups organized by size and clip them to two separate carabiners. Clip the carabiners on your harness gear loops or to a gear sling for easy access.
Finding the Right Nut Placement
First and foremost when looking for a nut placement, you need to examine the rock and make sure it's solid. Don't place a nut in contact with loose blocks or flakes that might pull out or break. As with any gear placement, a nut placement is only as strong as the rock around it.
Nuts work by wedging into a constriction in the rock, so look for a crack that's wider on top and tapers as it goes down. Nuts are most effective in vertical cracks with constrictions, but they can sometimes work in horizontal cracks if the crack narrows at the opening. Nuts do not work well in cracks that flare outward or downward because there is not enough of a constriction to hold the piece in place.

Selecting the Right Size Nut
When choosing the size of nut to place in a crack, keep in mind that generally more contact between the nut and the rock equals a stronger placement. This means that a larger nut is typically stronger than a smaller one.
Examine the crack and the constriction and determine the largest size nut that will go into the crack and effectively wedge into the constriction. For beginners, this process is mostly trial and error. If the nut is too large, it either won't go into the crack or it may not fit snugly in the constriction. If the nut is too small, it may have a tendency to pull through the crack.
As you gain experience, you'll get better at selecting the correct size nut on your first try. But even with years of climbing under your belt, you won't get it right every time.
Placing Nuts
Nuts can be placed in two primary positions: with the wide sides in contact with the rock or with the skinnier ends in contact with the rock. The wide sides provide more contact with the rock and are therefore typically more secure. What's most important, however, is how the nut fits in the crack; if the placement with the narrow sides contacting the rock seems more solid, go with that.

Most nuts are curved on one side, giving you additional placement options. When you're looking at the crack, try to match the curve with the shape of the rock to maximize the nut-to-rock contact.
To place a nut, start by unclipping your set of nuts from your harness or gear sling. Without removing a nut from the carabiner, grab the nut that you think is the right size and hold it by the wire as you insert it into the crack. The rest of the nuts will slide to the bottom of the carabiner as you're inserting the piece.
Pull the nut down into the constriction, paying attention to the surface contact between the nut and the rock. Place the nut with the cable facing in the direction of pull if you were to take a fall, which is generally down and slightly out.
Setting the Nut
If you're satisfied with the placement, unclip the carabiner that's still holding the rest of your nuts and return it to your harness or gear sling. Clip a quickdraw or sling to the wire loop on the nut you just placed and give it a gentle tug to test the security of the placement. Don't pull so hard that if the nut pops out it will cause you to lose your balance. Assuming the nut holds and the placement looks good, give the sling a harder tug to really set the piece into the constriction.
The quickdraw or sling not only gives you something to pull on to set the nut, it also helps reduce the amount of pull on the piece once you've clipped the rope. The tug of the rope as you're climbing can pull a nut out of its placement, so always use a quickdraw or sling to help avoid this.
Cleaning the Nut
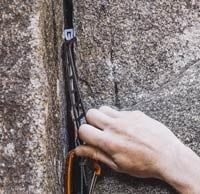
Cleaning (removing) a nut can sometimes be challenging. The key is to think about how the nut was placed and then reverse that. For example, if the nut was slotted into a constriction from above, then you'll need to push the piece up to get it out. You may be able to simply use your hands and the wire cable to gently wiggle the nut free. Don't get too forceful with the wire cable; you don't want to damage the wire.
If you can't free the nut with your hands, grab your nut tool off your harness and go to work. You can try tapping the nut with the tool or hooking it with the nose of the tool to pry the piece out. Nuts are relatively inexpensive, so if you've given it your best effort and can't retrieve it, it's ok to leave it behind.
How to Place Cams
Cams, short for spring-loaded camming devices (SLCDs), are a type of active protection (meaning they have moving parts.) They are very popular because they are generally very easy to place. There are many different cam designs, but the principles for how they work and how to place them are very similar.
In simple terms, cams work by converting the downward and outward pull of a fall into force against the walls of a crack. Together with friction this force can keep the cam in the crack and catch you when you fall.
Cams are generally easier and quicker to place than nuts: you pull the trigger to retract the cam lobes, insert the cam into the crack and release the trigger to allow the lobes to expand and contact the rock. However, for a cam placement to be secure you need to be competent in finding the right place to put the cam, choosing the right size cam and placing the cam.
Finding the Right Cam Placement
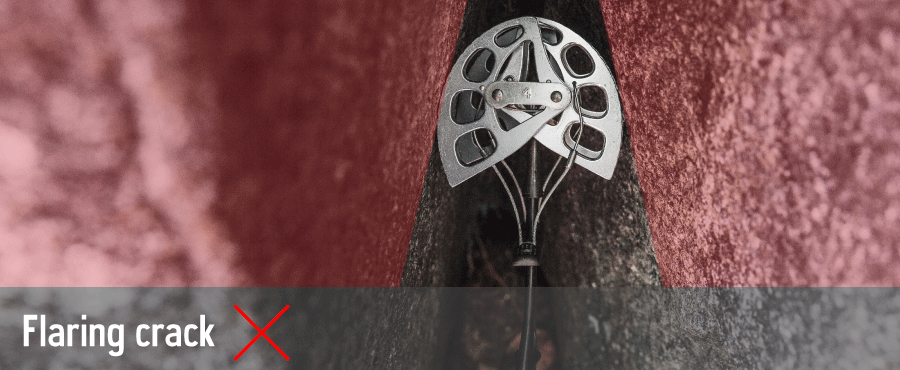
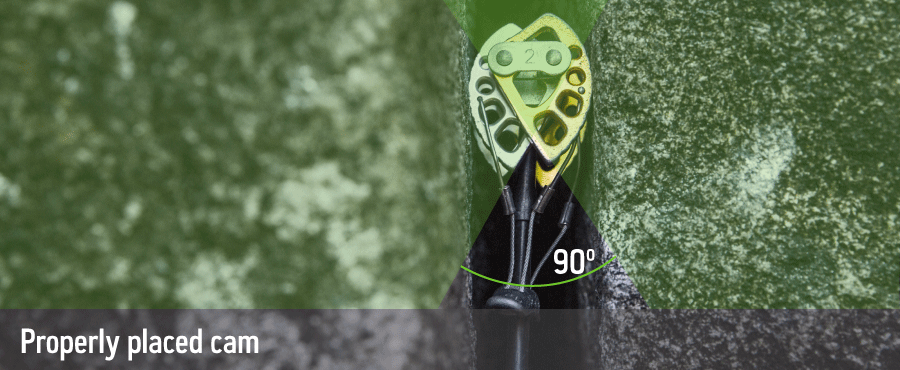
When looking for a spot to place a cam, look for cracks with parallel sides or small pockets. You generally want to avoid cracks that widen above or behind the cam because the cam will have a tendency to move into the wider space. This is called "walking."
Also avoid cracks that flare too much outward or downward. Flaring cracks often don't provide enough surface contact with the cam's lobes to create a secure placement.
As with any placement, keep in mind that a cam is only as strong as the rock around it. When a cam catches a fall, it creates a tremendous amount of outward force that can lever off sections of rock. Examine the rock to make sure it's solid and be very suspicious of flakes and freestanding blocks. Tap on the rock with your fist and listen to the sound it makes. If it sounds hollow, see if you can find a different place to put the cam.
Selecting the Right Size Cam
Cams come in a variety of sizes, allowing you to place them in cracks smaller than a half-inch wide up to cracks that are more than five inches wide. It's very important to choose the right size cam for a crack to create the most secure placement.
As a general rule, opt for the largest cam that will fit in the crack. However, you need to assess the route and think about what cams to use when. You don't want to use up all of your large cams early only to find out you desperately need one farther up the route.
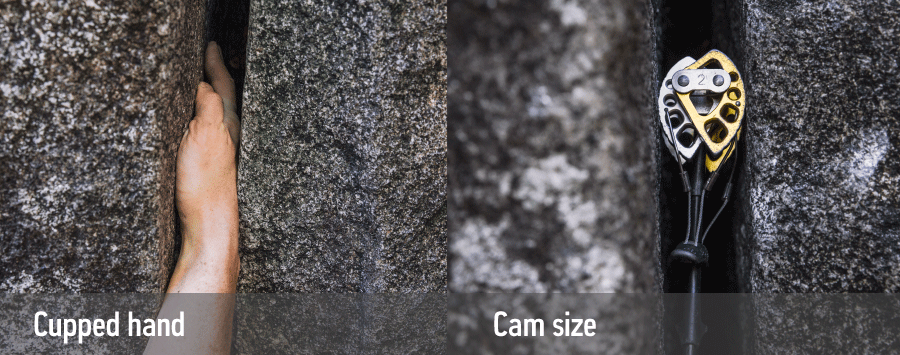
Beyond simply looking at a crack and estimating what size cam will work best, you can use your hands and fingers as a way to measure the crack. With experience, you'll learn that a crack that fits the tips of your fingers takes a specific size cam and a crack that fits your cupped hand takes another size. Eventually, you won't even need to see a crack to know what size cam it takes, you'll simply be able to feel the crack. We don't suggest placing cams blindly though; always visually inspect your placements when possible.
If you're new to placing cams, it will take some time before you're able to choose the right size cam on your first try, and even after years of experience you won't always get it right. But, the more you climb, the better you'll get at it.
Placing Cams
To place a cam, unclip the appropriate size cam from your harness or gear sling and pull the trigger to retract the cam lobes. Insert the cam into the crack and release the trigger to allow the lobes to expand and contact the rock.
As you place the cam, think about the direction of pull if you were to fall and position the cam so that the stem is pointed in that direction. This will generally be down, but the direction can vary depending on the route or the specific use of the cam.
To confirm that you've selected the right size cam, examine how retracted the lobes are. Most cam manufacturers provide recommendations on how much to retract a cam and we urge you follow those guidelines. Black Diamond suggests 50 - 90% retraction for their popular Camalot cams. Metolius puts colored dots on the cam lobes that indicate the ideal range of retraction for some of their cams.
With a cam in hand, you can get a sense for what the range of retraction feels like. When you're holding the cam and not pulling on the trigger, the cam is 0% retracted. Pull the trigger as tight as you can and the cam will retract to 100%. Without placing the cam in a crack, play around with the trigger and find the point at which the cam lobes are 50% retracted. This is generally a good starting point for a solid cam placement. Anything less than this will not be very stable.
Another way to think about retraction is to look at the angle formed by the intersecting straight edges on the bottoms of the cam lobes. If the angle is about 60 degrees or lower, then you're in the right range.
Under-camming and Over-camming

The amount of retraction is important because when a cam is weighted during a fall, it expands. If the cam is barely retracted (under-cammed) to begin with, it will have very little expansion left when it is weighted and won't be as secure as a more retracted cam. Also, a cam that is not retracted enough tends to sit loosely in a crack and can be prone to walking around in the crack.
On the other end of the spectrum, a cam that is more than 90% retracted is at risk for getting permanently stuck in the crack. Over-retracting (over-camming) a cam is when you place a cam that is fully, or nearly fully, retracted.
An over-cammed cam is typically very secure, but it's also almost impossible to remove because there's very little retraction left in the cam. Cams aren't cheap, so try not to get them stuck.
Once you've placed the cam in a crack, observe your placement and remember these key things:
- Is the stem of the cam aligned with the anticipated direction of pull if you were to take a fall?
- Are all lobes of the cam evenly retracted?
- Is the cam roughly 50 - 90% retracted?
- Is the cam placed so that it won't open up if it walks?
Practicing Placing Nuts and Cams
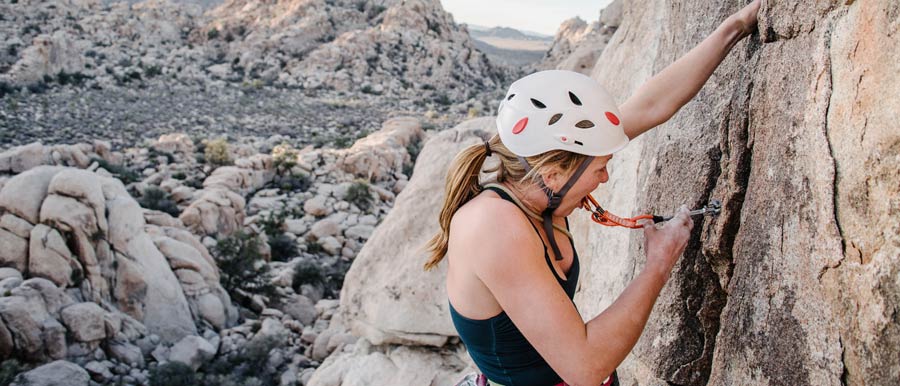
When you're learning how to place nuts and cams, ease into it. Here are some tips for practicing good gear placements:
- Follow a more experienced climber up a climb and examine his or her placements as you're cleaning the pieces.
- Find a crack that is accessible from the ground and experiment with gear placements. Clip a sling into a piece and apply your body weight to get a sense for how well the piece is placed. Know this though: falls generate much greater forces than simply standing on a piece.
- Do a mock lead: Recruit two friends and have one of them belay you on top rope while the other belays you with a separate rope as if you're leading the climb. You can place gear, clip the rope and even take falls knowing that you have the top rope as backup.
Always remember: Your safety is your responsibility. No article or video can replace proper instruction and experience. Make sure you're practiced in proper techniques and safety requirements before you climb.
