Being able to fix a flat on the fly is a key cycling skill, but it's even better to prevent or avoid getting flats in the first place. Enter tubeless tires, which forgo the typical inner tube for a tire that seals onto the rim of the bike. You pump tubeless tires up with a standard pump. The system eliminates the possibility of getting a pinch flat, which happens when you hit a rock or other object with too much force. A tubeless system also helps reduces puncture flats thanks to a sealant inside the tire that fills small holes.
Going tubeless can also help improve your ride. Tubeless systems are typically lighter than traditional tires and, because pinch flats aren't an issue, you can run them at a lower pressure which helps improve traction. (Read more on Tubed vs. Tubeless).
This guide will walk you through the steps of how to install tubeless tires if you have tubeless-ready tires or tubeless-compatible tires. (Note: We don't recommend converting standard rims and tires that aren't tubeless compatible into tubeless.)
And don't worry. If you're not ready to tackle the project on your own, bring your bike to a local REI Bike Shop for help.
Supplies needed
- Tubeless-compatible tires
- Tubeless-compatible rims
- Tire levers
- Tubeless rim tape (make sure it matches the internal width of your rims)
- Tubeless valve stems
- Bike tire sealant
- Valve core removal tool
- Rags and rubbing alcohol/bike cleaner for cleaning
- Screwdriver
- Floor pump or air compressor
Steps to Installing Tubeless Tires
Make sure you have tubeless-ready or tubeless-compatible rims and tires
- Remove the wheel and tire
- Remove any existing rim tape or rim strip
- Tape rim
- Install tubeless valve stem
- Remove valve core
- Mount the tire on the rim
- Inflate the tire
- Add sealant
- Inflate the tire
Remove the wheel and tire
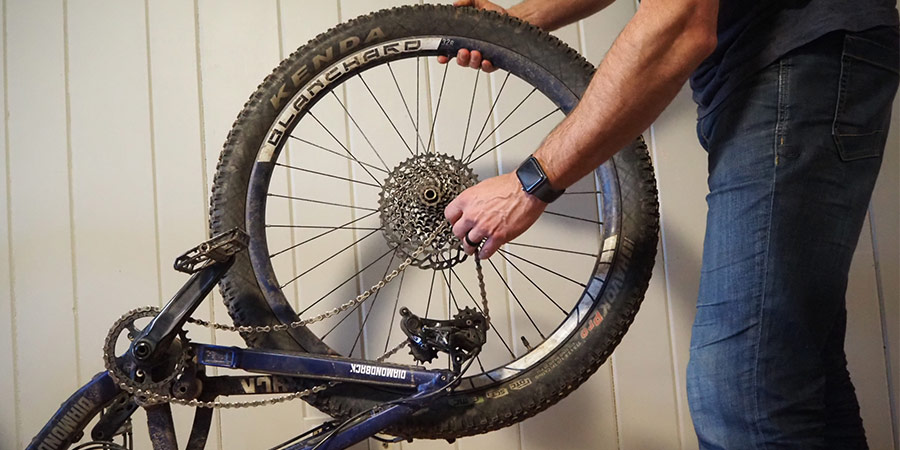
Follow the basic steps for removing a standard wheel and tire. (You can find the steps in this article on fixing a flat tire.)
Remove existing rim strips, if needed
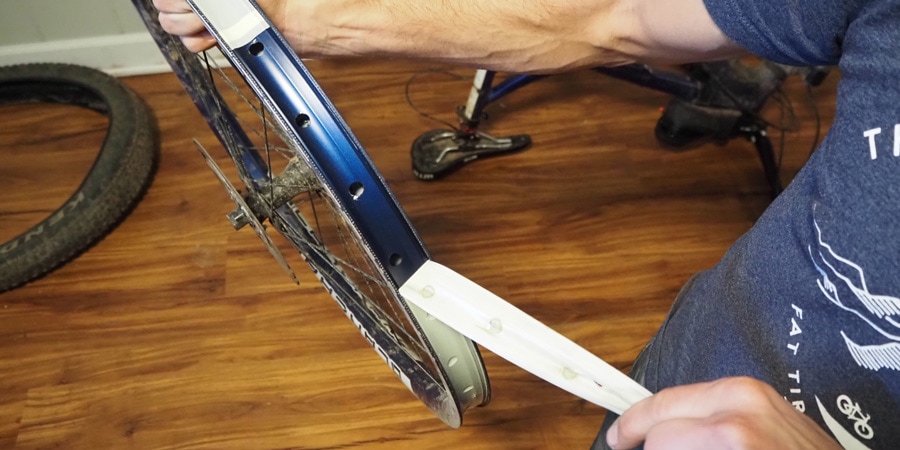
- If you have a truing stand, it's convenient to do all work with valve tape in the stand. If you don't, you can reinstall the wheel (without the tire) onto the bike so that the wheel is easier to work on.
- Depending on how the rim has been set up, you may have to remove the existing rim tape or rim strip from inside the rim—or you may skip this step entirely if the rim came pre-installed with tubeless tape. When in doubt, it's best to install new tubeless tape.
- After removing the valve, the rim tape should pull free easily.
- Now, take a rag and rubbing alcohol and clean the inside of the rim. Make sure there's no remaining tape or sealant residue, particularly on the hook of the rim where the tire bead sits.
- Be sure the rim is dry before you move on to the next step.
Tape rim with tubeless tape
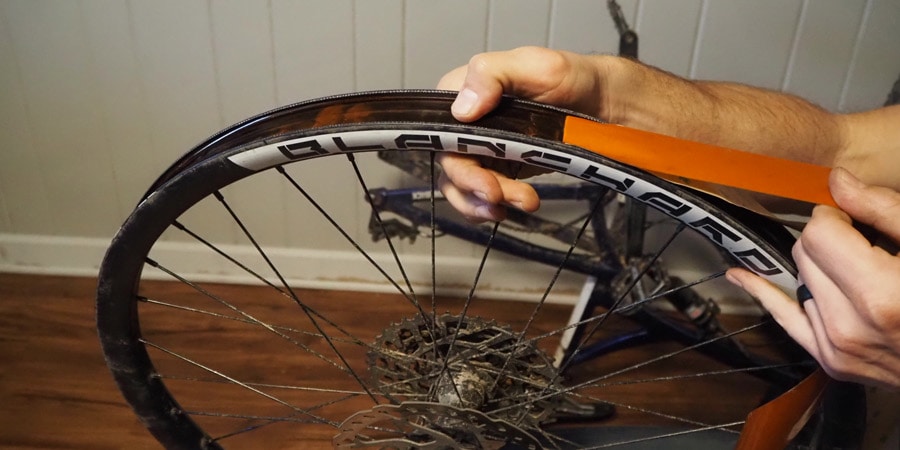
- Make sure the rim is properly taped with tubeless compatible rim tape so that no air can leak out the spoke holes. The tape should seal cleanly, without folds and with minimal air bubbles (air bubbles can lead to leaks later).
- Match the width of the rim tape to the inside width of your rim. You want the tape to cover the full width of the rim without interfering with the bead on the edges of the rim.
- Start the tape one spoke hole above the valve hole. Pull the tape tight toward you, stretching and pressing it firmly onto the rim by rubbing your thumb along the surface as you rotate the wheel. Also, press the tape into the center depression of the rim and work your way outward.
- Overlap the tape by a few inches (end it one spoke hole past the valve hole) to ensure a tight seal. Cut the tape with scissors.
Insert the valve
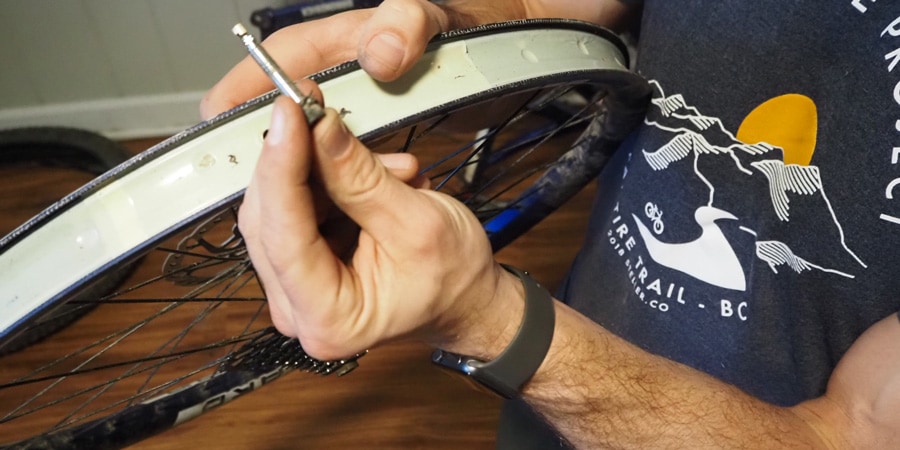
- Take a small Phillips head screwdriver and poke a hole through the valve hole.
- Push your new valve through the hole and adjust the rubber back of the valve so it fits snug against the rim and tape.
- Slide the rubber O-ring over the valve (if it comes with one), followed by the locking nut.
- As you seat the valve core tightly onto the rim with a thumb, simultaneously screw the locking nut tightly so the valve is secure, and no air can escape from around the valve.
Remove the valve core
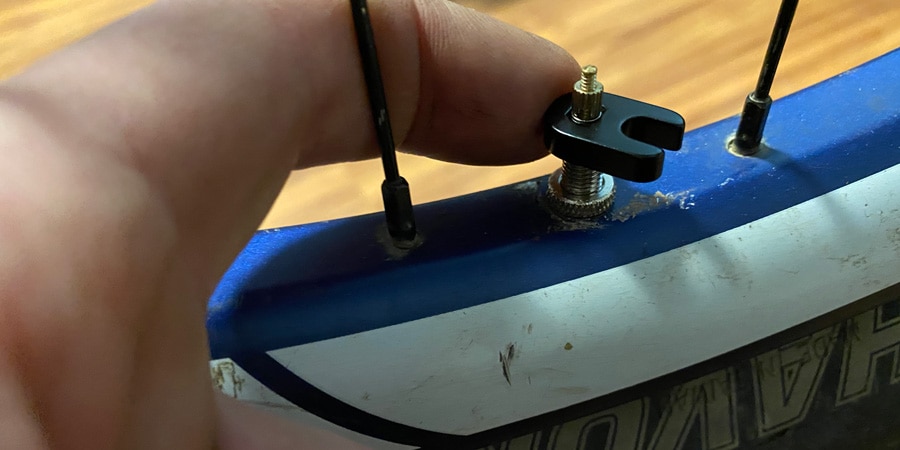
This will allow you to get more air into the tire quickly. You'll also pour the sealant through the valve core. Using a valve core removal tool, simply unscrew the center of the valve (the silver piece inside the valve). Set it aside and don't lose it.
Install the tire
Clean the inside of the tire with a rag to remove any sealant residue, particularly along the bead. If you have installed the wheel to the bike to tape the rim, you'll need to remove the wheel from the bike. Make sure you line up the tire in the right direction, ensuring that the tread is going forward. Installing it before adding sealant will help the tire bead seat correctly and reduce the mess. If you're using tire levers, be careful not to damage the rim tape.
Inflate (and deflate) the tire
- Fix the floor pump head onto the valve and pump vigorously and continuously. During this process, you will hear several loud pops. Don't worry, this is normal. This sound is the tire seating against the rim.
- You'll know the bead is set correctly by examining the tire and seeing it evenly seated all the way around the rim.
- Once seated, you can now let all the air out of the tire (which will happen as soon as you remove the pump head from the valve stem). The bead should stay seated even without air in the tire.
Add sealant
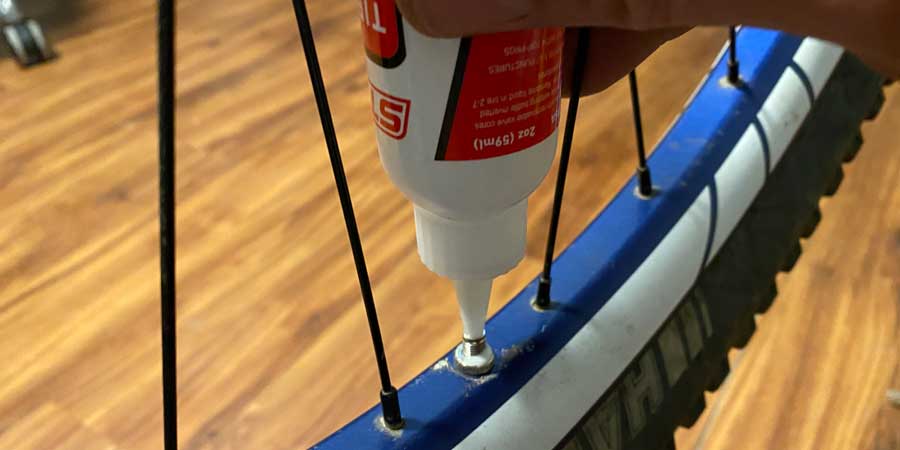
- Add 2 to 3 ounces of sealant through the valve you installed. If you're using a large container of sealant, you may want an injector. Some bottles of sealant come with injectors. Alternatively, you can get 2 fl. oz. bottles of sealant with an applicator tip, which will save on cost and eliminate the need to measure.
- Either way, attach the injector or applicator to the valve core and fill the tire with the desired amount of sealant. Since you're adding liquid to a closed volume system (the tire bead is seated), you may have to 'burp' the injector.
- When you're done adding sealant, reinsert the valve core.
- The sealant will dry out over time, so you'll need to refresh your sealant every few months.
Inflate the tire
- Now, inflate the tire with your floor pump until it reaches the maximum psi listed on the tire. (Using an air compressor can help, which solves the problem of inflating the tire quickly enough to seat the bead onto the rim.)
- Once the wheel is fully inflated, put it back on the bike and spin the tire on its axle to help spread the sealant around.
The best way to distribute the sealant is to go for a ride. It's not uncommon for air to initially leak out where the bead seats to the rim. If this happens, you'll notice sealant bubbling past the bead. Again, this may be normal. Reinflate to the maximum psi and give the sealant time to work. Make sure the system is sealed by ensuring the psi has stayed consistent overnight. Once you're sure the system isn't leaking, remove air from the tire to the desired pressure for your ride.
Just because you're riding tubeless doesn't mean you don't need to carry a spare tube. It's possible that your tire may get a large hole or slash in it that is too large for the sealant to seal. Always ride with a spare tube. Now go for a ride and enjoy added traction and puncture protection!
