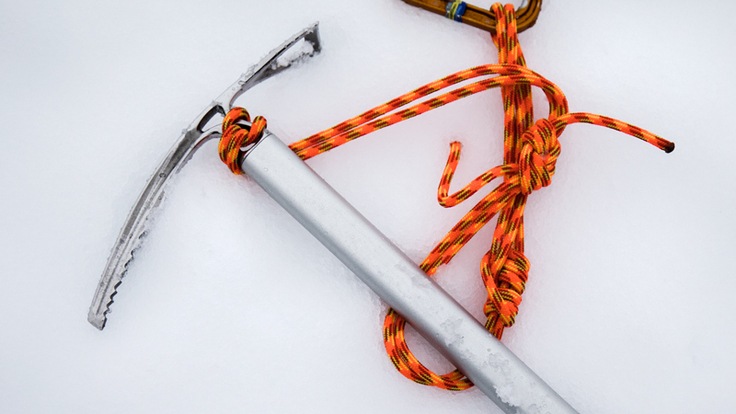
The ice axe, for many, is a mountaineering symbol that evokes images of rugged glaciated peaks and above-the-cloud summits. It's an essential safety tool for mountaineering adventures whether you use it to maintain balance or to self-arrest and stop yourself from a fall.
Why use an ice axe? In the previous snow travel article, you learned how proper foot technique provides your first level of security when making alpine ascents. After that important foundation, an ice axe gives you a second layer of protection. The tool has several uses:
- as a point of balance
- as additional security when you climb (whether you drive the shaft or the pick into the snow)
- most importantly, to stop yourself from sliding down a slope by getting into a self-arrest position
In this article, you'll learn:
For information about choosing the best ice axe for your size and activity, read our article on How to Choose Ice Axes.
Climbing safety is your responsibility. No article or video can replace qualified instruction and experience.
When to Use an Ice Axe
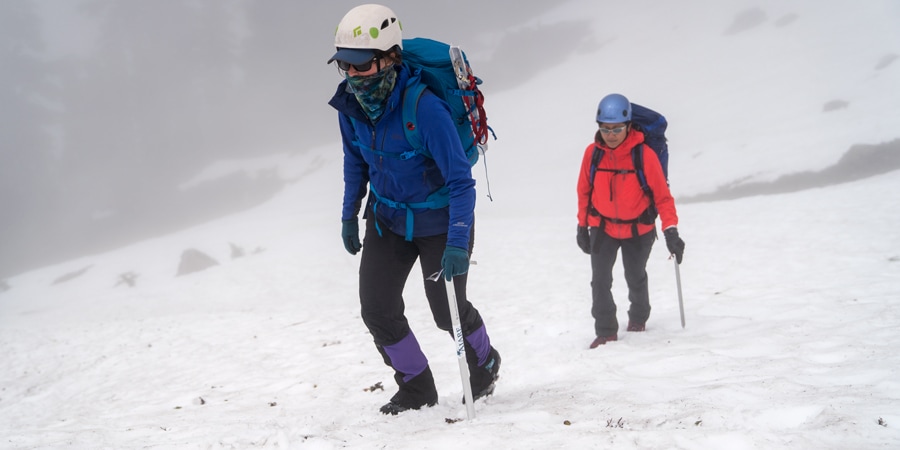
When to pull out your ice axe and carry it in your hand is a personal decision based on your assessment of many factors such as snow conditions, slope angle, your ability, what will happen if you fall or your personal risk tolerance.
Here are some factors that might influence your decision to use an ice axe:
- The likelihood of falling increases because the slope is steeper, snow conditions have changed or you're more fatigued.
- The consequences of falling become more severe because there are rocks or a cliff below you or you would fall a long way.
If you decide to use an ice axe, it's important that you have it out of your backpack and at the ready before you encounter challenging conditions. Don't wait until you're standing on an exposed slope to have your axe in hand. If you do slip and fall, you'll use your ice axe to stop your fall—this is called self-arrest.
How to Hold an Ice Axe

Parts of an Ice Axe
Before using your ice axe, you'll need to know its basic components:
Pick: This is the sharp, pointed bottom end of the ice axe. It's used for hooking and swinging into snow or ice, the key maneuver for a self-arrest.
Adze: This broad, hoe-like feature is predominately used to cut steps or seats in snow or ice.
Shaft:
- Straight shafts are ideal for general mountaineering because they let you use the axe as a supportive cane on low-angle terrain and they plunge cleanly into the snow when you need to self-belay or use the axe as an anchor.
- Curved shafts have a slight bend that provides clearance that keeps your hand off the snow when placing the pick into the snow. They're best for steep terrain. (Ice-climbing axe shafts have a pronounced curvature for a more ergonomic swinging motion).
Spike: This is the sharp bottom point of the axe that penetrates snow and ice. It is used to provide a secure support when you're walking or to make it easy to plunge the axe into snow for a belay or rescue.
If you decide to use an ice axe, it's important that you have it out of your backpack and at the ready before you encounter challenging conditions.
Ice Axe Grip
When you're ascending on snow, carry your ice axe in your uphill hand. Use it for support or balance and be prepared to use it to stop yourself if you trip or slide. There are two basic grips:
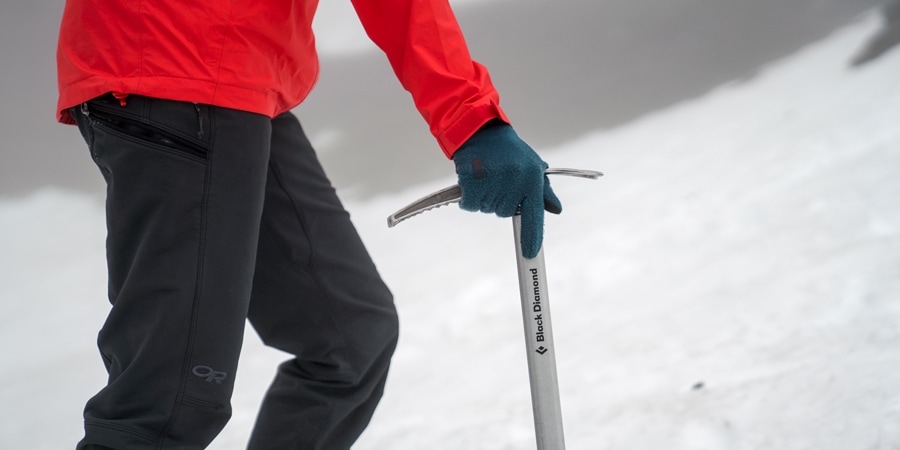
Self-arrest grip: In this position, the pick is pointed backward, the adze forward. Wrap your thumb under the adze and place your other fingers over the pick.
- Pros: Your hand is already in the self-arrest position if you slip.
- Cons: You can't use the pick to drive into the snow as you walk in steep terrain, but you can still drive the axe shaft.
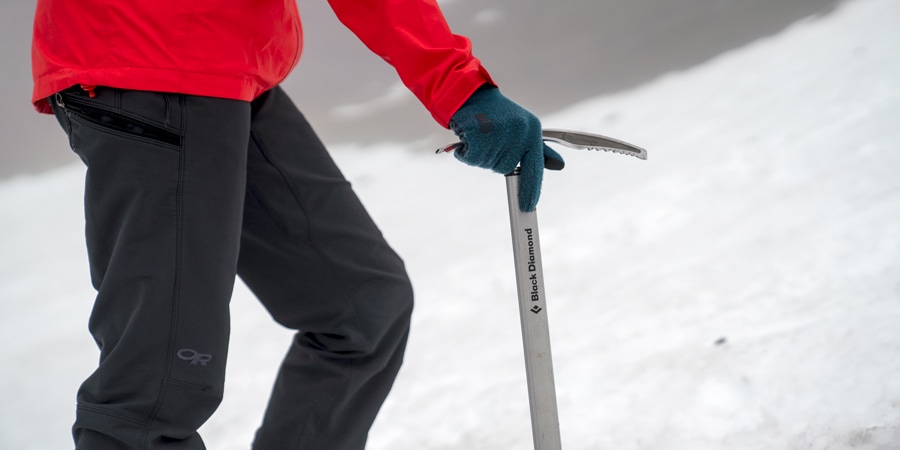
Self-belay grip: In this position, the pick is pointed forward. Place most of your palm over the adze; your thumb and forefinger should wrap under the pick.
- Pros: provides added security in steeper terrain because you can thrust the pick into the slope while standing up.
- Cons: Takes practice to maneuver into the self-arrest position because you have to spin the head of the axe around.
Using the Axe for Support
As you walk up the hill, keep your axe in your uphill hand and use it like a hiking staff for additional support. Plant the spike in for balance as you step uphill.
Using a Leash
Whether or not to use a leash to keep your axe attached to your wrist is a personal decision. The strap prevents you from losing your axe if you fall, but it can become an additional hazard as you slip. Ask yourself if you're likely to drop your ice axe. And if you do drop it, what will it mean for you?
In steeper, higher-consequence terrain, where losing your axe could be dangerous or make it hard for you to travel through the terrain safely, it may make sense to add a leash. If you do use a leash, it should be attached to your wrist; don't attach it to your harness because it's too close to your torso and if you fall and lose control, you could be seriously injured.
If you use a leash, you'll need to stop and move your leash to the other wrist every time you make a turn (because your axe needs to be in your uphill hand). This will take time, slowing you down and potentially exposing you to more risk. If the likelihood and consequences of dropping your axe are low, then it may make sense to travel without a leash.
How to Self-Arrest
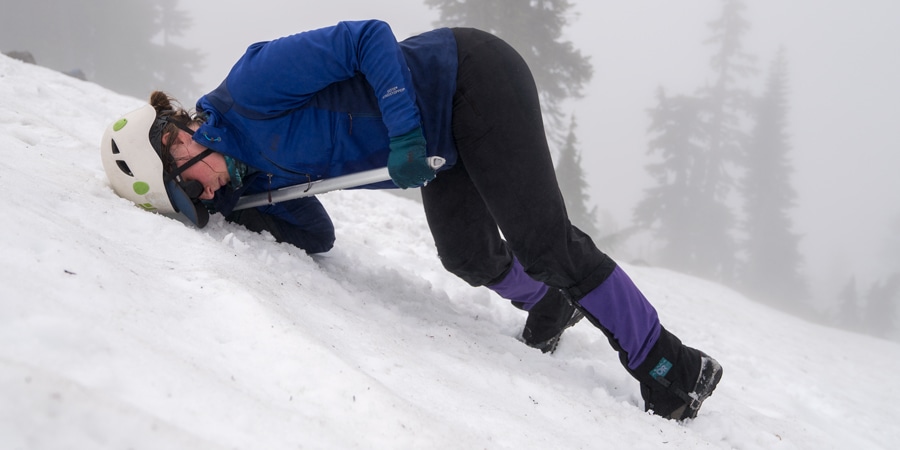
After proper footwork, knowing how to self-arrest adds another layer of security when you're mountaineering. You should consider this skill an insurance policy and not something you want to have to use in real time. It's far better to rely on good, balanced footwork to prevent a fall or slip in the first place.
Before you climb snow slopes or travel on glaciers, self-arrest is a skill you should practice, practice, practice until it becomes second nature.
There are different ways to get into the self-arrest position depending on your body orientation when you fall (see below). But the end goal is the same: Stop your fall by planting the pick of your ice axe into the snow and using your body to stop your momentum.
If you fall, here are the main steps to get into the final self-arrest position:
- Arrest as quickly as possible. It only gets harder to arrest as you gain speed down the hill.
- Hold the axe so the pick is pointed forward just above the shoulder of your uphill hand. The shaft is diagonal across your body with your hand holding the bottom of the shaft near your hip.
- Drive the pick of the axe into the snow and pull up on the shaft (keep it out of the snow).
- Get your body off the snow. Kick your toes into the slope to stop your fall.
- Look down at your shaft with your face in the snow.
Arrest as quickly as possible. It only gets harder to arrest as you gain speed down the hill.
Self-Arrest from Four Different Positions
There are different ways to arrest, depending on your body orientation when you fall. The goal is to turn yourself into a human anchor to stop your descent. In all these positions you should end with your feet downhill, facing the slope and with your ice axe underneath you when you stop.
If you fall on your stomach (head uphill): This is the easiest position to get into since your body is already in the proper self-arrest orientation. Drive the pick of the ice axe into the snow, bring the shaft close to your torso and get your body off the snow.
If you fall on your back (head uphill): Roll your body over in the direction of your uphill hand (the head of the axe). You should be facing the snow. Set the pick and get into the self-arrest position.
If you fall on your back (head downhill): As you're falling, try to plant the pick of the axe at your side. You'll want to keep your eye on the adze as you twist and move your body around so that your feet end up downhill of you. Get into the self-arrest position.
If you fall on your stomach (head downhill): As you are sliding, reach out and plant the pick of your axe into the snow. Then swing your body so your feet end up downhill.
How to Practice
As with all technical mountaineering skills, it's best to sign up for a course to learn the proper technique and practice in real conditions on snow or glaciers. REI offers mountaineering courses for beginners. Many guiding companies or local alpine clubs also provide instruction in these skills.
Find an REI Mountaineering Class
