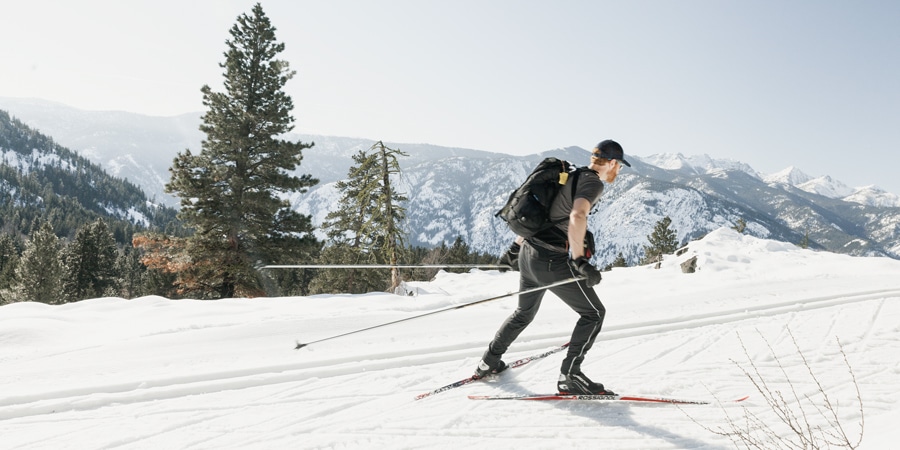
Skate skiing, where the skiing motion resembles a speed skater on ice, is a high energy workout as well as an exhilarating way to move through a winter landscape. Whether you're a classic cross-country skier who has watched skate skiers glide past or a total Nordic newbie, you should be able to get the hang of skate skiing if you take some time to learn a few fundamental techniques.
This article and video explain the basics of how to skate ski:
- Getting into a balanced stance
- Moving with skis on
- Using poles
- Going uphill
- Going downhill
- Turning
- Getting up after you fall
Where to go to learn: Some REI Co-op stores offer skate skiing lessons. You can also ask about lessons at resorts that have Nordic trails, or check with cross-country ski clubs, parks departments and pretty much any outfitter that sales or rents cross-country ski gear.
If you go on your own, try to find an area with groomed cross-country trails. Be sure you follow the area's etiquette rules, a universal no-no is tromping on (ruining) any ski tracks or smooth trail surfaces.
Getting to Know Your Gear

Your setup might vary from the description below, so be sure your gear provider shows you how everything works before you hit the trail. A typical boot/binding setup works as follows:
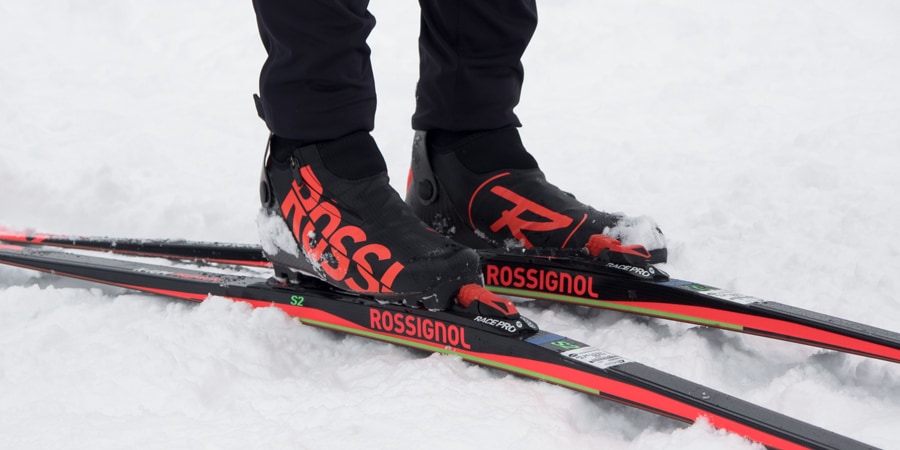
- Look at the boots and bindings: A typical binding has a crosswise groove at the front of it, which mates with a skinny bar at the toe of your ski boots. Pressing your toe bar into that groove clicks you into the skis. Release mechanisms vary—pushing on a button at the front of the binding, or perhaps twisting a knob, frees your boot from the binding.
- Click in and out a few times: Stand in a flat area with skis parallel and click your boots into and out of the bindings a few times to get the hang of how things work.
The Balanced Stance
Basic Athletic Body Position
A comfortable, athletic stance is the key to good balance:
- Stand upright but relaxed, with feet shoulder width apart.
- Bend softly at your ankles and knees, and stand so that your hips are right over your feet.
- Do a couple of quick hops and land lightly—you should feel a slight pressure underneath the balls of your feet.
- You should land each time with ankles and knees slightly bent, and your hips right over your feet.
Balance on One Foot
Skate skiing involves continually shifting weight from one foot to the other, and being able to maintain balance as you do so:
- Start out in the basic athletic body position you just practiced.
- Lift one foot and shift your body over to center the weight over your other foot; ankles and knees should be flexed like the basic athletic stance.
- Work on maintaining a straight line from your armpit down to your foot: Nose, hip, knee and toe should all be vertically aligned as you balance on the ball of that foot.
- Shift your weight to the other foot, maintaining the same alignment and balance on that foot.
- Repeat this process a few times.
Tip: Being proficient and remaining balanced atop one foot is a trait shared by advanced skiers, so the more you practice this skill (carpet ski) at home, the better you'll be the next time you hit the snow.
Moving with Skis On
Now it's time to put your skis on (no poles yet) to practice some basic skate ski movements.
Split Skate
Being able to keep your weight forward is another key to good skate technique. The split skate teaches you how to shift your weight forward to move your skis:
- With skis on, stand with your toes slightly out, which places ski tips wider and tails closer together; knees and ankles should be bent, with hips slightly behind your heels.
- While maintaining balance on the balls of your feet, move your hips gently forward.
- Moving your hips forward will cause your skis to move forward, gradually sliding apart as they do so.
- Stop when your skis drift too far apart.
- Walk your skis back together again until you're in the original position.
- Repeat steps 2 through 5.
Waddle Skate
This teaches you how to move forward by shifting your weight from ski to ski, maintaining balance on the ball of each foot as you go:
- Begin by moving hips forward like you did in the split skate drill.
- Before your skis slide too far apart, transfer your weight onto one ski to glide for a bit, lifting the other ski up as you do.
- Bring the elevated ski in and transfer your weight onto that ski, lifting the opposite ski up.
- Repeat steps 2 and 3 until you get comfortable with these movements.
Move on to the basic skate ski motion by flexing ankles and knees more to provide extra push and longer strides.
Marathon Skate
The marathon skate lets you work on pushing off and transferring your weight onto a gliding ski:
- Start with one ski in the ski track, and the other ski in the skating platform (the untracked center of the trail).
- Push off the non-track ski to propel the ski in the track forward.
- Transfer your weight onto the ski in the track, lifting your push-off ski up and bringing it forward as you glide.
- Repeat steps 2 and 3 as you move down the trail; concentrate on getting a good push-off and a full weight transfer to the gliding ski.
Change ski positions and repeat. Start by turning around, then do this drill with your opposite ski in the track on the return trip.
Speed Skate
This progression of skate skiing combines the leg push-off of the marathon skate with the side-to-side movement of the waddle skate:
- Begin waddle skating down the trail (no poles).
- Gain speed by flexing your knee and ankle to push off hard as you transfer weight to the opposite ski; your strides will lengthen as you do so.
- Swing your arms forward in a similar motion to that of a speed skater on the ice—except that your arms should swing directly forward, not across your body.
- Repeat steps 2 and 3, trying to maintain good balance and weight transfer on each stride.
Using Poles
Before you grab your poles, it's worth spending a lot of time skate skiing without them in order to fully ingrain correct body position and movement. When you're comfortable with that, though, it's time to pick up your poles.
Grasp Your Poles Correctly
Some skate pole straps include a thumbhole and a hook-and-loop closure. Grasp those poles this way:
- Slide your hand up through the strap loop from the bottom, sliding your thumb through the thumbhole as you do so.
- Snugly attach the hook-and-loop cross-strap.
If your poles have a simple loop strap instead, grasp them this way:
- Slide your hand up through the strap loop from the bottom of the loop.
- Grasp the top of the strap and pole grip together (holding the strap against the grip).
Double-Pole Movement
Skate skiers (unlike classic cross-country skiers) move both poles in unison during the majority of time they are on the trail. This double-pole skiing motion is the foundation of most types of skate skiing:
- Hold your hands at eye level and shoulder-width apart with elbows bent at about 90 degrees; both elbows and shoulders should be relaxed.
- While still in your balanced stance, activate (tighten) your core muscles.
- As you do this, you'll bring your poles straight down so that the tips land in the snow even with the toes of your boots.
- Repeat a few times, activating your core muscles each time as you plant your plant pole tips in the snow.
Double-Pole Skiing
Now do that double-pole movement to propel you forward on your skis.
- Start with both skis in the tracks.
- After you plant your pole tips, push off the snow and glide for a bit on both skis; your shoulders should remain bent and your hands should move through an arc as they swing down and back.
- Continue double-poling to move yourself down the ski trail.
V1 Skate Rhythm
Skate skiers use a variety of rhythms (gears) as they ski. Each one involves coordinating the rhythm of pole and ski movements. Most skate skiers use a V1 rhythm 90+ percent of the time:
- Begin by doing the basic speed skate (with pole tips held up off the snow).
- Double pole at the same time you push off of one ski (three push-off points).
- After you glide, push off the other ski (one push-off point).
- Repeat these steps (in this 3-1 push-off rhythm) mile after mile.
Note that the same ski pushes off with the poles each time, while the opposite ski travels solo each time. So stop and switch which ski is in sync with the poles from time to time so that you learn to do it both ways.
How to Go Uphill
Though you should start out in flat areas when you're first learning, eventually you'll want to go up a hill. Listed below are two options for going uphill:
V1
Slow down your V1 skate rhythm as the terrain gets steeper. On gentler hills, you should be able to V1 your way to the top.
Herringbone
Named for the pattern your skis leave in the snow, this is the go-to technique for steeper hills. Practice the herringbone first on flat terrain to get a feel for the movement:
- Create a "V" with your skis. (The wide part should face forward.)
- Roll your feet slightly inward, which digs the inside of the ski edges into the snow.
- Take small gliding steps, maintaining the V shape and inward ski edge as you push off. Take care not to cross the ski tails as you lift each ski up, over and in front of the tail of the other ski.
- Move using an opposite arm/opposite leg pattern; pole tips should be placed in the snow slightly behind your skis to help keep you from sliding backward.
- Keep glide-stepping up the hill until you reach the top.
Note: On steeper hills, you might not be able to generate any uphill glide; if that happens, take a series of small steps up the hill instead.
How to Go Downhill
Hilly terrain, of course, also involves going down, something that makes many beginners anxious. Note that poles aren't used on downhills—hold them so that the pole tips are off the snow and behind your skis. You have two basic ways to go downhill:
Gliding Down
On gentle slopes, you can stay in the ski tracks and let gravity do the work:
- Crouch down into your basic balanced ski stance: Bend softly at your ankles and knees, while also keeping your hands slightly out in front (and pole tips above the snow behind you).
- Slide smoothly down the hill.
Wedge Braking
This technique allows you to control your speed (slow down):
- Practice first on flat terrain to get a feel for your body positioning.
- Push your heels out to make a wedge with ski tips close together and ski tails apart.
- Roll knees and ankles in slightly, which leans in your inner ski edges at the same time.
- Move to a gentle slope and practice holding this wedge stance as you glide down a gentle hill.
- Brake harder by increasing the pressure on the inside edge of your skis; you can also use the wedge to come to a complete stop.
Tip: Experiment with the width of the wedge—a narrower wedge lets you accelerate, a wider one slows you down more.
How to Turn
In a groomed trail system, you have the option of getting into the classic ski tracks, and to let them do the turning for you. You'll need to know how to turn out of the tracks, though. As a skate skier, you can turn using one of the following two methods:
Step Turn
This technique lets you make a gradual turn on gentle terrain:
- Slow down and shorten up your stride.
- Lift one ski up, angle it slightly in the direction you want to turn, and then step down on it.
- Lift up your opposite ski and set it down parallel to the angled ski.
- Repeat steps 2 and 3 until you've completed the turn and both your skis are heading the direction you want to go.
Wedge Turn
Using the wedge turn on a downhill section to control your speed and change direction at the same time:
- While going downhill and using your wedge to brake (see above), put more pressure on the ski that's angled slightly in the direction you want to turn; that helps steer you in the direction you want to go.
- Rotate your hips slightly, angling them in the direction you want to turn.
- When your turn is complete and you're facing the direction you want to go, resume normal wedge braking.
How to Get Up After a Fall
Falling is a natural part of the learning process—even pros do it from time to time. The key is to not get flustered when it happens (or discouraged if it happens more than once):
- Take a deep breath and relax.
- Roll onto your back, while sticking your feet/skis and arms/poles up in the air (the dead bug position).
- Move your skis so that they are parallel to one another; also move your arms so that your poles aren't tangled together.
- Slowly roll over onto your side toward your parallel skis.
- Lean forward toward your hands and knees.
- From here, you should be able to stand up slowly.
If you're struggling, unclip your boots, gather your gear and move to the side of the trail. If you made a few divots in the ski trail, fill them in. Then put your gear back on and start again.
Remember: Safety is your responsibility. No internet article or video can replace proper instruction and experience—this article is intended solely as supplemental information. Be sure you're practiced in proper techniques and safety requirements before you engage in any outdoors activity.


