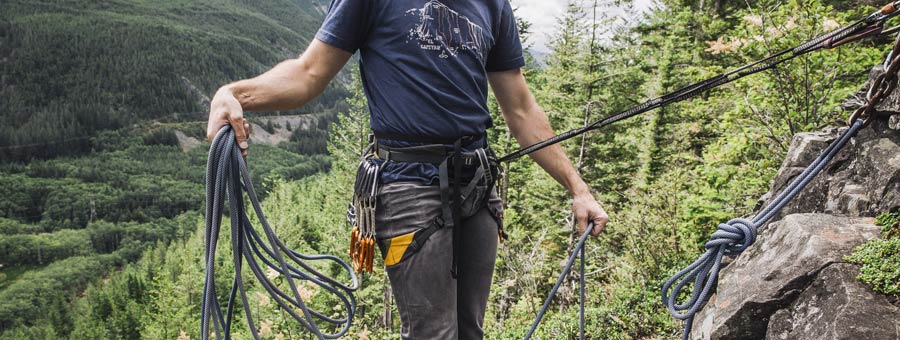
While all climbers aspire to reach the top of a pitch, getting back down is every bit as important. Lowering on belay is what most of us do when we start climbing. Rappelling is another essential skill, though, for you to become a well-rounded climber.
Lowering requires a belay partner, while in rappelling the climber self lowers. Rappelling comes in handy in a number of scenarios, including:
- You have no approach trail to access the base of your climb (like on a sea cliff).
- The wall has a lot of loose rocks and you want to clean the route before you climb.
- You have an injured climber and a rescue from the top of the climb is warranted.
- You want to minimize wear and tear on an anchor system (like one that has rappel rings) after you've cleaned the anchor and need to get down.
- Any situation when climbing down, lowering and walking off are all not possible or not preferable.
This article provides rappel steps for a common scenario: a sport-climbing area with two bolts at the top of the route.
A few things to keep in mind:
- We assume you know how to tie knots, bends and hitches, and that you are proficient at lead climbing and lead belaying.
- Because rappels are when a large percentage of climbing accidents happen, taking the time to learn how to do them correctly is essential. Until you master the process under the close watch of an expert, don't rappel on your own.
- The best way to learn all these skills is to find an experienced climber to mentor you, or to sign up for classes taught by a certified climbing instructors. Find a Climbing Class at REI Outdoor School
Rappelling steps in this article:
- Checking rappel gear
- Preparing at the top of the route
- Setting up the rappel
- Rappelling down
Video: How to Rappel
Checking Rappel Gear
Your essential climbing gear is also your rappel gear, with a few additions.
One piece of added gear needed here and for many rappels is a personal anchor system (PAS), attached to your harness by a girth hitch tied through both harness tie-in points. (If you use an alternative type of anchor tether to a PAS, some steps here will change slightly.)
You also need a 24- to 36-inch length of 5mm or 6mm cord, tied into a loop with a double fisherman's knot. This is for the Autoblock hitch that backs up your rappel device.
Note that you'll need to inspect and replace this periodically because rappels generate friction that degrades the strength of the cord over time.
Also double-check the manufacturers recommendations for your belay device. Some are more suitable for rappelling than others.
- Most tubular-style belay devices are approved for rappel. (This article describes rappel with a tubular belay device.)
- Most mechanical belay devices are more suitable for belay than rappel.
- The classic figure-8 belay device is approved for rappel, and many climbers believe it's more suited to that than belay.
Always read the manufacturer's directions to find out if your current belay device is approved for rappel.
One non-essential item many climbers also take is rappel gloves, especially if they will be doing multiple rappels.
For a basic climbing equipment list, read our Sport-Climbing Checklist.
For info on choosing a belay device, read our article, How to Choose a Belay Device.
Preparing at the Top of the Route

These steps will vary with each rappel scenario. In this case, you will have climbed to the top of the route to clean a top-rope anchor.
- Clip a quickdraw to one bolt, or another acceptable point, and clip the rope into that draw.
- Tell your belayer to take in the slack (the belay will back up your PAS).
- Use a locking carabiner to clip a loop of the PAS to the same bolt as the draw.
- Clip another PAS loop to the other bolt, making sure that you select a loop that will keep slack out of the system as you work.
- Clean and rack the top anchor.
- Ask for slack and pull up about 30 feet of rope
- Tie off the slack with a clove hitch or overhand on a bight and clip it into your belay loop. This prevents a mishandled rope from plummeting to the ground, stranding you.
- Untie the figure 8 that attaches the rope to your harness and thread the rope through the bottom link on both chains.
- Close the system by tying a stopper knot in the end of the rope; this, combined with the stopper knot you should already have tied on the ground end of the rope, ensures you can't rappel off the rope ends.
- Feed the rope until you come to the clove hitch or overhand on a bight that's clipped to your belay loop; untie it and keep feeding the rope until the middle mark on the rope is at the top point of your rappel.
- Have your belayer confirm that both rope ends are touching the ground.
Setting Up the Rappel

Your PAS should still be firmly attached to both bolts. Now it can be set up as an extension of your rappel device.
Set up an extension for your rappel device:
An extension to your rappel device keeps it away from loose clothes, makes it easier to back up and centers it so it's easier for you to control the brake strands.
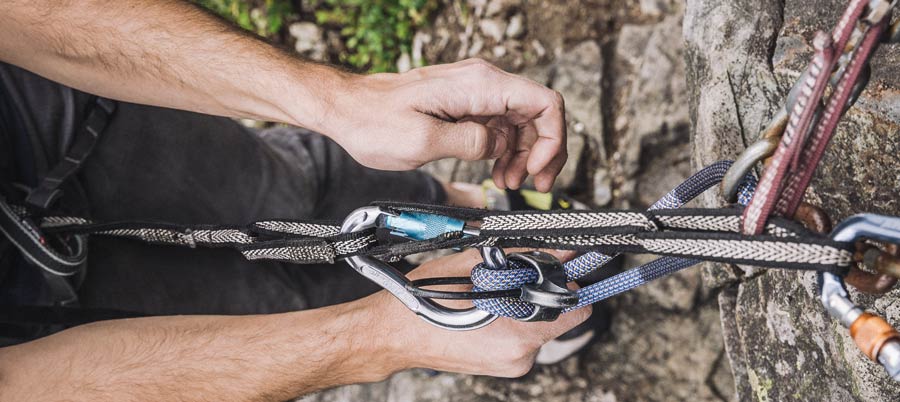
- Clip a locking carabiner through two of the loops on your PAS and the cable of your rappel device.
- Grab both strands of the rope hanging near the rappel device, pinch them into a bight and push them through both sides of the rappel device.
- Reclip your locker carabiner into both loops of rope and the cable on the rappel device.
- Lock the carabiner.
Back up your rappel device:

Always back up your rappel with a friction hitch that helps hold the brake strands if something happens and you lose your grip. Hitch options include the Prusik and the Autoblock, described here:
- Take your pre-tied 24- 36-inch loop of cord and wrap its strands several times around the strands of your climbing rope.
- Clip a locking carabiner through (both) remaining ends of the loop and the belay loop of your harness.
- Check that the wrapped strands on the hitch are neat and not crossed.
- Check that the hitch isn't so long that it can jam in your rappel device.
- Slide the hitch as high as possible, then, with your brake hand firmly on the rope, gently weight the rope to see if the hitch holds you; if not, wrap the loop an extra time and relock the carabiner.
Rappelling Down

- Double-check all knots, hitches, locking carabiners and make certain everything is secure; double-check that both rope ends have a knot and that both knots are on the ground.
- Shout "on rappel" to your belaying partner below.
- Adjust your Autoblock so that the brake hand can tend to it.
- Keeping your brake hand on the rope—where it must always remain—take in slack and weight the rope.
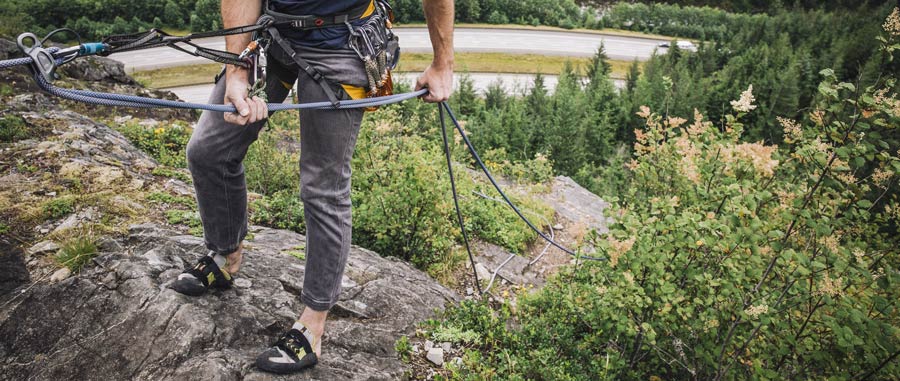
- Unclip your PAS from the anchor and clip the end of it to your belay loop; this creates redundancy in your rappel extension.
- To begin lowering, use your guide hand to feed rope through the rappel device.
- Try to keep your legs perpendicular to the wall and your torso leaning slightly in as your feet walk you backwards down the wall.
- Turn your head to watch for obstructions.
- Maintain a steady, controlled pace.
- When you reach the ground, remove the Autoblock, pull the ropes out of your device and tell your partner that you're "off rappel."
To retrieve your rope, you untie the end knots and pull one of the strands until it's freed and falls from the rappel rings.
Remember: Safety is your responsibility. No article or video can replace proper instruction and experience—this article is intended solely as supplemental information. Be sure you practice proper techniques and follow safety requirements before you climb.

