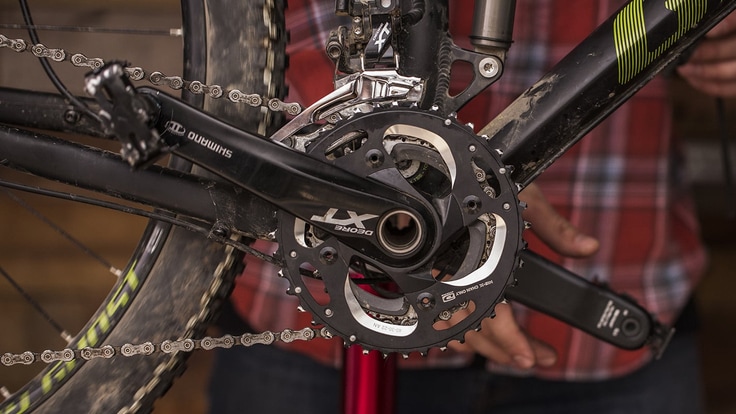
You get the picture. The bicycle is a bunch of parts working together. The crankset, which includes all of the parts between the two pedals, is the bike's transmission, so to speak. It takes the energy from your legs and puts it to use by powering the pedals, the chain and finally, the rear wheel. Crankset care, then, is about ensuring smooth power transfer.
The good news about crankset care is that little is required. Routine inspection and cleaning is all you need.
What to Inspect
Check your crankarms and chainrings to make sure they're in good physical condition. Look for cracks, dents or other signs of damage and check the crankarms for "play."
To check for play, grab either crankarm (not the pedal) and try to rock it back and forth perpendicular to your frame. Any movement may suggest that the bearings need to be adjusted, are damaged, or that the crank bolts are loose.
If there is a bend in your crankarm or pedal, you'll be able to feel this bend as you pedal. It will feel like an up-down rocking motion or a back-and-forth motion. If you notice this, take the pedal off, hold it by the bolt that attaches to the crankarm and give the pedal a spin. If the pedal doesn't spin smoothly, it's damaged and will need to be replaced. If it does spin smoothly, then it is likely your crankarm's bent and it will need to be replaced.
If any of these conditions exist, your crankset problems may be serious. Your best solution, then, is to take your bicycle into an REI bike shop for service before you ride it again. If you're a do-it-yourselfer, there are many great books on thorough bicycle repair offered on our site.
Crankset Cleaning Procedures
Inspect your crankset to make sure it's clean. Dirt and grime quickly build up and may affect your bike's performance. Since most modern crankset systems contain sealed bearings, you don't need to lube the area or regrease the bearings. Simply wash the bike after each ride. However, be sure not to spray water directly at the bearing area. Also, never use a power sprayer.
For more detailed cleaning, use a stiff brush—a toothbrush works fine—and solvent. To get into those hard-to-reach places, use a screwdriver wrapped in a clean rag or a Q-tip.
You can't hurt your bike by keeping it as dry and as clean as possible at all times.
