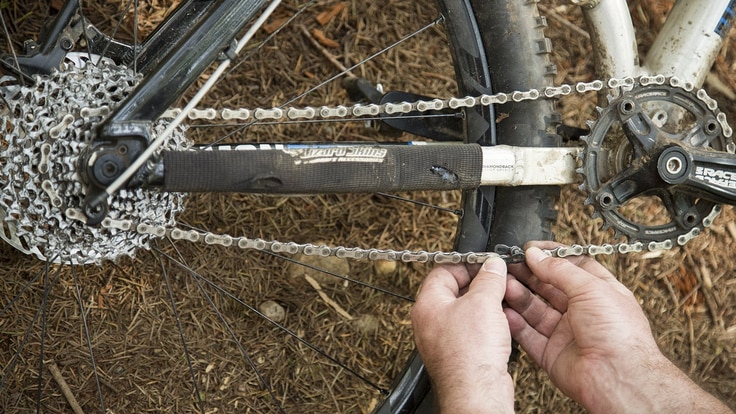
If you put a lot of miles on your bike, the parts will eventually wear out. After many miles, a bike chain will "stretch" and need to be replaced.
Technically, the chain isn't stretching, but rather the pins that join the links are wearing down, which causes the length of the chain to grow. A stretched chain expedites wear on your bike's cassette and chainrings, so it's a good idea to replace your chain when you notice significant stretch, or every 750 to 1,000 miles. It's much cheaper to replace a chain than a cassette or chainrings.
You can also use the following information when repairing or shortening an existing bike chain.
Video: How to Replace a Bike Chain
Bike Chain Parts and Tools
Chain wear tool: A typical chain wear tool hooks over one roller (or pin) in your chain while the other end inserts in the opening between two rollers. Numbers on the tool will indicate how worn your chain is and whether it's time to replace your chain.
New chain: Chains are speed-specific. So, for example, if you have a 9-speed bike, buy a 9-speed replacement chain. Higher-end chains include special coatings that delay rusting, or are made from stainless steel rather than regular steel.
Replacement Pin or Master Link: New chains will come with either a new pin, or a specialized link called a master link, to connect the two ends of the chain together. If you are repairing an existing chain, you can buy replacement pins or master links separately—they should be compatible with your chain speed and brand.
Chain tool: If you have a chain with standard links, you will need a compatible chain tool that allows you to easily remove an old pin and insert a new one when breaking and reconnecting your chain.
Master link pliers: If you have a chain that connects with a master link, you'll appreciate these pliers that simplify the process of disconnecting and reconnecting the master link.
How to Check a Bike Chain
To check your chain for excessive stretch, use a chain wear tool. Hook one end over one roller (or pin) in your chain. The other end will either come to rest on top of the chain or you will be able to insert it in the opening between two rollers. If it drops between the rollers, it means your chain is stretched and should be replaced.
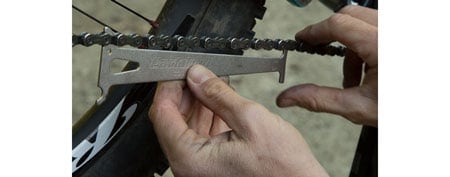
Chain wear tools have stamped-in numbers indicating how worn your chain is. A reading of 0.5 to 0.75 means you should replace your chain. A reading of 0.75 or higher means you not only need to replace your chain, but you should also check the condition of your cassette and chainrings to see if the stretched chain has caused excessive wear to these parts.
Another way to check for chain stretch is to measure the chain with a ruler or tape measure. On a new chain, 12 full links (measuring from pin to pin) will measure exactly 12 inches long. If the 12 links measure 12 1/8 inches or more, you need to replace the chain.
How to Remove a Bike Chain
To remove the chain from the bike, you need to disconnect the chain, which is also called breaking the chain. There are a couple methods to do this depending on whether your chain has a master link or not.
Before you begin, shift your chain to the smallest chainring and smallest cog. Even better, remove the chain from the front chainring or take the rear wheel off the bike. Either method will remove tension from the chain.
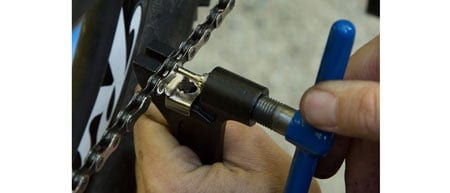
If you have a standard chain with no master link: Seat the chain in the chain tool, with the pin of the chain tool aligned with a pin in the chain. Turn the handle of the chain tool until you push the pin out far enough that you can break the chain.
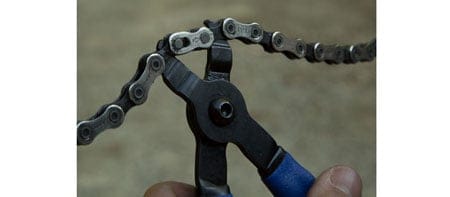
If you have a chain with a master link: To find the master link, look for a link that looks significantly different when viewed from the side. This is where you will break the chain.
The master link has a pin on one side that inserts into a notch on the other side. Use master link pliers to squeeze the master link pins toward each other, so you can then pop the link open.
Determining New Bike Chain Length
Usually a new chain out of the box will be too long for your drivetrain, so you'll need to shorten it by removing links. There are a couple methods to do this.
The best and easiest way to determine your new chain length is to lay it down next to your old chain. Then, shorten your new chain to match the old (double check by counting the links).
Another way is to run the chain through the front derailleur and drape the chain over the big chainring in front and the big cog in back. Do not pass the chain through your rear derailleur yet. Bring the two ends of the chain together and pull them tight. The correct length for the chain is the point where the chain meets, plus two full chain links (or 1 in.) of overlap (you will have an additional half link at the end where you will connect the chain).
(Note: Many full-suspension mountain bikes use a design that moves the rear axle further away from the bottom bracket as the bike cycles through its suspension; this is known as "chain growth." To accommodate for this chain growth, you will need to fully compress the rear suspension when using the above method.)
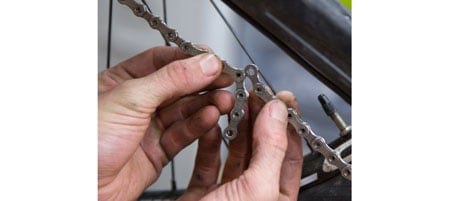
Before removing the extra links, be sure the two remaining ends of the chain will connect to each other: A chain can only be joined by connecting the outer plate of one link to the inner plate of the connecting link. Remove the extra links using a chain tool.
Installing a Bike Chain
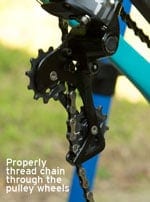
Now it's time to thread the chain through the rear derailleur and reconnect it. Pay particular attention to make sure you thread the chain properly through the pulley wheels on the rear derailleur.
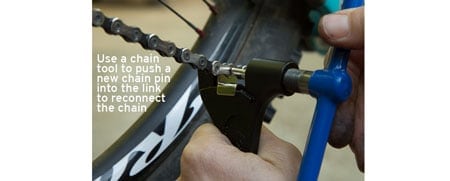
Using a chain pin: If your chain does not have a master link, use a chain tool to reconnect the chain with the chain pin included with your new chain.
If you are repairing an existing chain, always use a new chain pin rather than reusing an existing pin. Your new pin should be compatible with your chain speed and brand.
With most new chain pins, you insert them half way using a chain tool, then snap off the protruding end of the pin with pliers.
Using a master link: If you're reconnecting your chain with a master link, insert half of the master link onto each end of the chain, pull the ends together, assemble the master link and use a master link tool to snap the link into place.
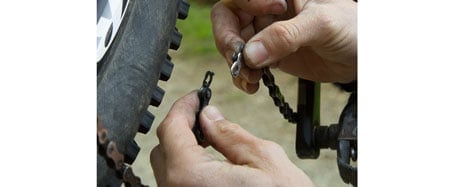
It's possible to link a master link without a tool. To do so, assemble the link and pull the sides of the chain away from each other to lock in the master link as best you can. Then release the derailleur clutch if you have one, turn your pedals so that the master link is on top of your drivetrain, and with your brakes engaged, step on one pedal hard, tensioning the chain and clicking the link into place.
Chain Maintenance
If you live near the beach where sand can get into your drivetrain or if you live in a wet environment where rain routinely flushes away your chain lube, making your chain rusty, keep a closer eye on the condition of your chain. Both can cause your chain to wear out faster. See our article, Bike Maintenance Basics, for more tips.
