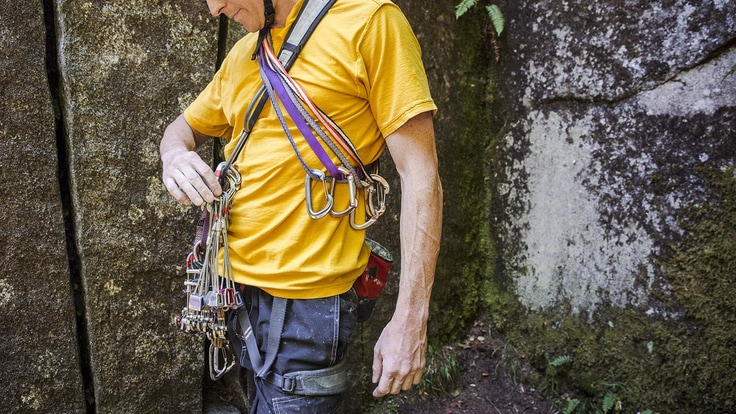
What gear to carry, where to carry it and how to rack it are key considerations as you progress in your skills as a lead trad climber. In this article, we'll discuss some best practices for assembling your "rack" — all your nuts, cams, carabiners, 'draws, etc. — on a gear sling or harness gear loops (or a combo) so you'll be able to quickly reach what you need during your climb.
How to Build a Climbing Rack
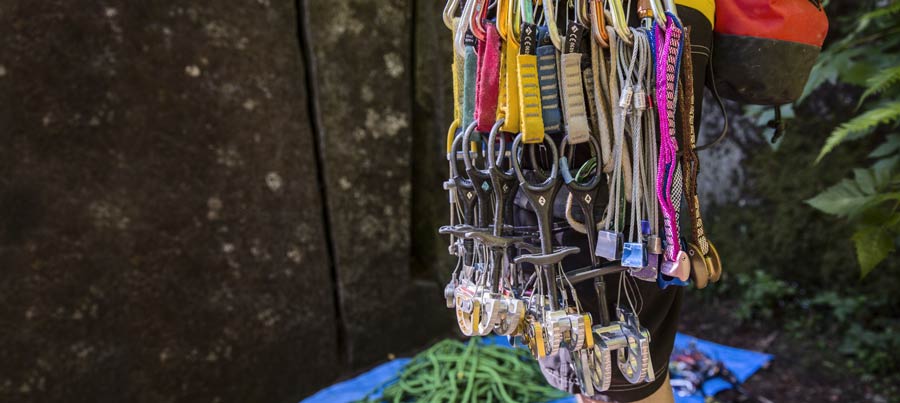
Start with the basics: If you're just starting to build a climbing rack, we recommend buying the most common sizes of nuts and cams to create a basic rack that's versatile enough to satisfy your needs most of the time. As you gain experience, you'll realize that some climbing areas and routes require very specific gear, such as really small or really large cams, and you may decide to add these sizes to your rack or even double up on nuts and cams that you place frequently.
Sharing gear: Keep in mind that it's very common to combine your gear with your climbing partner's (assuming he or she owns some) to make a rack that's appropriate for the route you're climbing. Don't feel like you alone need to own gear for every possible climbing scenario. It's a good idea to mark your gear, using colored tape, paint or fingernail polish, so you can easily sort yours from your partner's at day's end.
How to build a basic climbing rack: Here's an example of a basic rack that's suitable for most climbs at most climbing areas:
- 10 - 12 nuts: It's easiest to buy a complete set of nuts that includes about 10 - 12 pieces. (For more details, see our article on how to choose passive pro).
- 6 - 12 cams: Cams are expensive, so start with one each of the key sizes: from approximately a half-inch wide to three inches wide. A selection of cams that covers this range will satisfy most of your climbing needs. Cams smaller and larger than this aren't used as frequently, so you can add them later. As you gain experience, you may decide it's worth doubling up on certain sizes. (Remember, you can combine your gear with your partner's.) (For more details, see our article on how to choose active pro).
- 10 - 12 quickdraws or alpine 'draws: Most trad climbers use alpine 'draws, which are made using a single-length sling (60cm long) or a double-length sling (120cm long) and two carabiners. These long slings help you manage rope drag on wandering alpine routes. If the route goes up in a straight line, then sport-climbing quickdraws may be suitable. (For more information, see our articles about how to choose slings, cord and webbing, and how to choose quickdraws.)
The exact number you carry depends on how long the route is and how many pieces of gear you anticipate placing. If the route is short, you may only place a few pieces and therefore will only need a few 'draws. If the route is really long and/or you know that you like to place gear frequently, you may need to carry more than 12 'draws. - 20 - 30 non-locking carabiners: You're going to need a lot of carabiners to rack all that gear you're carrying. Most climbers choose small- to medium-size wiregate carabiners. The exact number depends on how many nuts, cams and quickdraws you have and how you choose to organize them. (For more details, see Carabiners: How to Choose.)
- 4 locking carabiners: You need locking carabiners to build belay anchors.
- Cordelette: You'll want an 18 - 20 ft. section of seven- to eight-millimeter Perlon accessory cord for building anchors. If you're doing a multipitch climb, you'll need two cordelettes.
- Nut tool (chock pick): A nut tool is essential for freeing cams and nuts that get stuck in cracks.
How to Rack Climbing Gear
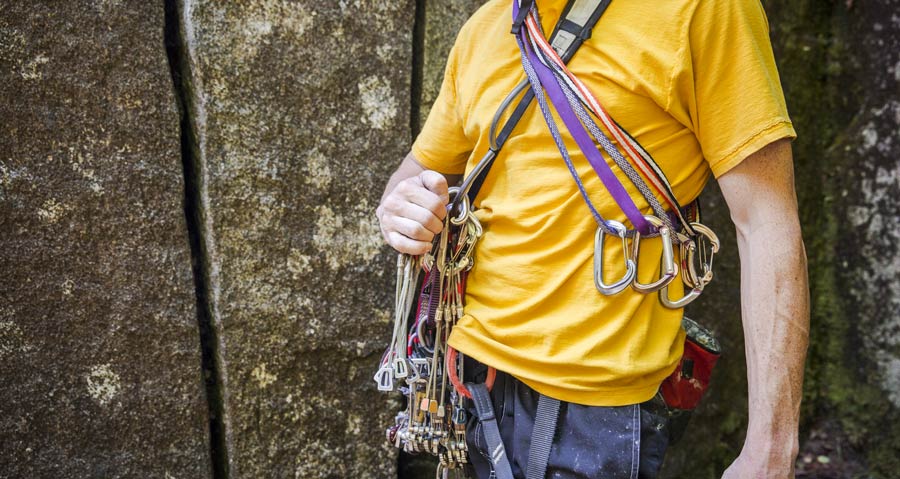
You have a few basic options for where to stow your climbing gear: on a gear sling or on your harness gear loops —or you can use a combination of the two.
Racking on a Gear Sling
You can make a gear sling by simply taking a 60cm sewn sling, putting it over one shoulder and under the opposite arm and clipping all your gear to it. But, a padded, adjustable gear sling designed specifically to carry lots of gear will be much more comfortable.
Advantages:
- Provides lots of space for racking gear.
- Slings with partitions keep gear organized and divided by type.
- Makes swapping gear between partners easy—you simply hand over the entire rack with the gear sling.
Disadvantages:
- The gear can get in the way while climbing.
- Creates a top-heavy weight distribution.
- The weight of the rack can shift dramatically while you're climbing.
Racking on Harness Gear Loops
Most climbing harnesses have four or more gear loops on them.
Advantages:
- Distributes the weight of the rack around your waist rather than your torso (as it does using a gear sling).
- The individual gear loops keep gear organized and divided by type (this is also possible with a gear sling with partitions).
Disadvantages:
- Swapping gear at the top of a pitch takes longer than it does with a gear sling because you have to unclip each piece and hand it to your partner who must then clip each piece to his or her gear loops.
- Low-hanging gear and quickdraws can interfere with footwork.
- Provides less space than a gear sling.
Racking on a Combo of Gear Sling, Gear Loops
A best-of-both-worlds scenario, using a gear sling and the gear loops on your harness is very common. You'll often see lead climbers with cams, nuts and other pieces of protection clipped to the gear sling, while things like quickdraws, slings, spare carabiners and a belay device are clipped to the harness.
Advantages:
- Extremely versatile
- Lots of storage space
- Slings with partitions and individual gear loops keep gear organized and divided by type.
How to Rack Climbing Gear
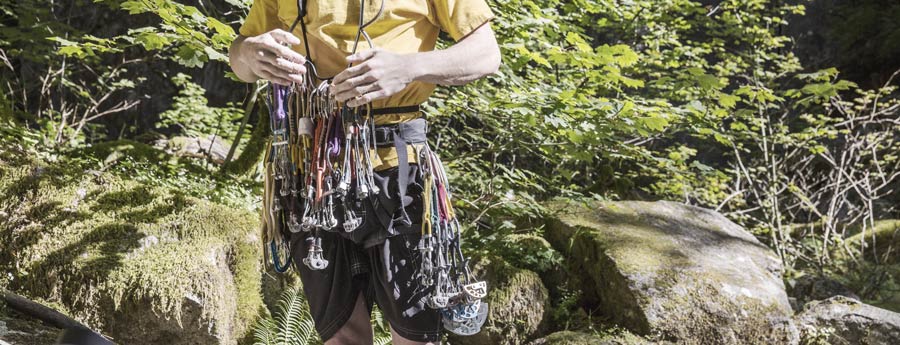
Whatever method you choose for racking gear (on a gear sling, on your harness or a combination of the two), you need to develop a system for organizing your gear. If you're climbing a multipitch route, be sure you and your climbing partner agree on the system and that it works for both of you.
Here are some common ways to organize and rack your gear:
Start small: Most climbers will rack the smallest gear toward the front of the gear sling or harness and work back with larger pieces. Start with your set of nuts clipped to either one or two carabiners and stow them on either the front of your gear sling or one of your front harness gear loops. Next clip your cams in order of size, smallest in front.
Be consistent in which way the gates of your carabiners are facing—all the gates should face either in or out, not both. Work this out with your climbing partner before heading up to be sure you're on the same page.
Group your nuts: Instead of racking each nut on its own carabiner, group them all together on a single carabiner or split them into two groups by size and clip each group to its own carabiner. By splitting the nuts into two groups you make it a bit easier to find the size you're after, but you add the weight of another carabiner.
Clip your cams: Most climbers will clip a carabiner to each cam, then clip the carabiner to the gear sling or gear loop. If you have two cams of the same size you can still clip a carabiner to each one and rack them individually. Or, you can clip the carabiner on one cam to the carabiner on the other one and then clip one of the carabiners to your gear sling or gear loop. This keeps similarly sized cams together for better organization.
To reduce weight and keep your rack more compact, you can clip two cams to one carabiner. However, this can add a bit of fussing around because you'll keep the cams together while you place one then you'll unclip the unused cam and return it to your rack.
Organize your quickdraws: If you're carrying sport-climbing quickdraws, simply clip them to your harness gear loops and get climbing. If you're using alpine quickdraws with double-length slings or longer, you'll want to turn them into what most climbers call "extendable quickdraws."
How to make an extendable quickdraw:
- Take a double-length sling or longer and clip two carabiners to it.
- Grab one carabiner and pass it through the other one but don't pull the sling all the way through. This creates a loop in the sling.
- With the same carabiner still in your hand, clip the loop in the sling.
- Pull on both carabiners in opposite directions.
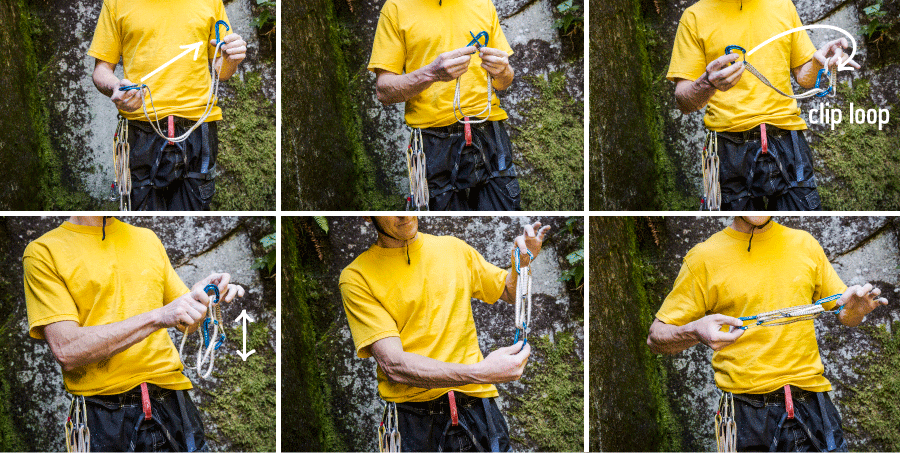
The quickdraw is now compact and ready to be stowed. Most climbers keep quickdraws clipped to harness gear loops. When you need to use an extendable sling, unclip it from your harness and clip it to a nut or cam that you've placed. Take the other carabiner and unclip two of the three loops of the sling. When you pull down on the carabiner, the sling will extend to its full length.
Shoulder some slings: Another option for stowing double-length slings is to leave them at their full length and clip one carabiner to each sling. Throw the sling over one shoulder and under the opposite arm so that they run diagonally across your torso. If you're climbing with a gear sling, be sure these slings are on top of the gear sling and that they hang under the opposite arm of the gear sling.
This technique reduces the number of carabiners you carry, thereby reducing weight. However, it can feel a bit more cluttered when you have a rack of gear and a bunch of slings hanging around your neck. To minimize the clutter, many climbers will carry a few slings around their neck and put the rest on their harness.
Since these slings only have one carabiner on them, you'll need to use them in conjunction with a piece of protection that has a carabiner on it (such as a cam that you've racked with a carabiner).
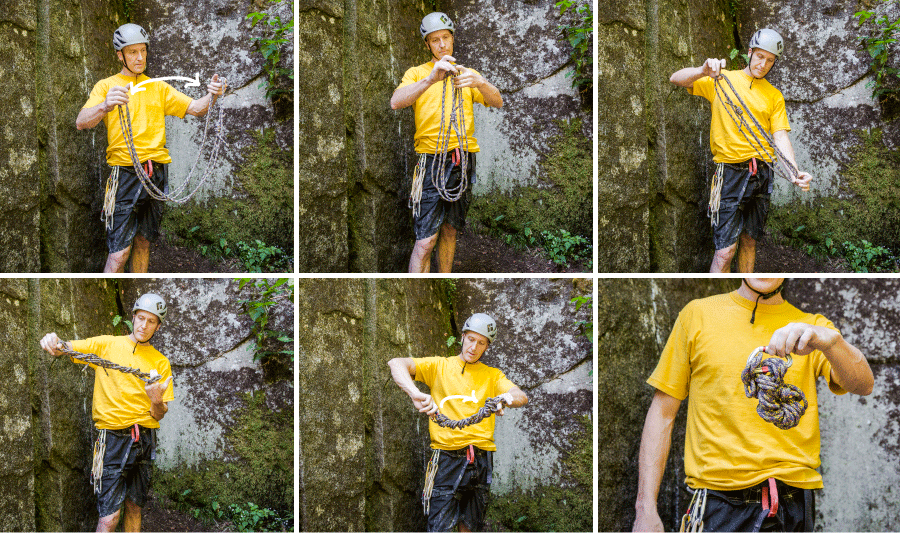
Twist your cordelette: Stowing a cordelette or other long loop of cord or webbing can be awkward. A clever way to handle this is to fold it in half, then in half again. While holding each end with your hands, start twisting the cordelette. With enough twists, the cord will wrap around itself, forming a compact bundle. Clip a large locking carabiner through the two loops you are holding and attach the carabiner to your harness.
Tether your nut tool: To prevent the loss of your nut tool, buy an inexpensive key chain with a plastic coil and clip. (These are available at most hardware and drug stores.) Attach the pick to the ring and clip the other end to your harness with a carabiner. When you need to use the pick, stretch out the plastic cord, keeping the other end attached to your harness.
Find what works: As you climb more, you'll develop a system that works for you. You might find you prefer certain gear on your right-front harness gear loop or that you like having your quickdraws on your gear sling. All that matters is that it works for you (and your climbing partner if you're on a multi-pitch route.)
Always remember: Your safety is your responsibility. No article or video can replace proper instruction and experience. Make sure you practice proper techniques and safety requirements before you climb.
