Whether you purchase a DSLR, a mirrorless model or an advanced point-and-shoot camera, you're making a serious investment in your outdoor photography. And once you have your camera, you'll want to know all the way-cool things your new toy can do and how to make it do those things.
The companion piece for this article is your camera manual. The settings discussed here are common to most cameras, but your model may use different terminology. Use your manual to learn what the settings are called and the exact steps needed to adjust them.
In this article, we'll briefly cover the following topics to help you understand how your camera works:
Exposure settings: The camera has three ways to control exposure, and, depending on your exposure mode, you might have to set (or at least check) one, two, or all of three of them:
ISO: The light sensitivity you set for your camera.
Aperture: How wide or narrow you make the lens opening.
Shutter speed: The speed you set for the shutter to open and close.
- Exposure modes: You'll probably start with auto mode so your camera will set everything for you. When you're ready to take the training wheels off, you can experiment with exposure modes, such as aperture priority or shutter priority, that give you increasingly more creative control—all the way up to manual mode.
Metering modes: Your camera reads light via different methods; in certain conditions, changing to a different metering mode yields a better exposure.
Exposure compensation feature: Allows you to override settings and bump exposure up or down to fine tune the brightness (or darkness) of the final image.
Image formats: You'll need to choose how your camera stores the digital information it captures. RAW captures the most data and gives you the greatest ability to edit your photos later. JPG uses less storage space, but sacrifices a little of the final quality.
White balance: Some types of light can give photos an unnatural tint; adjusting white balance gives you control over how cool, warm or true the colors look.
Focus control: Your camera's ability to focus automatically is a valuable tool, but you'll still want to be able to control what subject it focuses on.
Lenses and filters: Switching to a different lens (such as a telephoto or macro lens) can let you capture distant wildlife or take extreme close-ups; adding a filter can do things like cut glare and help protect the front of your lens.
A hands-on photography course is also an excellent way to get tips on how to use your new camera. You can find both in-store and in-the-field classes at many REI stores:
Sign Up for an Outdoor Photography Class
How to Use Your Camera's Exposure Modes and Settings
All exposure modes involve the three key exposure settings: ISO, aperture and shutter speed. When you choose a mode, you're telling the camera which exposure elements you want to control manually versus what you want the camera to do for you.
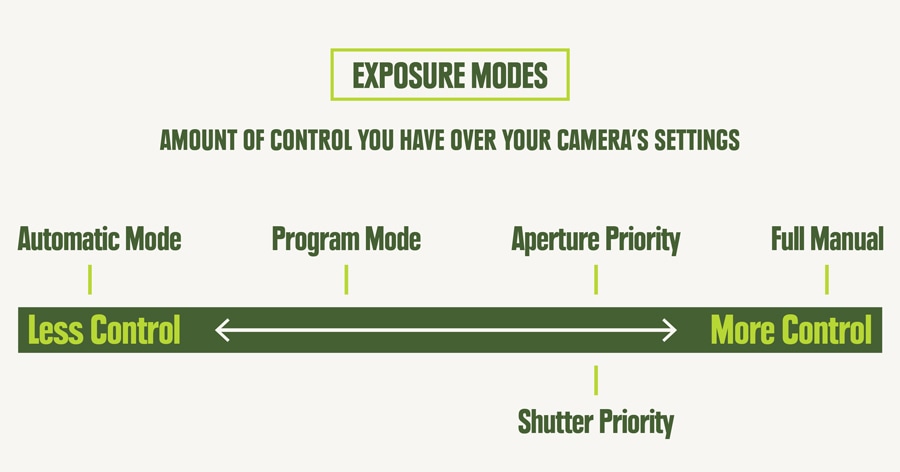
Basic exposure modes include the following:
Automatic mode (AE): Use this mode when you want the camera to provide the exposure setting for you and you're not using a specific scene mode. If you're a novice photographer, you might start here while you explore the creative aspects of composition without having to worry about exposure settings.
Program mode (P): This is a "semi-automatic" mode, where you set ISO and exposure compensation. The camera then picks both aperture and shutter speed for you. It also allows you to cycle through a series of aperture/shutter-speed combos and to pick the combo you prefer.
Aperture priority mode (A or Av): Use aperture priority mode when you want to control how much of the image is in focus, aka the "depth of field." You choose the aperture (f-stop) you want, as well as the ISO, and your camera sets the shutter speed to ensure you get a correct exposure.
Shutter priority mode (S or Tv): Use shutter priority when you want creative control over how motion is displayed in your photo. You choose the shutter speed for the effect you want, as well as the ISO, and your camera sets the aperture to ensure you get a correct exposure.
Manual mode (M): Use this mode when you want to determine all exposure settings. You might want to experiment with the modes above first before you move to taking over full control.
Other exposure settings to consider include:
Scene modes: Use scene modes when you want to capture a certain type of pre-defined photo, like landscapes, sunsets or night shots, but you want the camera to set the exposures for you. Each scene mode on your camera is a fully automatic setting optimized for that specific type of shot.
Auto ISO setting: Your camera may or may not have this option. The Auto ISO feature is really helpful when you use aperture or shutter priority exposure modes. You can put your camera on this setting and let it pick ISO for any mode where you would otherwise be required to set it. Auto ISO selects the best quality ISO number to use for each situation. You might also have the option to do additional settings like an ISO maximum or a shutter-speed minimum.
How to Use Metering Modes on Your Camera
The camera monitors light coming off your subject to determine proper exposure. When the exposure settings on your camera would render a black-and-white version of your image as a middle gray tone, the meter indicates that the light exposure is correct. It indicates this as a "0" setting on the exposure scale.
To get better exposures, you can set the way the camera meters the light. Here are three of the most common metering modes:

Evaluative (also called matrix) mode: This mode divides the frame into zones and evaluates the light coming from each one. Then it averages the readings from all of those zones to determine the correct exposure needed. This is typically the default setting and it works well most of the time.

Center mode: The camera meters only the center area of the frame. Use this mode if you have a subject that is much brighter or darker than the background lighting.

Spot mode: This is very similar to center mode, but the area metered is much smaller. You use it when your subject is much brighter or darker than the background lighting, but the main subject is relatively small within the frame.
How to Use Exposure Compensation on Your Camera
Even with sophisticated light metering and automated exposure settings, your camera might capture an image that's darker or lighter than you prefer. Exposure compensation lets you bump the exposure up or down a little:
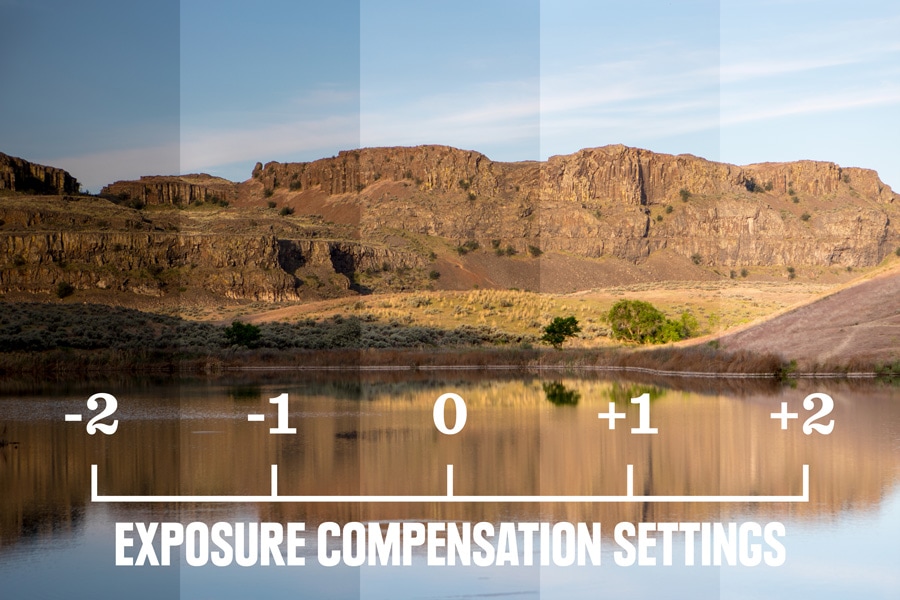
If the subject looks too dark after you take a shot, then adjust the exposure compensation by +1 or +2 stops. Conversely, you can adjust the setting down by -1 or -2 stops if the subject in your initial shot is brighter than you want. For more information about how these stop numbers relate to ISO, aperture and shutter speed, read Understanding Exposure in Photography.
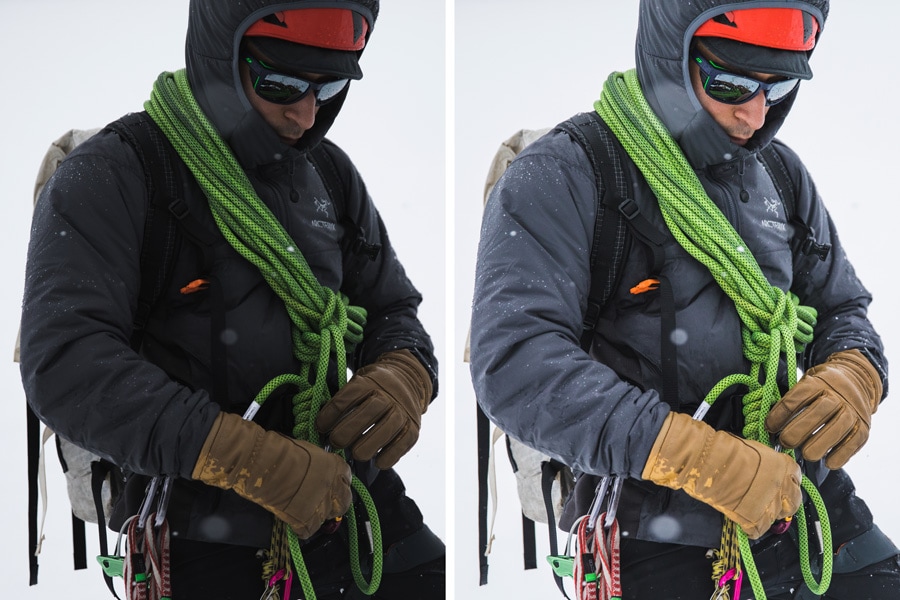
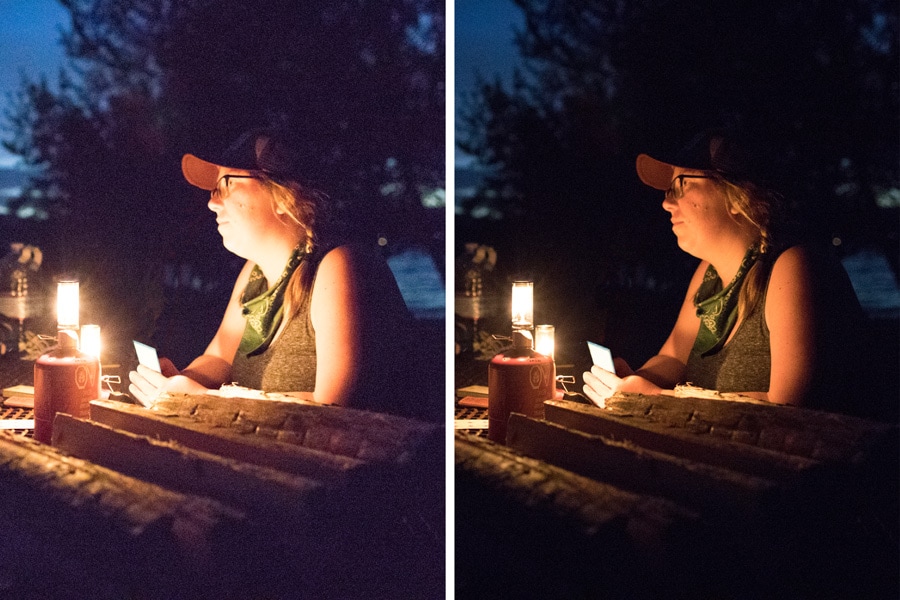
Which Image Format Should You Use? RAW vs. JPG
Most cameras let you choose between two primary image capturing formats: RAW and JPG. Here are the pros and cons of each and why you would use one vs. the other.
When to choose RAW: Shoot using the RAW format when you want to have the maximum ability to adjust your photos in the editing process later.
When to choose JPG: Shoot using JPG when you want to save storage space and simplify sharing and printing.
RAW + JPG mode: Not available in all cameras, it uses the most memory of all. The benefit is that it gives you the option to share images immediately, and then a full range of editing options later.
RAW vs. JPG Format
| Image Format | Pros | Cons |
|---|---|---|
| RAW |
|
|
| JPG |
|
|
How to Adjust White Balance on Your Camera
Even if the exposure level is correct, the colors in your image might sometimes appear "cooler" or "warmer" than you want.
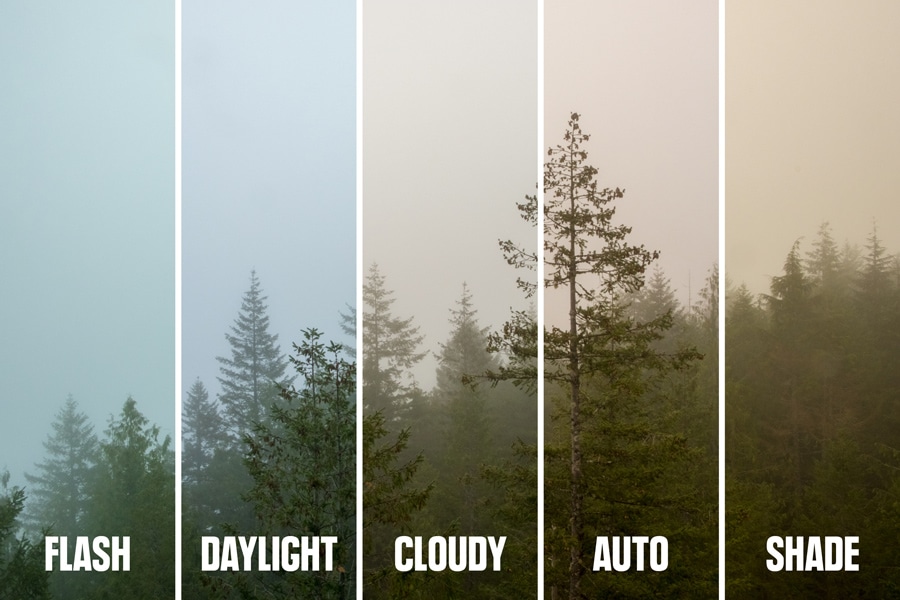
White balance is how your camera adjusts for this. Most of the time, leaving it on the auto setting works fine. If not, try switching it to one of its preset modes, with names like "daylight," "cloudy," "shade," "fluorescent" or "tungsten." You choose the mode that matches the light source for your subject and the camera compensates by shifting the overall coloring in the final image.
If you shoot in JPG, getting white balance correct in the field is important because you have limited ability to affect it later during editing. Shooting in RAW, though, gives you the option of doing a full range of white balance corrections later.
How to Control the Focus on Your Camera
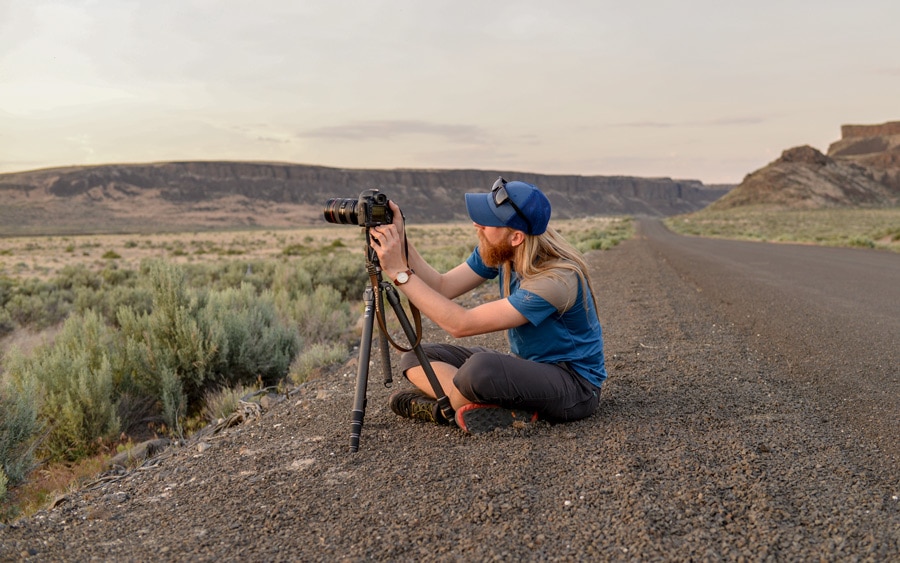
You have two basic choices for how you want to control focus with your camera:
Single focus mode (sometimes called single servo) is when the focus locks on a single point when you press the shutter halfway down. It's an ideal choice for stationary subjects.
Continuous focus mode (sometimes called continuous servo) is when the camera will continue to focus if the shutter is pressed halfway down. Use this when you're capturing moving subjects.
How to focus your images: A lot of cameras have default focus modes. A common one is to have multiple focus points. By selecting a single focus point instead—the center point—you can exert greater control over the sharpest point in the image.
With your camera in single mode and set to focus on the center point, you simply place your subject in the center of the frame, then press the shutter halfway down to lock in the focus. As long as you keep the shutter pressed halfway, you're now free to move the camera around to frame up the precise shot you want. The subject will remain in focus even if you compose the shot with the subject somewhere else (not centered) within the frame.
Focusing tips
Use your LCD screen to check the sharpness of your focus. Review your image after you shoot it and zoom in on areas where you want the focus to be super sharp. If the zoomed-in area seems out of focus, take another shot.
Consider using image stabilization: Turn image stabilization "on" to help eliminate blurs from any unsteadiness you might have during your shots, particularly in low light or slow shutter-speed situations.
Use a sturdy tripod when you're unable to hold the camera still enough to unwanted avoid blur. Night shots are a classic example of when you might use a tripod for steadiness. Turn off image stabilization, then use your camera's self timer with at least a two-second shutter delay so you won't risk blurring the image with your hand movement. (If you have one, you could also use a cable release.) Also, if you're doing a tripod shot in low light and the auto focus isn't sharp, put the focus mode in manual and fine tune it yourself. Zooming in with the LCD viewfinder can sometimes make this easier.
The rule of thumb for the lowest handheld shutter speed is to look at your lens focal length and use a tripod for speeds lower than that number. If you have a 50mm (a common setting for fixed-length lenses), use a tripod for speeds slower than 1/50th of a second. If your lens is in the telephoto realm, say 250mm, you'll want a tripod for anything slower than 1/250th of a second.
If you have a moving subject, switch to continuous focus mode and shoot several shots in a row. You'll increase the odds that one image will have the exact focus you want. Many cameras also offer a burst shooting mode that works great for this.
Types of Camera Lenses and Filters
Both DSLR and mirrorless cameras give you the option of buying additional lenses and swapping those out with your original one.
Lenses come in a variety of sizes (stated in millimeters). Lens sizes are actually stating the measurement of an internal optical component called "focal length." Even though lens sizes don't tell you the exact exterior length of the lens, you can trust that lenses get progressively longer as focal lengths increase.
Here are some common lens options:
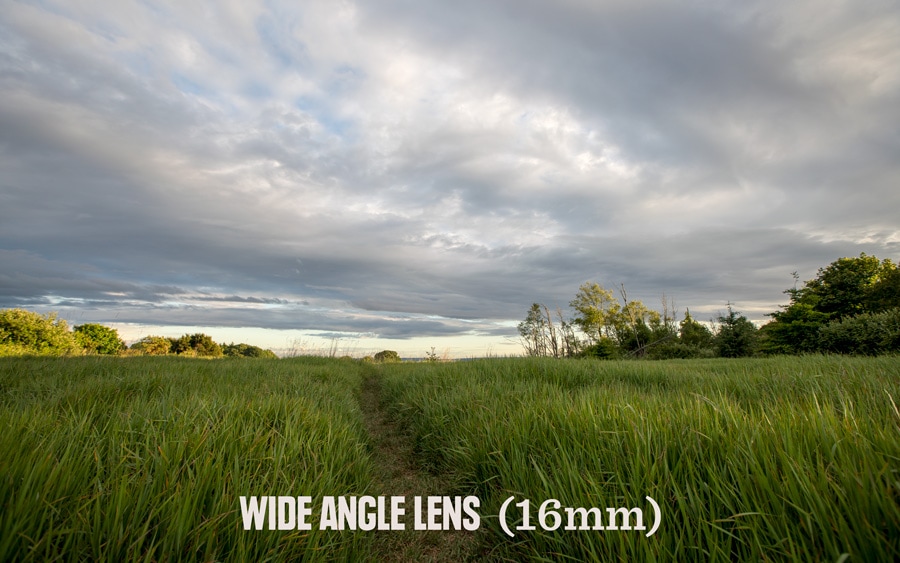
Wide angle lens (less than 30mm): Its field of view is wider than your vision, so you can create expansively dramatic landscape shots. It can also create interesting, though slightly distorted, close-up images.
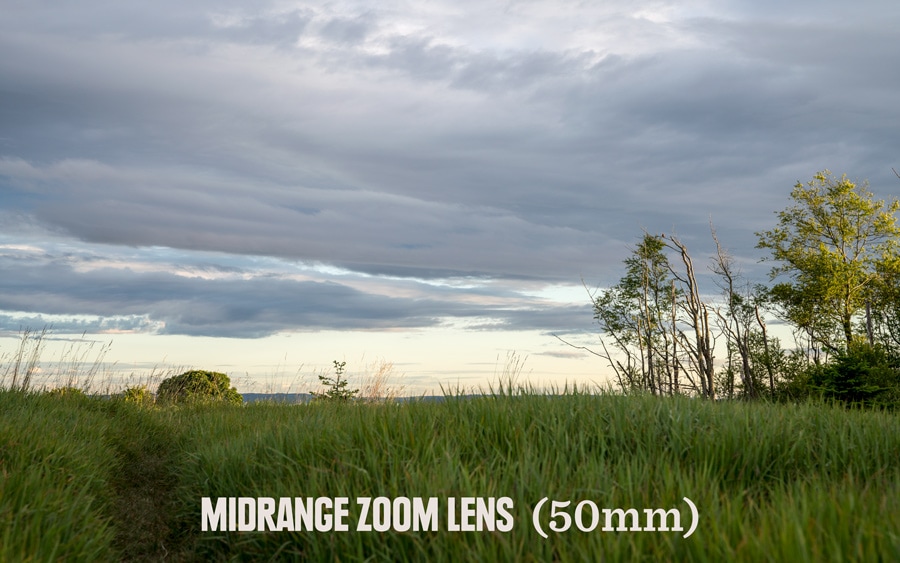
Midrange zoom lens (less than 30mm to more than 135mm): Stated as a range, like 28-75mm, it bridges the gap from a modest wide-angle to a modest telephoto image. This gives you a range of capabilities within a single lens.
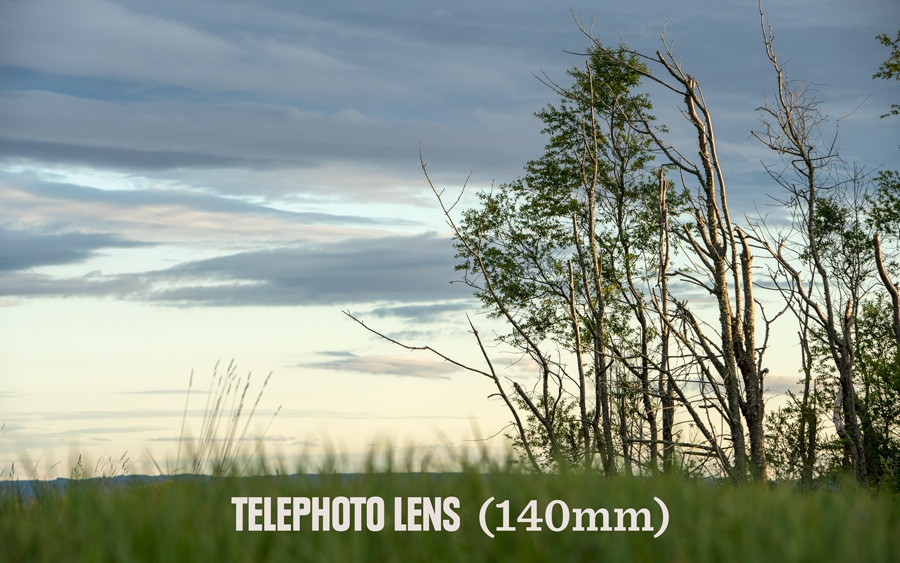
Telephoto lens (70mm or more): It lets you zoom in close optically, magnifying the image of a far-away subject. It's ideal for wildlife shots, where approaching too close can be stressful for animals and/or dangerous for you. Long telephoto lenses can be 300mm or more.
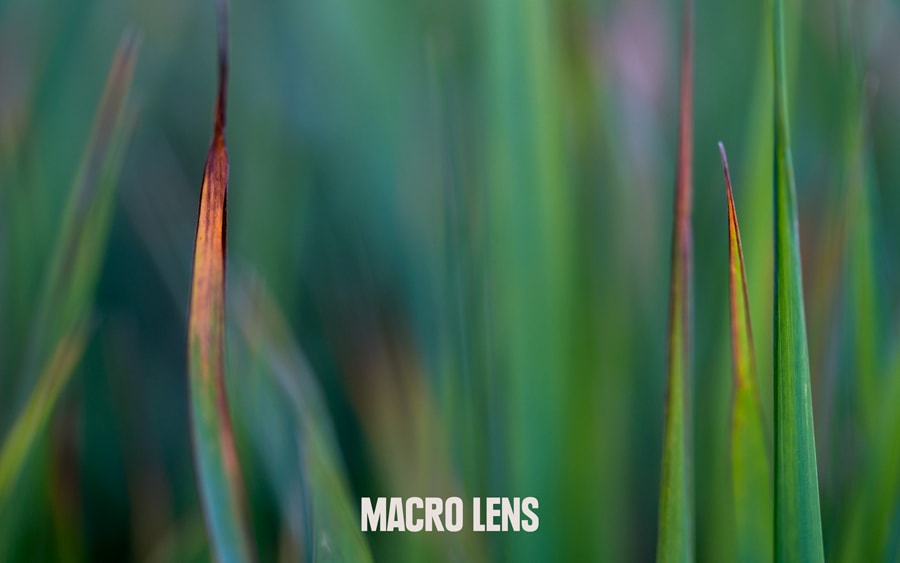
Macro lens (focal lengths vary): This type of lens also magnifies images, but is used primarily for close-up shots. Every lens has a minimum focus distance—move closer than that and it's impossible to get a sharp focus. Because they offer super-close minimum focus distances, macro lenses allow you to both magnify the details of your subject and capture shots of it from just a few inches away.
You can also add a variety of filters (and some point-and-shoots also allow the use of filters, too):
Polarizing filter: You can buy a wide range of filters to create many different photographic effects, but the polarizing filter is a good first choice. Add it on to any lens and, much like a pair of polarized sunglasses, it cuts glare and reflections. It also cuts haze, while making skies darker and more intensely blue.
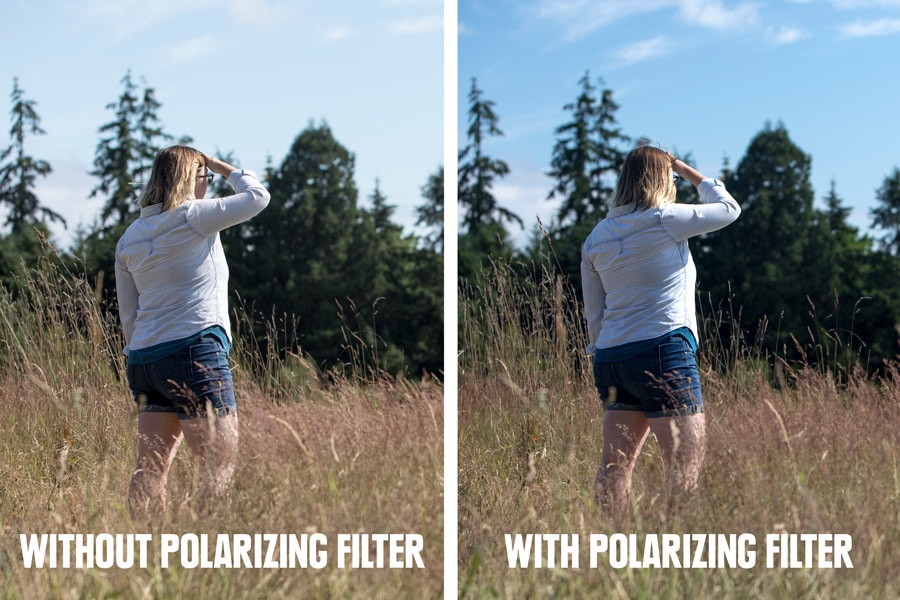
UV/haze filter: Many people buy this as a protective add-on. The outdoors has dust, rocks and generally gnarly terrain, which can all do some damage to your expensive lens. Better to crack or scratch the affordable UV filter on the front of that lens instead. As a bonus, these filters also cut through haze. You can buy them in a number of haze-cutting strengths, but a clear one is all you need for protection.
