On past road trips, I had a simple approach to meal planning: I'd stop at the gas station for snacks and buy dinner fixings at a grocery store somewhere near the car-camping destination. It didn't require much planning. I'd buy pre-packaged, salty, fatty, sugary treats (insert your favorite junk foods here) for daytime travel and something reasonably healthy for dinner. But this travel diet left me feeling thirsty from too much salt, puffy with inflammation, crashing from the sugar and battling indigestion. Not to mention, I felt depleted of energy for the rock climbing, hiking, paddle boarding and other activities that put me on the road in the first place.
I've learned over the years that some light menu planning will up the road-snack stoke meter. Homemade travel snacks can pack loads more nutrition because you're in charge of the ingredients. This rewards you with increased energy levels and better body function. Plus, it's convenient to be a self-contained road tripper who doesn't need to pull off the highway to buy often mediocre, unhealthy food. That said, while eating foods that make the body feel good is the goal, I'm a big fan of the 80/20 rule: 80% of the time I eat healthy foods, and the other 20% I enjoy that slice of pizza or chocolate bar. A road trip is a time to enjoy yourself.
Ready to whip up your own road snacks? This article will take you through selecting food, planning a menu and packing food for your next adventure, whether it's a day trek or a multi-night trip.
Tips for Selecting Food
When planning what food to bring, a key factor I consider is shelf life: How long will the food hold up in the cooler when it comes to flavor, texture and freshness? For dry goods, I'll consider items that won't degrade in the heat while they sit in my van for the duration of the trip and are exposed to fluctuating temperatures. Stretching my dollars is another deciding factor. Making food from scratch can be a cheaper way to road trip. From there, you can select items based on your preferences including dietary needs. After all, it's a lot easier to modify your meals to be dairy-free, gluten-free or vegan if you source the ingredients yourself. Here are some ideas to get you started.
Non-Refrigerated Food
Foods that don't require any refrigeration will get you through long days on the road.
Some non-refrigerated items that I pack:
| Granola | Nuts | Nut Butter | Electrolytes | Crackers |
| Dark Chocolate | Potatoes | Avocado | Tea | Couscous |
| Melons | Brown Rice | Apples | Spices | Homemade Energy Bars |
| Coffee | Free-dried fruit | Cooking Oil | Supplements | Vinegar |
For an overview of what I bring, watch my video: Everything in a Pro Chef's CAMP KITCHEN! | Cook Out with Chef Maria Hines
Refrigerated Food
Coolers are exceptional for keeping ready-to-eat, minimally processed snacks and meals cold and fresh.
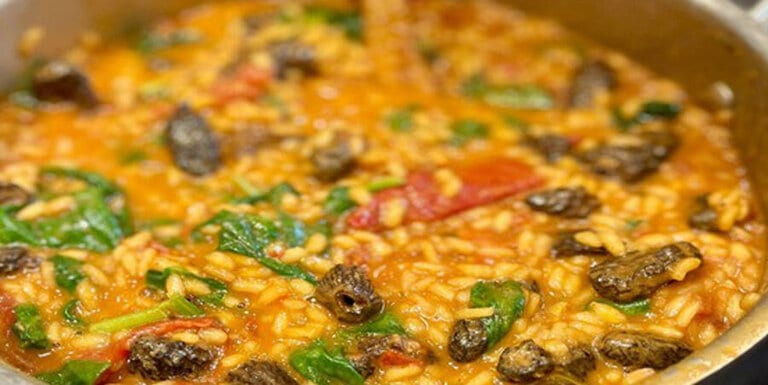
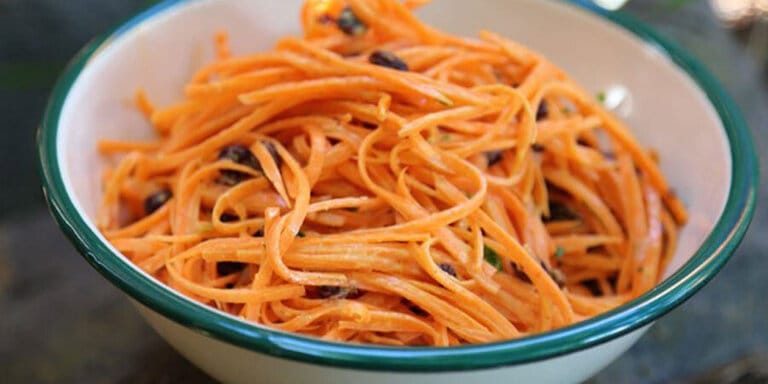
My favorite foods to prepare for a trip are homemade hearty salads that last a few days (cauliflower salad, carrot salad, marinated kale salad and cucumber salad are all good options). Smoothies, roasted chicken, smoked salmon, pre-made risotto and hard-boiled marinated eggs are also favorites.
Store-bought items you'll find in my cooler are yogurt, cheeses, vegetables that last a few days (broccoli, red peppers, carrots, etc.), eggs, fruit, tortillas and charcuterie.

Tips for Menu Planning
When prepping meals for a trip, consider how many days you'll be on the road, your vehicle's cargo space, the perishability of your food and what equipment you'll need to prep your meals.
Taking those factors into consideration, you can plan your menu. Planning a menu is an opportunity to create nutritious meals that you crave and will help boost your immune system while traveling. They should give you a feeling of vitality and create memorable food experiences. When traveling, stick with familiar foods that you know your body tolerates. There's nothing more uncomfortable than being on the road with an upset belly or worse: bad bowels, especially if you're participating in a rigorous physical event.
Consider filling your menu with items that serve well as leftovers, or choose ingredients that can be used to make multiple meals. Aim for a 3- to 5-day shelf life for items that live in the cooler. To give you an idea of what your day's eats could include, I've written a sample menu below. All of these foods will keep for at least three to five days.
Sample Menu
Breakfast: Yogurt, fruit and granola.
Snack: A pre-prepared protein smoothie. It'll last up to four days in the cooler. I like to put mine in a mason jar. Give it a shake if it separates.
Lunch: A hearty salad, nuts, cheese and a small piece of dark chocolate.
Pre-dinner snack: Cured meats and grapes.
Dinner: A pre-made cold or hot dinner option, or ingredients to make dinner at camp. Some of my pre-made dinner favorites are risotto, creamy polenta, stews and roasted chicken.
Pro tip: Remember to plan your menu with convenience in mind. On big travel or activity days, cooking can feel like a chore. Make sure you consider how much effort your meals require-and make it easy when you can. For instance, you can pack breakfast items that are simple to eat while driving, like boiled eggs or premade chilled frittata bites. Sandwiches, tortilla wraps or lettuce wraps are convenient handheld lunches.
Cold camp dinners like roasted chicken with a mustard-mayo sauce, hearty salad and a tortilla are great when you don't want to cook. When you can take your time, you can bust out the camp kitchen and have some fun with it.
Ultimately, setting yourself up for success is key. Pack tasty and familiar foods that are convenient for outdoor play, road snacking and epic camp dinners.
How To Pack Your Food
If you're packing refrigerated items, then a cooler is mighty handy. A bear-resistant version is a bonus. Keep in mind there may be local bear protocols when storing your food. Often there will be a designated bear box at your campsite. In areas where bears have become conditioned to humans feeding them, campers are required to take the added step of removing non-food items like chapstick from their car.
If you're only traveling with dry foods, a cardboard box or bin with a lid will work to store your items. Keep your bin in a cooler part of the car, so the sun doesn't break the food down faster (or melt your chocolate!). I also like to keep a box of compostable silverware, napkins, beeswax paper, resealable silicone bags and silicone containers with lids. I use these to store any leftovers or to pack a quick snack for a day hike or treats to enjoy during the car ride. If I use plastics, I'll do my best to use recycled materials, so I can reduce the damage to the planet.
For cooking, I bring a two-burner camp stove. For brewing coffee and making tea, I pack a smaller backpacking stove. (You can see an overview of my personal car camp-kitchen here.)
Lastly, I like to have biodegradable dish soap, wash cloths, hand sanitizer and trash bags on hand to keep camp and myself clean. Sanitation helps cut down on food-borne illnesses and lingering odors, and it deters wildlife from entering your camp (depending on your destination, be aware of whether you need to filter your water before using it to clean your dishes). It's also nice to keep some of your compostable silverware, napkins and hand sanitizer readily available (for instance, in your glove box) for on-the-go snacking.
Road-Trip Housekeeping
I've learned a few things during my time on the road. Keep these in mind to ensure a successful trip
- Follow Leave No Trace principles. If you pack it in, pack it out.
- Be bear aware. If you're traveling in bear country, pay attention to rules about storing food.
- Learn if there's a burn ban where you're camping.
- Put fires out completely before leaving camp or going to sleep. Use water, dirt or sand to help put fires out completely.
- Consider bringing a fire extinguisher to put out any camp-kitchen or camp-area fires.
- Keep cold foods under 40° F and hot foods above 140° F to prevent the formation of bacteria that can cause borne-illness. You can leave food out of refrigeration for up to 2 hours if the temperature outside isn't above 90 degrees.
- Keep toilet paper in the car in case you come across a portable bathroom at a trailhead or camp area without any.
- Lastly, have as much fun as possible on the road. Be safe, and enjoy the adventure!
As a parting gift, here's a recipe for you to enjoy on your next road adventure.
Carrot + Currant Salad Recipe
Yield: 4 servings
Recipe Type: Vegetarian, Gluten-Free, Keto, Paleo

Ingredients
- 5 carrots, peeled
- 3/4 cup dried currants
- 1/2 cup mayonnaise
- 1/4 cup apple cider vinegar
- 2 tablespoons chopped fresh parsley
- 1/2 teaspoon ground cumin
- 1/8 teaspoon cayenne pepper
- Sea salt, to taste
- Freshly ground black pepper, to taste
Directions
Step 1
Cut the carrots in half. Using a mandolin on its thinnest setting, slice the carrots lengthwise into 1/8-inch-thick strips.
Step 2
Add the carrots to a medium bowl and toss with the currants, mayonnaise, vinegar, parsley, cumin and cayenne.
Step 3
Cover and let marinate in the refrigerator for at least 15 minutes. Season with salt and pepper to taste before serving.
