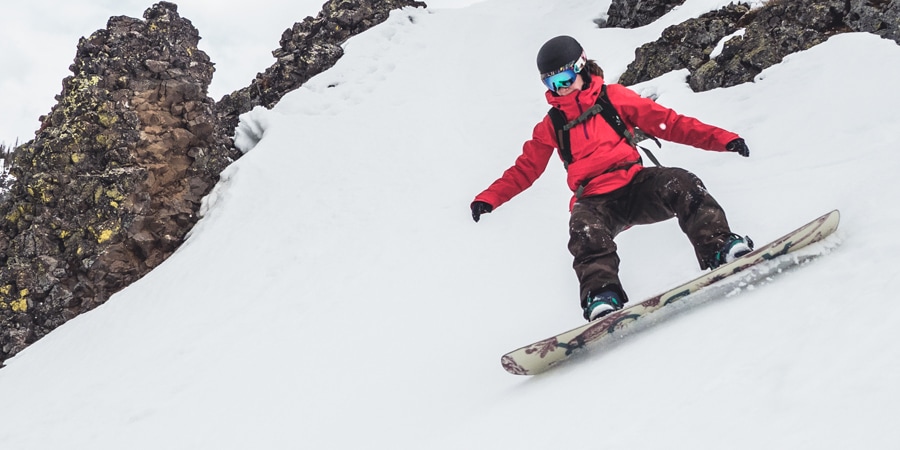
Skidding turns by pivoting your board works just fine, except that you're dumping speed all the time. If you like the idea of carrying more speed through your turns, it's time to learn to carve.
Carving also lets you stay out longer, because all that legwork on skidded turns eventually turns calf and thigh muscles into jelly. Finessing your board is easier than wrestling it. And you'll fear no crud because the board will slice through bad patches, not pinball off of them.
Upgrade or Tune Up?
Any board can carve, so there's no need to splurge on a bunch of new gear solely to advance your turning skills. But skill progression and gear progression go hand in hand, so now is a good time to at least consider the possibility. If you're sticking with the gear you've got, check it over and take it to the shop if it needs some work.
Upgrading your boots: Though boards get all the attention, your first consideration is having boots that fit you well. Consider stiffer boots because they're more responsive, which is helpful for learning more advanced moves. If you're still using your first pair of boots, they might be too soft for you to carve effectively.
For more details, see our Snowboard Boots: How to Choose article.
Upgrading Your Board: Consider these attributes:
- Board width: You don't want to drag your toes or your heels when you tilt the board on edge. For boot sizes up to a men's 10.5/women's 11.5, a standard-width board is okay; for bigger boots, look at wide boards.
- Edge grip: Different brands enhance grip differently—having a serrated edge, for example. If you see a buzzword that hints at added grip—and each brand seems to have its own word—that board should help you carve better.
- Sidecut radius: This spec is the radius of a circle formed by the sidecut arc on the board; a smaller value will let you turn more sharply.
- Flex and camber: You can carve with a stiffer board, but a softer flex and reverse camber will let you carve tighter turns.
- Mixing and matching: Responsiveness is determined by your softest component, so having the same level of flex in your boots, board and bindings will give your board a consistent feel when you ride it.
- All-mountain boards: Generally, this type of board has a good combination of the above felatures for carving.
For more details, see our Snowboards: How to Choose article.
Tune Your Snowboard: Sharp, ding-free edges help you carve better. So if you have a favorite board, check the base and edges for wear and tear. You can smooth out minor stuff at home. Be aware, though, that sharpness also can also cause you to catch an edge, so you also want to "de-tune" areas, like the nose and tail, that you don't want to hook up. This is particularly true for park riders.
You can also bring your board to an REI shop for bigger repairs and serious edge work. Ask them to fine-tune the base and adjust your bindings while they're at it. For more details see our Ski and Snowboard Base Repair article.
Where to Practice Carving
Your progression from learner to burner will go faster if you do some recon on potential practice slopes.
Find an empty run: Megaresorts have their place, but smaller, out-of-the way operations will be less crowded. And midweek days will be better anywhere. You'll spend less time focusing on traffic and more time on technique.
Find a wide run: Even though carving is faster than skidding, your board will be doing wider turns. So you need a wide run to practice. Your snowboard's sidecut radius dictates how tightly you turn, so you'll need an even wider run if you have a long sidecut radius.
Find a blue run: Go beyond the greens: You want enough slope to give your board some momentum and tilt. It's analogous to riding a bike: Carving is easier when you get a little speed. Practice on a blue slope. On a black-rated run you'll carry so much speed that the edge tends to skid, rather than grip and carve.
Find a groomed run: You want a slope that's neither too icy nor too soft. If the snow is too icy, your board has trouble digging in enough to hold an edge. If the snow is too soft, your board digs in easily but again, the snow won't hold an edge.
Corn snow works pretty well, but fresh groomers are even better because the edge of your board has a uniform surface to engage. You can also go back and marvel at the slope whenever you lay down a superfine S-track.
Video: How to Carve on a Snowboard
How to Carve on a Snowboard
Focus on a couple of things when you are carving: board tilt and flexing and extending your knees and ankles.
Initiation
- Tilt the board: On the heelside edge, this means flexing to bring toes toward your shins and bending your knees like you're sitting down in a chair; this causes your toeside edge to lift and your heelside edge to dig in.
- On the toeside edge, this means extending toes away from your shins and straightening your knees slightly; this causes your heelside edge to lift and your toeside edge to dig in.
Control
- Hold the edge and let the board pass through the slope's fall line: The sidecut of the board is doing the turning for you.
- Keep your board on autopilot by holding your upper body still and in line with the board.
- Square your shoulder with the nose of the board.
- Keep your head up and back straight.
Finish
- Hold the edge and prepare to ease up: The board will slow as the turn crosses the slope.
- Lighten your board by relaxing your flexion or extension; then initiate the next turn by tilting the board onto the opposite edge.
Tips
- Stay small on your heels and tall on your toes: This is an easy way to remember the key body movements for each edge of the board.
- Take wide turns: Wider turns allow you to feel your edge; they also allow you to regulate your speed.
- Listen to your board and watch for flying snow: A quiet board and minimal spray mean you're becoming a master carver.
- Take a lesson: An instructor can quickly identify and fix technique flaws.

