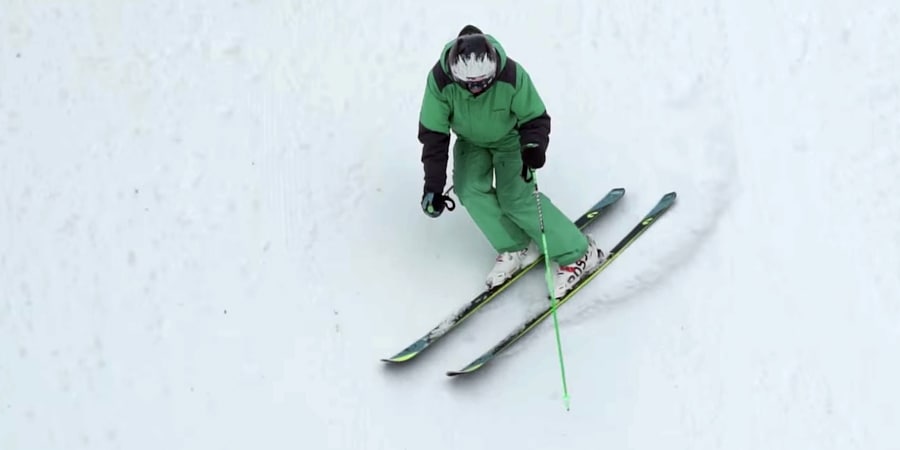
If you're feeling good about your ability to skid turns on the slopes, then you're ready to learn how to carve. Dancing down a slope on the edges of your skis isn't just for show: you'll be able to go faster while staying in control.
You'll also be able to stay out longer, because repeatedly tensing leg muscles to absorb skids exacts a toll. Carving requires muscle control, rather than brute force.
Ski Gear for Carving Turns
Before you begin carving practice, re-examine your setup. Are your skills better than your starter gear responds to now? As your skills progress, so do your equipment needs.
Consider new skis: Look at sidecut radius on new skis. "Sidecut" is the arced shape along the side of your ski. The radius of a circle formed by that arc is the ski's sidecut radius.

Skis with a smaller sidecut radius let you turn more sharply. As long as you have some sidecut, though, you'll be able do carved turns.
You don't need to buy new skis just to learn how to carve. If you're considering new skis anyway, though, all-mountain skis offer a nice sidecut radius for carving. They also have enough camber to allow you to flex the skis and hold the edges.
For more details, see our Downhill Skis: How to Choose article.
Tune your old skis: Sharp edges help you carve better. So if you already have a sweet set of skis, take a close look to see if the bases or edges need attention. You can smooth out minor scratches and edge burrs at home. You can also bring your skis to an REI shop for bigger repairs and serious edge work.
For more details see our How to Tune Skis article.
Check your boots: Stiffer, tighter-fitting boots are more responsive, which is key to more advanced techniques like carving. If you're still using your first pair of boots, they might be too soft or fit too loosely for you to carve effectively.
For more details see our Downhill Ski Boots: How to Choose article.
Where to Practice Carving
Expert skiers can carve seemingly anywhere, but you'll want to be more selective. Finding the right slope will smooth out your learning curve.
Find a wide run: Carving involves following your skis' sidecut radius. If you try to turn more sharply than that (over-initiating) you'll skid and end up in a wrestling match with your skis. So you want to find a wide run to practice carving turns. If you have a long sidecut radius, you'll need an especially wide run.
Find a blue run: A less steep (green) slope requires you to expend less effort to carve turns on it, but you need enough incline to give your skis some initial momentum and tilt. So you'll have to go beyond the bunny hill. Carving is best practiced on blue slope. On a black-rated run you'll carry so much speed that edges tend to skid, rather than grip and carve.
Find a groomed run: You want a slope that's neither too icy nor too soft. If the snow is too icy, your skis have trouble digging in enough to hold an edge. If the snow is too soft, your skis dig in easily but again, the snow won't hold an edge. Corn snow works pretty well, but fresh groomers are even better because the edges of your skis have a uniform surface to engage. You can also go back and look at the slope to see whether you made random squiggles or beautiful S-shaped tracks.
How to Carve Turns on Skis
Before beginning your turn, you want your skis parallel and hip-width apart. Throughout the entire process, it's important to keep your weight forward.
Video: How to Carve Ski Turns
Initiation
- Roll knees and ankles: First, focus on the ski that will become the outside ski of the turn. Roll (lean) your knees and ankles toward the big toe of that ski. Your knees and ankles should be bent, applying pressure against your shins.
- As you roll toward your big toe, you'll also begin weighting the inside edge of that ski into the snow.
Shaping
- Drive your outside knee toward the toe piece of the ski binding: This movement will flex the ski and set its edge firmly into the snow.
- As you exert greater force, your ski flexes more and creates a better turning edge. Less force results in less flex and less momentum through the turn.
- You can exert greater force by leaning hips, knees and shoulders into your turn.
Finish
- Roll knees and ankles upright: Your ski's carving edge will lift out of the snow. Then you can shift weight to your new outside ski for the next turn.
- Transfer between skis happens as you put pressure on the outside ski to flex it and engage its sidecut; your inside ski should maintain contact to act as a stabilizer.
- Transitioning from turn to turn takes timing and practice. Skiers who do it smoothly will have a graceful rhythm as they carve their way down the slope.
Tips
- Keep your arms forward: That helps keep your weight forward.
- Keep your upper body still and your lower body loose.
- As you tip your knees and ankles, use your ankles to control how much you tip the skis.
- Adjust technique to snow conditions: In firm or icy snow, you shift more weight to the outside ski; in soft snow, this weight shift is less prominent.
- Take a lesson: An instructor can quickly identify and fix technique flaws.
Remember: Safety is your responsibility. No internet article or video can replace proper instruction and experience—this article is intended solely as supplemental information. Be sure you're practiced in proper techniques and safety requirements before you engage in any outdoors activity.

