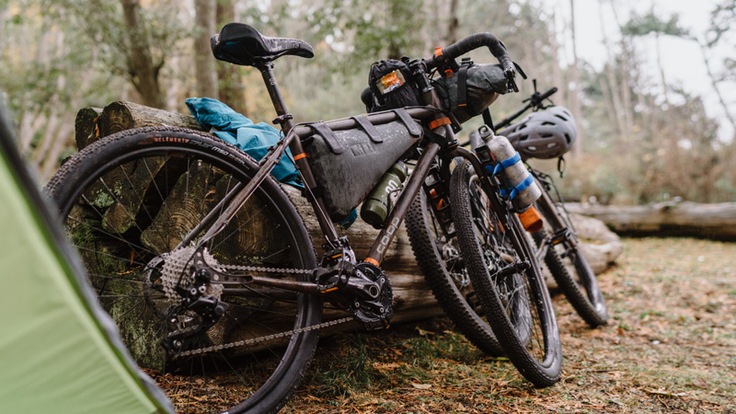
Bikepacking is a fun and adventurous way to explore the outdoors. With everything you need for one or more nights packed securely on your bike, you can travel fast to reach destinations that would be days away by foot.
Packing your bike for bikepacking requires you to think strategically about where things go and be smart about distributing weight. A loaded bike will never handle as well as one that has nothing extra on it, but when you pack well, you'll find you can successfully navigate off-road terrain and have fun doing so.
Video: How to Pack for Bikepacking
How to Pack for Bikepacking
- Put lightweight, bulky items in your seat pack and handlebar pack: Overloading these packs can negatively impact the handling of your bike. Many bikepackers put things like clothes, a sleeping bag, sleeping pad and tent in their seat pack and handlebar pack.
- Put heavy items in your frame pack: Packing your stove, fuel, bike tubes, extra food and other heavy items in your frame pack keeps your bike's center of gravity low to help maintain your bike's handling.
- Keep frequently used items within reach: Things like snacks, water, maps and a cell phone are best kept in stem bags, top tube bags or cages where you can get to them easily.
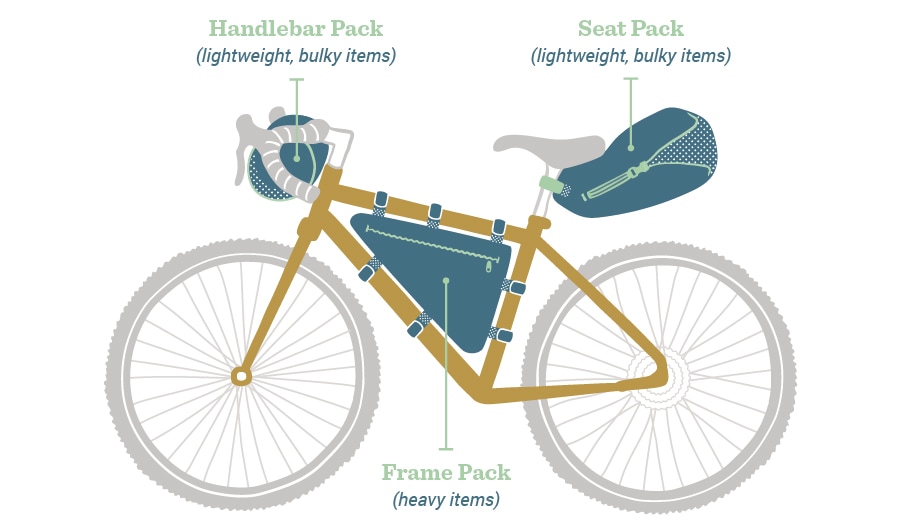
Keep in mind there's no one right way to pack your bike. You can follow the packing principles laid out in this article to get you started, but as you gain experience and get ideas from other bikepackers, you'll likely develop a system that works just for you. Also, when packing, make sure that your cargo weight combined with your body weight does not exceed your bike's weight capacity (many bike manufacturers publish weight capacities in user manuals and/or on their websites).
What to Pack in Your Seat Pack
The most important thing when packing a seat pack is to be careful not to overload it with heavy items. Doing so will throw off the weight distribution of your bike and make riding more difficult.
How to Pack a Seat Pack
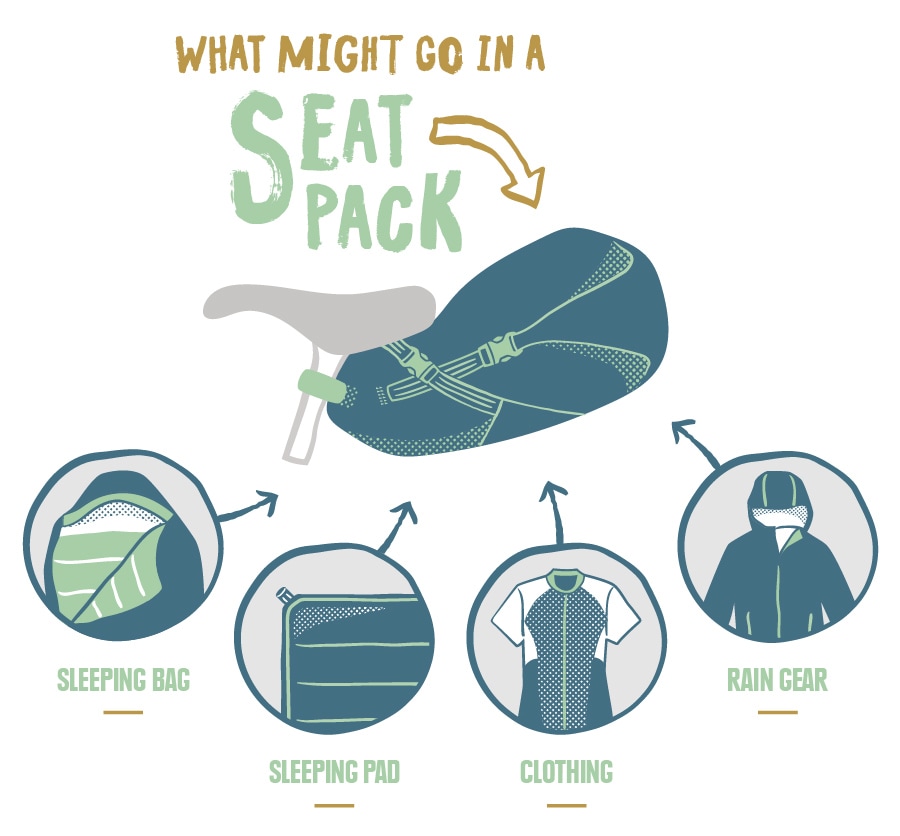
- Put only lightweight items in: Most experienced bikepackers put bulky, lightweight items in their seat packs, such as clothes, rain gear, a sleeping bag and a folded sleeping pad. Go ahead and stuff these items straight into the pack without using stuff sacks (this saves weight and is the easiest way to fill every square inch of the bag). If your seat pack is not waterproof, make sure items like your sleeping bag and clothes are packed in a waterproof stuff sack before putting them in the seat pack.
- Place heaviest items closest to the seat post: This can help limit the amount of side-to-side sway that can sometimes occur with a seat pack.
Keep in mind that access to your seat pack is not terribly difficult, but it's also not super quick and easy, so you don't put anything back there that you'll need frequently throughout a day of riding.
What to Pack in Your Handlebar Pack
As with the seat pack, you need to be aware of how much weight you put in your handlebar pack. Putting too much weight on your handlebar can drastically affect handling and steering. As a general rule try to fill your handlebar pack so it ends up weighing about the same as your seat pack. This will help keep your bike balanced.
How to Pack a Handlebar Pack
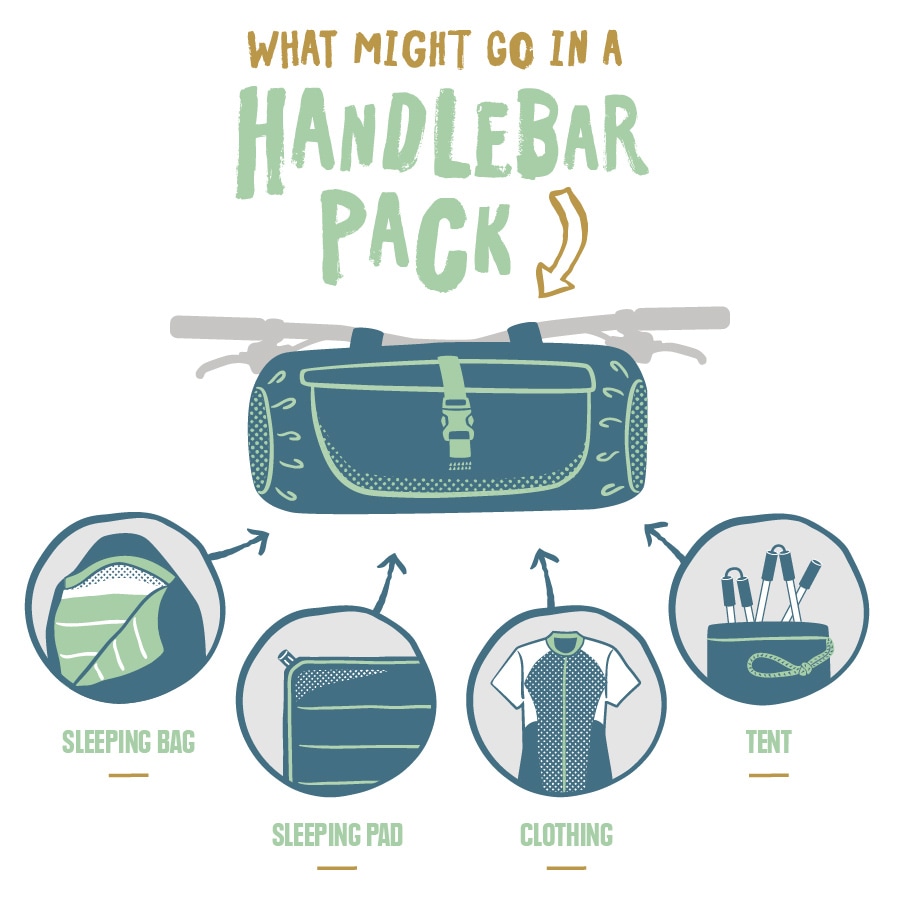
- Use it for lightweight, cylindrical items: Your handlebar pack is a great place to stow items like a tent or a dry bag filled with clothes. You could also put your sleeping bag and folded sleeping pad in there. Like with the seat pack, most bikepackers will forgo individual stuff sacks and cram these items directly into the handlebar pack to save weight and make use of all available space. If your handlebar pack is not waterproof, protect important items like your sleeping bag and clothes with waterproof stuff sacks.
- Keep frequently used items accessible: Items buried deep in your handlebar pack can be tough to get to, so think about the order in which you pack. If you want to keep your rain gear there but have it handy, put it in last. Some handlebar packs have an outer zippered pouch for stowing a couple small items for easy access, like gloves and a hat.
What to Pack in Your Frame Pack
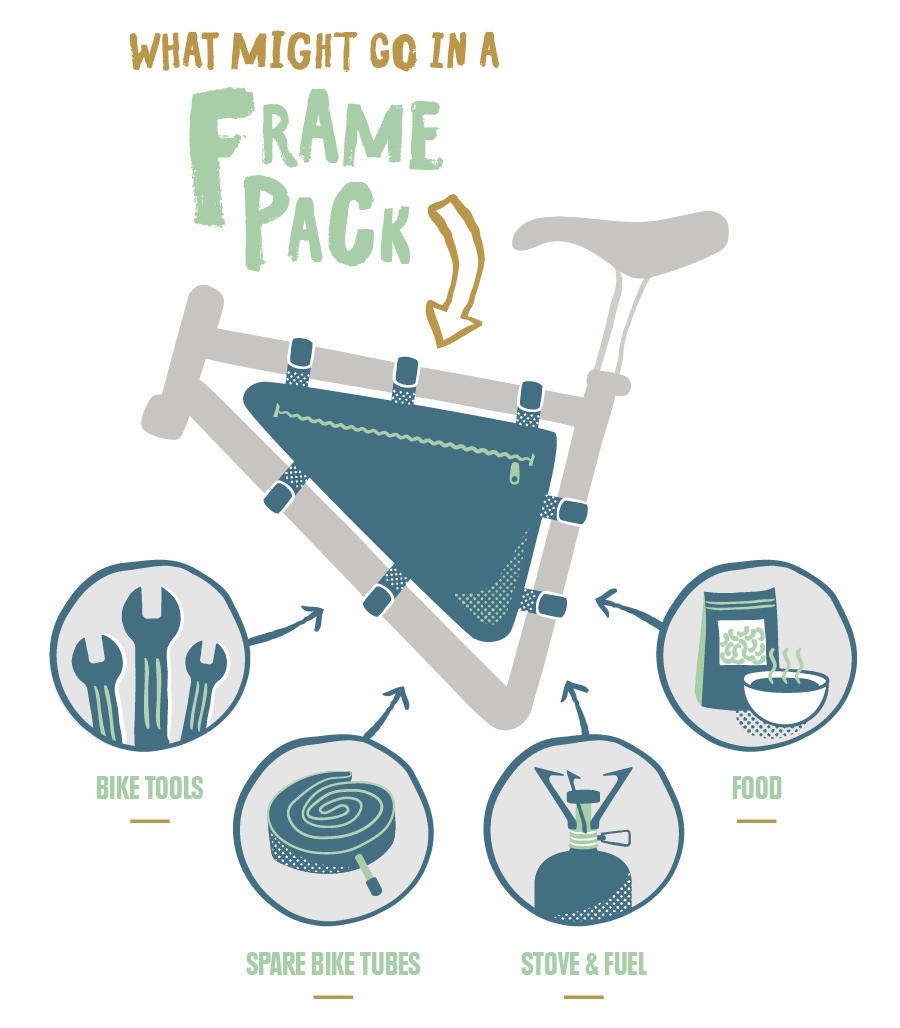
A frame pack fits inside the triangle of your bike that's created by the top tube, seat tube and down tube. Most bikepackers try to get as much weight as they can into their frame pack; doing so keeps the bike's center of gravity low, which helps maintain good stability while riding.
How to Pack a Frame Pack
- Use it for seldom-used gear: Getting to an item buried at the bottom of a frame pack can be a pain, so it's best to only stow stuff that's rarely needed while riding. Some frame packs do have an outer zippered pocket or two for keeping a couple small items handy.
- Put your heaviest items in low: Put things like big bike tools, spare tubes, a camp stove, fuel and food that you won't eat until arriving at camp at the bottom of your frame pack. Some riders like to place a hydration reservoir in there and run the tube up to their handlebar so they can sip easily while pedaling.
Other Storage Bags
Bikepacking bag makers offer many creative ways for storing gear beyond the standard options above. There are bags, pouches and cages that attach to just about any little nook on your bike. If you're struggling to pack a particular item or just need a little more storage space, search around for what's out there and you just might find the exact thing to solve all your storage troubles.
Common Additional Storage Options for Bikepacking
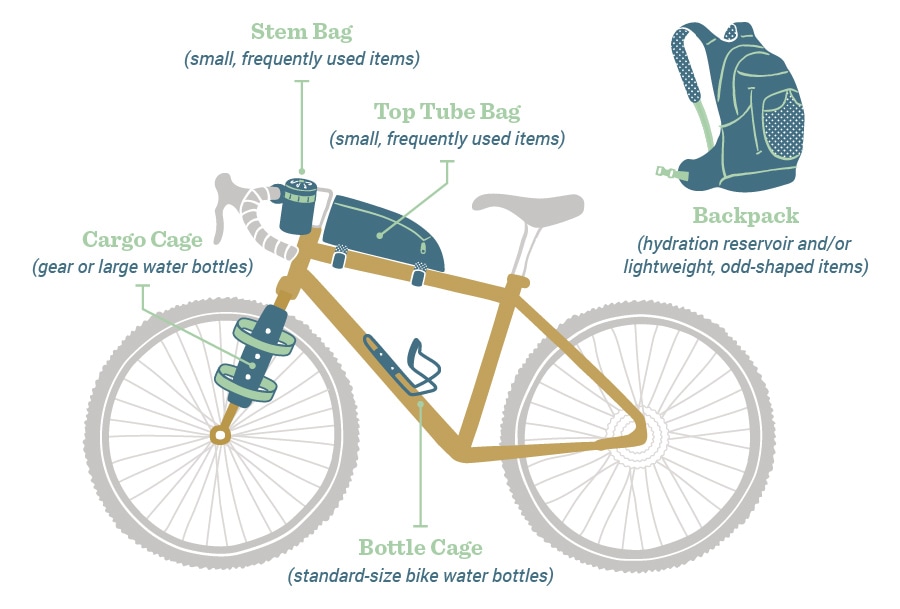
- Stem bags: These small pouches attach behind your handlebar, usually to the handlebar and/or stem with a couple hook-and-loop strips. Most bikepackers use one or more stem bags to keep small, frequently used items nearby. Things like snacks, water, a map, a phone or sunglasses are good items to stash in there. Some riders choose to keep their camera and extra lenses here.
- Top tube bags: Usually a tad bigger than stem bags, top tube bags attach to the top of your top tube, behind your head tube. There are also top tube bags that attach just in front of your seat post. Top tube bags are often the easiest bags to get in and out of while you're riding, so they're great for holding small items that you use frequently, like energy bars, sunscreen, lip balm and a phone. You might also keep a small multi-tool in here for quick repairs.
- Bottle cages: Standard bottle cages are key for carrying water while bikepacking. They attach to threaded fittings (a.k.a. braze-ons) on the seat tube and/or down tube on most bikes, giving you a place to put standard-size bike bottles. Some bikes designed specifically for bikepacking have braze-ons on the fork and/or underside of the down tube as well. These are nice to have if you plan on using a frame pack, which will likely interfere with standard bottle-cage braze-ons. If your bike doesn't have braze-ons on the fork or underside of the down tube, you can secure a cage with hose clamps from a hardware store.
- Cargo cages: These look a lot like bottle cages, but are designed to carry gear or larger water bottles instead of standard bike bottles. They are often meant to go on your bike's fork, but some can go on the down tube and/or seat tube. You'll want to check how the cage attaches and make sure it will work with your bike. Some cargo cages require a 3-hole mounting pattern, which you can find on some forks designed for bikepacking.
- Backpacks: Many bikepackers try to not wear a backpack because it can be cumbersome and tiring to have weight on your back while riding. But, for longer trips that require more food and gear, it can be unavoidable. If you do ride with a pack, try to keep it as light as possible. Some riders will only carry water in a pack with a hydration reservoir, making sipping while riding simple. If you stow other gear in there, try to put any lightweight, odd-shaped items that don't fit well in other places. As a general rule, use a lightweight hiking or biking pack that is 20-liters or smaller; anything bigger will likely be uncomfortable.
Additional Packing Tips
Give it a test run: Before you head out on a big multiday adventure, load up your bikepacking bags and head out for a ride. Ideally, you can test things out on terrain that's similar to what you will actually ride, but even if you just bike across town, doing so will give you a chance to get used to how your loaded bike feels. You can then make adjustments before you head out on a big trip.
Don't overpack: It's very common for new bikepackers to bring too much stuff. We can tell you this, but sometimes the only way to figure it out is to make this mistake for yourself. Every trip is a little different, so packing can always be a bit of a puzzle, but with some experience you'll be better able to identify what you do and don't need. To help get you started, take a look at our bikepacking checklist.
Trim weight: Similar to ultralight backpackers, bikepackers frequently look for ways to cut weight and save space. To get some ideas for how to do this, see our Ultralight Backpacking Basics article.
