Rolling away on two wheels with everything you need for a multiday journey attached to your bike can be very liberating. But some bike tourers might say otherwise, describing it as uncomfortable, heavy and unsteady. While it's true that a bike loaded with gear will feel different than one that's not, with a little guidance you'll be able to pack your things so they remain accessible during the ride without greatly impacting the stability and performance of your bike.
First, Know the Type of Tour You're Doing
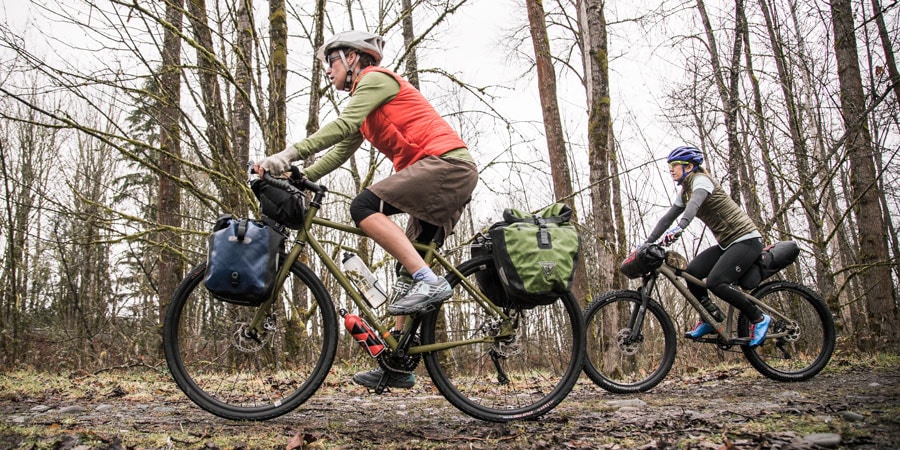
Before you grab your gear and start packing your bags, take a moment to think about the type of trip you're about to set out on. The style of the tour you're taking will affect how much gear you need to bring and, therefore, how you pack. Here are several common types of bike touring:
- Self-supported touring: With this style of bike touring, you'll primarily camp and cook your own meals, so you'll need standard backpacking equipment like a tent, sleeping bag, sleeping pad, stove, fuel and cookware in addition to clothing, toiletries and food. To fit all this gear, it's common for bike tourers to use four panniers (two in the back and two up front) or a trailer, with or without panniers.
- Credit-card touring: So-called credit-card touring involves buying meals rather than making them and spending nights in hotels, motels, or bed and breakfasts rather than camping. This style of bike touring requires you to only pack along clothing, toiletries, snacks and a few extras, all of which will likely fit in two rear or front panniers.
- Vehicle-supported touring: Some people enjoy touring with the support of a friend who drives a vehicle loaded with overnight gear and extra food and clothing. This style of touring allows you to carry only what you need for a day of riding, which means you'll be able to fit everything in one or two front or rear panniers or even smaller options, like a handlebar bag, saddlebag and/or rack trunk.
- Organized tours: These are organized and run by commercial outfitters. Some organized tours provide support for carrying your gear, food and clothing, requiring you to only carry what you need for the day. Be sure to get details about how much support is provided so you know how to pack.
This article primarily discusses how to pack for self-supported bike touring; if you're preparing for a different type of tour, it's easy enough to make adjustments to the strategies presented here based on how much stuff you're bringing along.
How to Pack Panniers
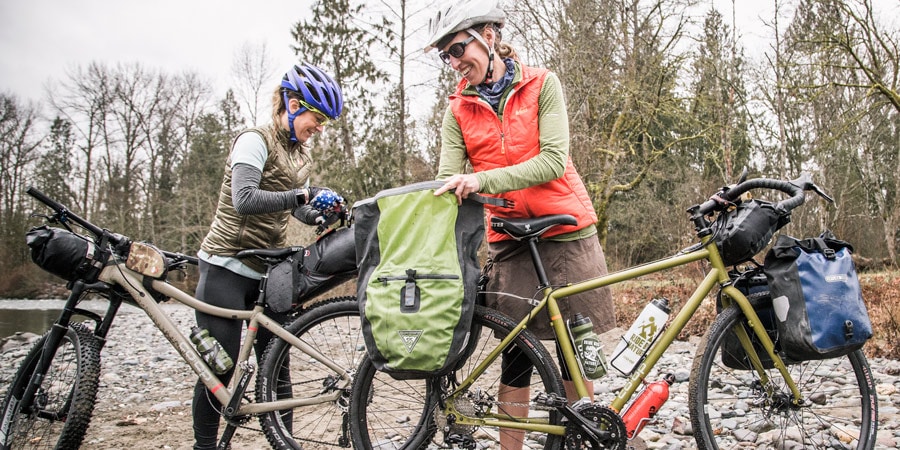
Panniers are the go-to storage solution for most bike tourers. These bags offer roomy storage and are designed to clip onto the sides of front and rear racks and can be quickly removed so you can take the bags with you when you reach a destination. Many panniers are waterproof, so you don't have to worry about your things getting wet during a rainy ride; for those that aren't, consider packing your things in waterproof stuff sacks or using raincovers designed to go over your panniers.
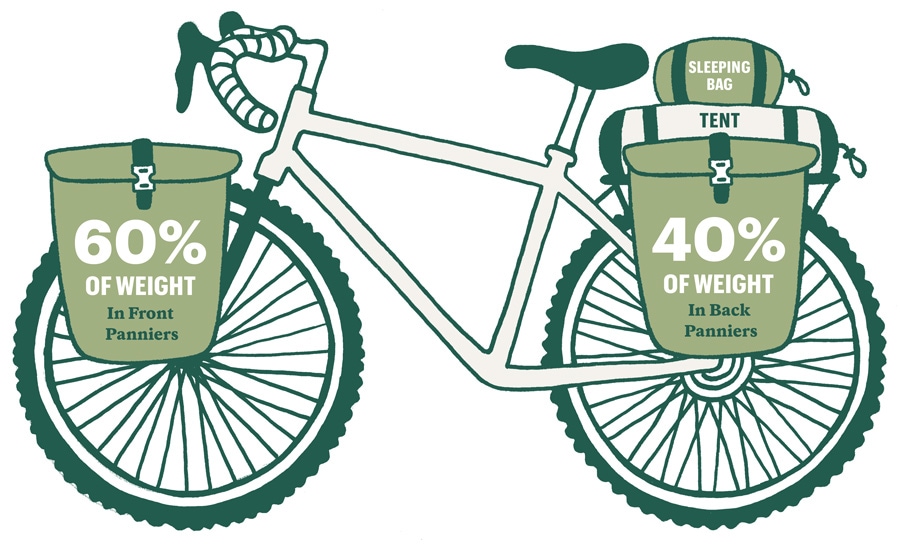
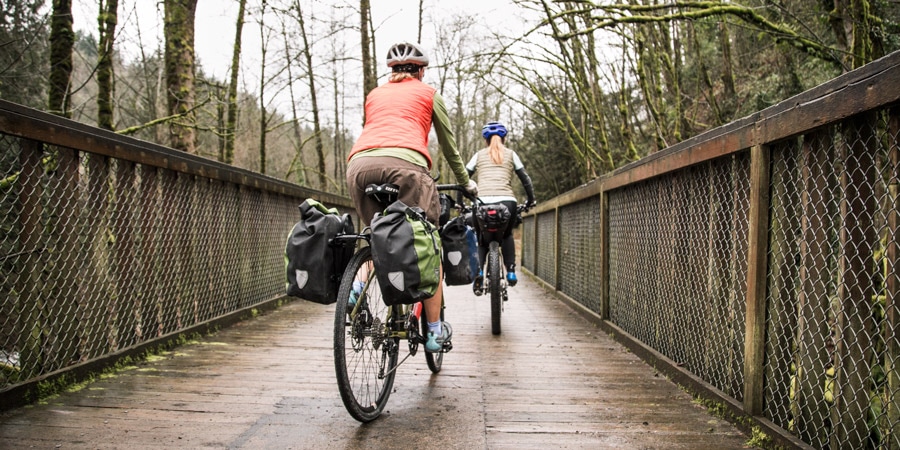
When doing a self-supported tour, you'll likely need four panniers (two in front and two in back) to fit all your gear, clothing and food. The goal when riding with four panniers is to have the load on your bike evenly distributed front-to-back and side-to-side. This will create a more stable ride that doesn't wobble. To achieve this, set your sleeping bag and tent aside, then pack approximately 60 percent of the weight in your two front panniers and 40 percent of the weight in your two rear panniers. Then, when you strap the tent and sleeping bag onto your rear rack, as many riders do, you will have an evenly distributed load. You can use a scale to make sure you have the right distribution, but going by feel usually gets you close enough.
What to Pack in Rear Panniers
Rear panniers are the storage option that most cyclists turn to when getting into touring. For trips lasting just a few days and that don't require lots of gear, clothing and food, two rear panniers may be all you need to carry your things. If you can't quite fit everything into two rear panniers, you can strap items onto your rack (most riders strap their tent to the top of the rear rack) and/or add other small bags, like a handlebar bag, top-tube bag or saddlebag. On longer journeys, you can add a front rack and a pair of front panniers to hold more gear.
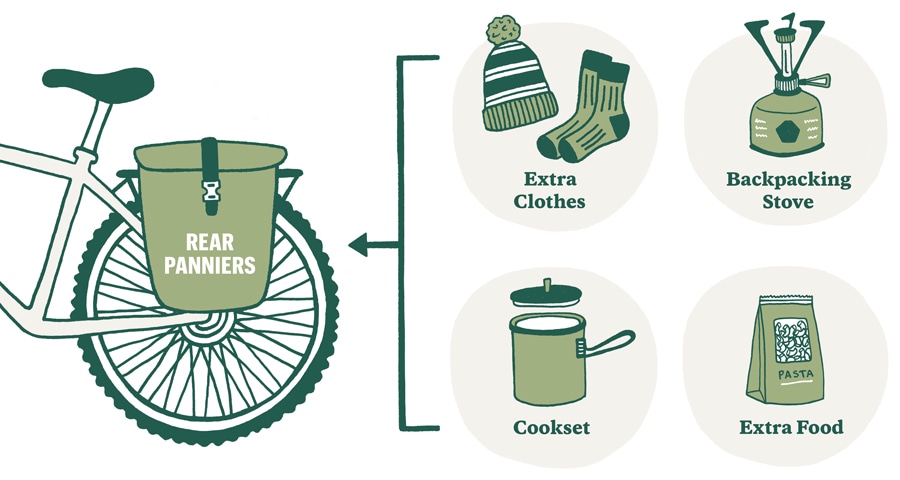
Here are some tips for packing rear panniers:
- Use rear panniers for seldom-used gear: Rear panniers aren't easy to get into unless you get completely off your bike, so it's best to use them to hold items you don't need frequent access to. Things like your extra clothing, backpacking stove, cookset and extra food are good options. Your sleeping bag and sleeping pad can go in here, too, though many people strap them to their rear rack (inside a waterpoof bag) because of their bulky size. If you're only using rear panniers, and thus will be putting items in that you'll surely need during your ride, then keep those items near the top.
- Put heavy items in low: Place the heaviest items low in the panniers to help keep your bike's center of gravity low, which can help maintain good stability while riding.
What to Pack in Front Panniers
Front panniers are generally considered secondary to rear panniers and are added when you set out on an adventure that requires more supplies. Most riders will use them in addition to rear panniers on self-supported trips lasting more than a few days. But if you're credit-card touring or have the support of a vehicle, then you could choose to use only front panniers. Front panniers are very similar in design to rear panniers, though they are typically a bit smaller.

Here's how many bike tourers use them:
- Use front panniers for frequently used items: Front panniers are easier to get into than rear panniers. Often, all you must do is stop riding and reach over your handlebars to access a front pannier (whereas with a rear pannier, you'll have to completely dismount the bike.) This makes front panniers a great place for things like snacks and food for the day, a first-aid kid, bike tools and any clothing you want quick access to, such as rain gear.
- Again, put heavy items in low: Just as with the rear panniers, you want to put the heaviest items in low to keep your bike's center of gravity low. But, also strive to keep items you're likely to need during the day from getting buried too deep.
How to Use Front and Rear Bike Racks
While there are advantages to getting everything into panniers, such as good protection from rain, it isn't always achievable, especially on longer journeys. So, it's common for bike tourers to strap things onto their front and rear racks. To do so, use lash straps rather than stretchy bungee cords that are prone to snapping back in your face.
- Put bulky, lightweight items in back: A tent, sleeping bag and/or sleeping pad are commonly strapped to the rear rack. You can leave these items in their own stuff sacks and strap them on, but many tourers will put at least the sleeping bag and pad in a waterproof dry sack or duffel bag, lay the sack or bag across the top of the rear panniers and strap it to their rear rack.
- Put smaller, heavier items in front: Depending on the style of front rack you have, you may be able to strap items to the top or sides. Things like a pair of sandals or a bundled-up jacket are good options.
How To Pack Bike Storage Bags and Accessories
Many bike tourers can fit everything they need for a ride in front and rear panniers and strapped to their racks. But there are other bags and accessories that can make it easier to access things while you're riding and stay organized throughout your trip. Keep in mind, though, that with each bag you add, you increase the weight you must pedal uphill. So, really do think about whether extra bags are necessary or if the items you would put in them can fit just as well in your panniers.
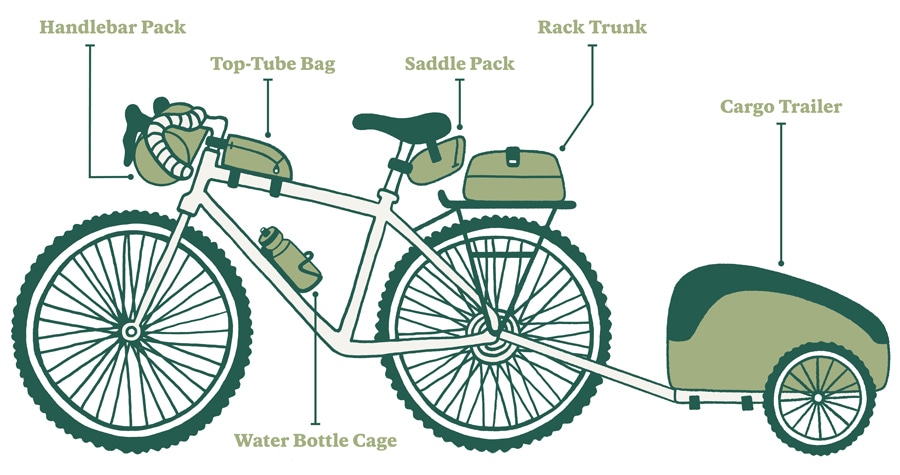
- Cargo trailers: Cargo trailers typically attach to the rear hub of your bike. Some bike tourers use cargo trailers in addition to a full set of panniers if they need a massive amount of storage space (though most riders won't need front and rear panniers and a trailer). Other tourers will use a trailer instead of some or all of their panniers because they have bulky gear that fits better in a trailer and/or they prefer the way the bike handles when they move weight off the bike and into a trailer. The right combination of trailer and panniers for you depends on personal preference and how much stuff you have. For many self-supported riders, a cargo trailer and two rear or front panniers will provide ample room for packing. Learn more about cargo trailers in our article How to Choose Bike Trailers.
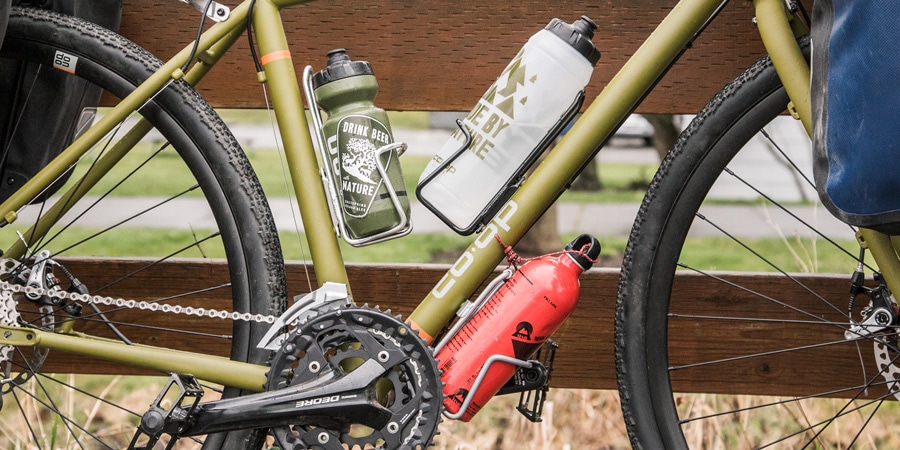
- Water bottle cages: Standard bottle cages are essential for carrying water on a bike tour. Most bikes have threaded fittings (called braze-ons) on the seat tube and/or down tube that you can use to attach bottle cages to your bike. The cages fit standard-size bike bottles. If your bike can fit more than one bottle cage, then you can use one to carry your stove's liquid-fuel bottle and the other one for water.
- Handlebar packs: These bags attach to the front of your handlebar, giving you a convenient place to keep things like snacks, sunglasses, a cellphone, your wallet and a spare tube. Some handlebar bags have a waterproof spot on top for displaying a map. Aim to put only about 3 to 5 pounds of gear in here. More weight than that can be too much for the handlebar bag to support and it will raise the center of gravity on your bike, resulting in a wobbly ride.
- Saddle packs: Also called a seat bag, saddlebag or underseat bag, a small saddlebag attaches to the underside of your bike saddle. Riders often use them to stow bike tools and a spare tube.
- Top-tube bags: Top-tube bags (often called bento bags) attach to the top of your bike's top tube, behind the head tube. They are easy to get into while riding, making them a good spot to keep snacks, sunscreen and a cellphone.
- Rack trunks: A rack trunk sits on top of your rear rack. They are smaller than panniers but larger than saddlebags, making them a good in-between option for carrying clothes, food and other items you want to keep accessible. Rack trunks are more commonly used on day trips rather than multiday tours.
- Phone mounts: If you plan to navigate using your phone or always want it handy for snapping photos, then you'll want to mount it front and center. For most people, this is on the handlebar of their bike.
Additional Packing Tips for Bike Touring
You won't need as much as you think you do: Beginner bike tourers commonly bring more gear, food and clothing than they need, which adds cumbersome weight and takes up precious space in panniers. Strive to carry no more than about 50 pounds (including the weight of the panniers/trailer) of stuff for self-supported, multiday tours. (You should be able to carry much less on shorter trips or those that are supported.) Pay special attention to how much clothing you bring, as it's common to bring too much (see the next tip), and don't carry more than about one day's worth of food unless you're biking in remote areas without access to grocery stores, markets or restaurants. It's often helpful to use a checklist so you won't forget items or bring too much. When considering the weight of how much you're carrying, it's worth checking for load limits for both your bike and front and rear racks.
Bring no more than three or four days' worth of clothes: It's easy to pack more clothing than you really need. So, for any trip lasting more than a few days (including those that last weeks or even months), don't bring more than about three or four days' worth of clothes (shorter trips generally require less). You can wash your clothes along the way, either at laundromats or in sinks with some travel soap, and strap items to your rear rack to dry while you ride. Also, when choosing what clothes to bring, remember that you will be in biking clothes far more often than off-bike clothes, so select items that you're comfortable riding in but will also work if you take a day off. For instance, rather than wearing cycling jerseys and tight, stretchy shorts, many bike tourers opt for synthetic shirts with a casual style and baggy mountain bike shorts because they work well for biking and walking through town. Zip-off hiking pants work well, too.
Bring a comfort item: Whether it's a French press for making a morning cup of coffee or a favorite cotton T-shirt, having something from home that brings you joy can be worth the extra weight to haul it along.
Pack only the essential repair items: Before pedaling away on a bike tour, you should be equipped with the knowhow and tools to fix a flat tire, tighten a loose bolt or replace a broken spoke. But most riders don't need the skills or tools to handle rare catastrophic failures. If you have a major breakdown that can't be handled with a travel pump, spare tube, patch kit, spare spoke and a basic bike multitool, then you may be best served by finding your way to a local bike shop for help. Some riders like to be more self-sufficient, especially when going on tours in remote areas, and will carry a spare tire, spare brake/shifting cables, spare nuts and bolts, and replacement chain links. Before packing these things, consider their benefit to you while thinking about how close your route is to civilization, your mechanical skills and the amount of weight the parts add to your load. Learn more about what to take along in our article, What to Bring in a Bike Repair Kit.
Lay everything out when packing: When you're getting ready for your trip, lay everything out on the floor or your bed so you can see exactly what you're taking. This will help you remember to bring what you need and keep you from packing things you don't. You can then use small stuff sacks or zip-top plastic bags to organize your possessions. This works especially well for clothing—pack one outfit per stuff sack or plastic bag and when you're ready for a wardrobe change on your trip, all you have to do is grab a stuff sack or bag rather than digging around for individual items.
Put everything back in its place: The key to remembering which pannier you put your rain jacket in when it starts to pour or where your snacks are when you just can't pedal one more stroke without eating is to develop a packing system where everything has a place. If you decide to keep your rain jacket near the top of your front left pannier, put it there every time. If your snacks go in the front right pannier, put them there every time. This will help keep you from going crazy and having to completely unpack multiple bags while searching for things. Some riders like to create an inventory of items on a notecard and include the location, so they will know exactly where to look.
Keep important items within easy reach: Things like your phone, wallet, passport, bike tools, headlamp and first-aid kit should always be kept in a spot that you can easily access. You don't want to have to go on a lengthy search for these items when you really need them.
Leave a little empty space: Rather than filling your panniers and/or cargo trailer to the brim at home, leaving a little empty space makes it easier to pack and allows you to pick up supplies along your way, like food and souvenirs.
Stay organized at home: If you're hooked on bike touring and already planning your next outing, then do yourself a favor and keep your bike touring clothing and gear together and ready to go. You can even have your panniers partially packed with items that go with you on every trip. Taking the time to stay organized at home will make it simpler and quicker to get out the door.
Learn as you go: There's no one right way to pack for bike touring, so with each bike trip you go on, you have the opportunity to refine what to bring and the way you pack. Even experienced bike tourers will reflect on what worked and what didn't, and to make changes before heading out again.

