Ski bindings provide the critical connection between your boots and your skis. They not only hold you in when you ski but release you safely when needed. Alpine touring (AT) bindings differ from downhill ski bindings in one major way: They're designed so you can lift your heels to stride uphill (with the help of climbing skins on your skis) while providing you with a fixed heel for the downhill. When you're looking for backcountry ski bindings, you'll find a continuum from light and efficient for uphill to heavy and powerful for the downhill.
Here are the key steps for shopping for bindings for your backcountry ski setup:
1. Choose AT bindings based on the kind of skiing you do and how you ski
- If you're mostly backcountry skiing, choose tech bindings. With a tech binding, you're connected to your skis only at the toes when traveling uphill; you only lift up your boots (less weight to pick up) when you stride, allowing for the most efficient uphill travel.
- If you're skiing mostly resort, and some backcountry, choose frame bindings. These look more like traditional downhill ski bindings and are optimal if you spend the bulk of your time in the resorts, or you're an aggressive skier who heads out into the backcountry on occasions.
2. Make sure the bindings are compatible with your boots
Ideally, you'll want to start by finding boots before bindings. Boots are critical to your comfort, so spend time finding a pair that fits well and let that decision drive your binding choice. Read more on How to Choose Backcountry Ski Boots.
3. Always have a certified ski expert mount and set your bindings
REI has certified ski experts during the winter season to help with binding inspection and mounting. Find an REI store with snow shop services.
Before you head out into the backcountry, get educated about avalanche safety. Start by reading our Avalanche Awareness series.
Types of AT Bindings
Below are types of backcountry ski bindings with some pros and cons of each.
Tech Bindings
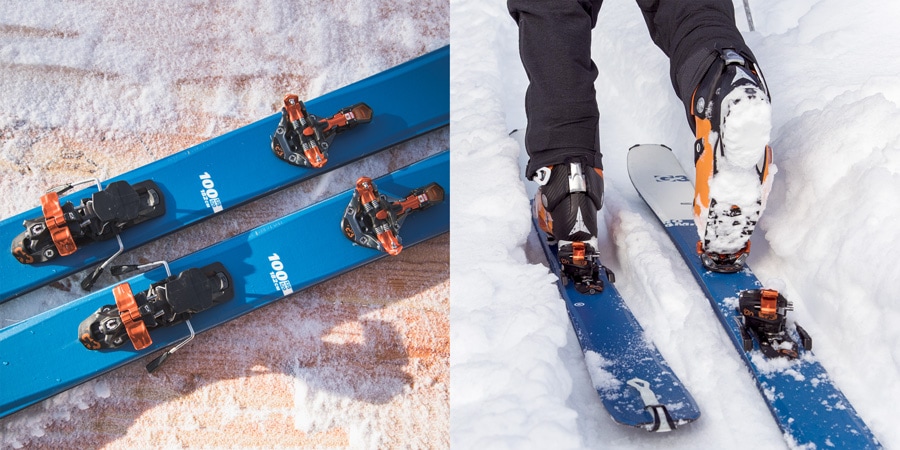
Tech bindings have separate toe and heel pieces in a minimalist design. Small pins in the toe piece connect to holes (tech inserts) on your boots, securing them in place for uphill travel. When you're touring, the pins allow your foot to pivot so you can stride in a more natural way and use a full range of motion. Typically, pins in the back of the heel piece lock you into place when you're ready for downhill skiing.
Tech bindings:
- require tech-compatible boots that have tech (pin) inserts.
- are the lightest binding option because of their minimalist design.
- are ideal for skiers doing lots of human-powered touring or uphill climbing who care about weight.
- may require an initial learning curve for beginners.
Frame bindings
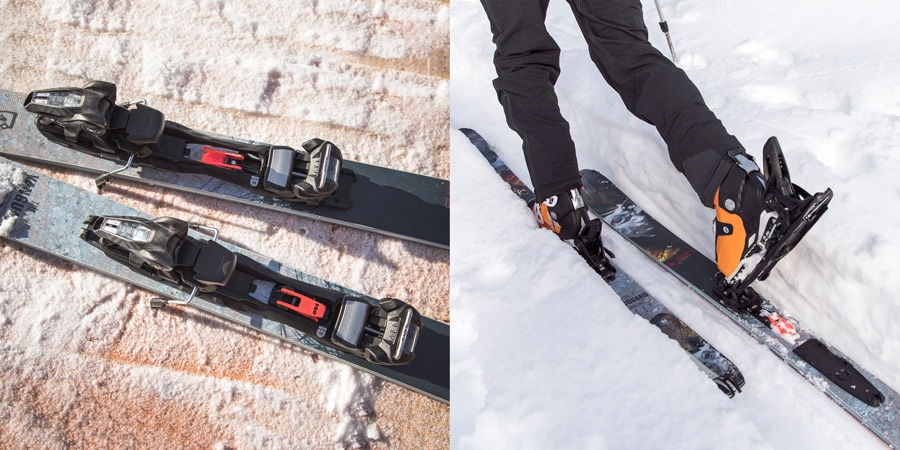
Frame bindings look more like a traditional alpine ski binding with the toe and heel pieces connected by a rail, which comprises the frame. The entire binding lifts up when you're in touring mode and locks back down in ski mode, providing a feel nearly identical to a traditional downhill binding. These beefier bindings also mean more weight underfoot so they're not as optimal if you're planning to tour over long distances or make steep ascents.
Frame bindings:
- are ideal for aggressive or downhill-oriented skiers who want performance and don't mind extra weight.
- excel on the downhill because they can be as burly as alpine bindings.
- are compatible with most touring-specific boots as well as downhill ski boots.
- are a good one-ski setup for those who mostly stick to resorts with occasional laps into the backcountry.
- can be less efficient for uphill travel due to their heavier weight.
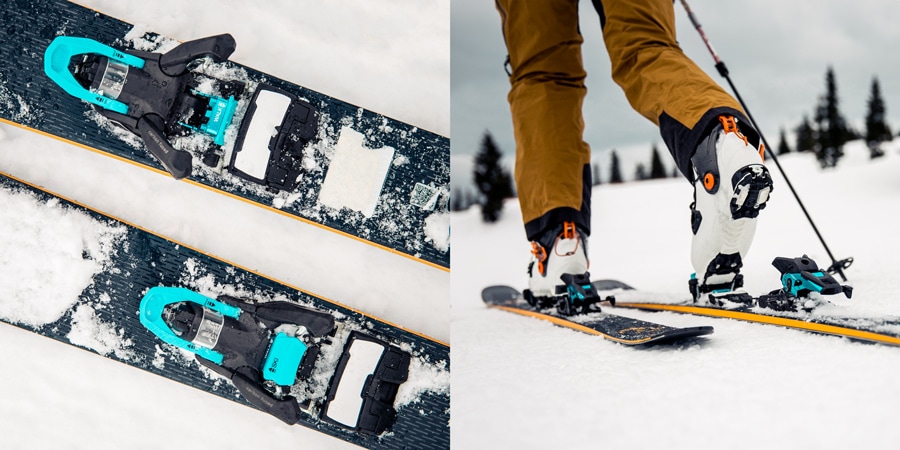
A newer binding on the market merges the features of a typical downhill binding with features of a tech binding, and doesn't easily fall into the above two categories. The toe pieces use pins to allow for full rotation of the heel while touring. For the descent, the toe pieces convert to a more traditional downhill toe piece that does not use pins. These "hybrid" bindings are ideal for skiers who split equal time in-bounds and in the backcountry and want one setup or those seeking the best of uphill and downhill features.
Make Sure Your Bindings and Boots Are Compatible
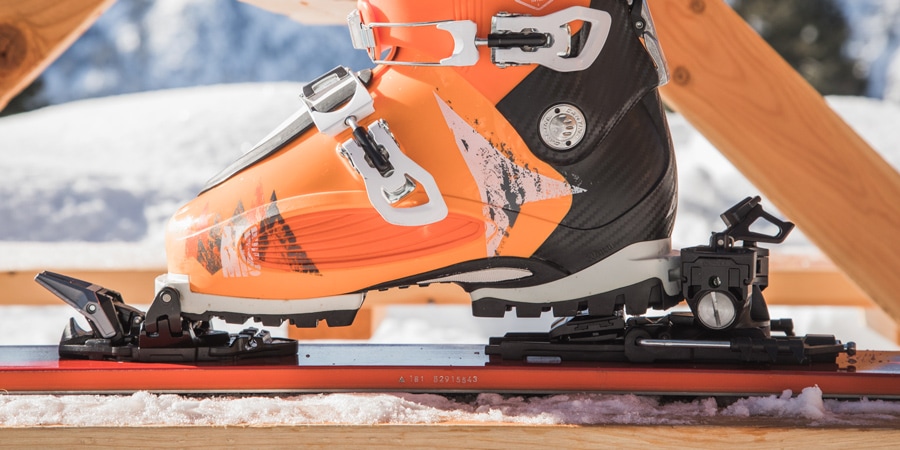
Figuring out boot and binding compatibility can be a confusing, complicated process, especially as new innovations in backcountry gear rapidly come on the market. If possible, it's a good idea to visit your local ski shop or boot fitter to make sure your backcountry boots, bindings and skis are compatible and will function properly. Find an REI store with snow shop services. Read more on How to Choose Backcountry Ski Boots.
Choose Your Brake Width
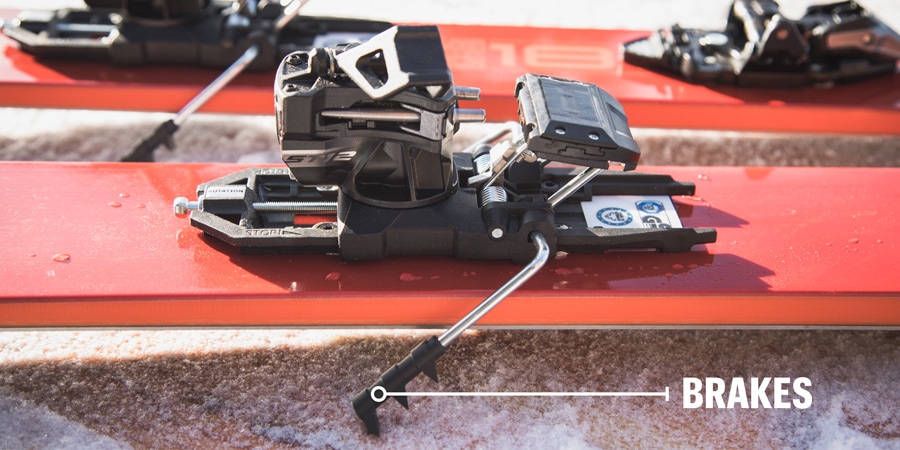
Most alpine touring bindings come with brakes, though some come only with leashes that attach to boots. If your bindings release unexpectedly, brakes stop your skis from flying out of control and potentially hitting someone. Racers or other skiers interested in fast and light may opt to ditch the brakes and use a leash instead.
Match the brake width to your skis, as measured underfoot (or at the waist). Too narrow and it won't fit your skis well; too wide and that brake will drag as you ski and make turns. Toe pieces in bindings are getting wider to accommodate skis that are also getting fatter. The general rule is that brakes should be equal to the width of your skis or no wider than 15mm. Here's where a ski specialist can help.
Other Considerations
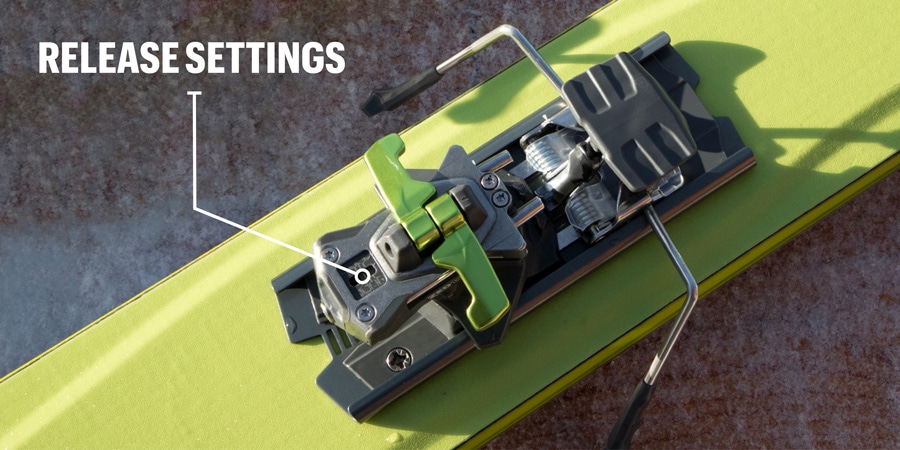
Release settings: All bindings offer a range of release settings, which is the measure of the torque required to release you from your bindings. The lower the number, the less force is needed. Release settings are based on your height, weight, age, skier type and boot sole length. In general, beginners or intermediate skiers will want a lower release setting while more aggressive or heavier skiers will want a higher release setting. Make sure that your skiing ability and other characteristics fit within the release value of the bindings. It's critical to have a certified ski technician set and test your release settings.
Some AT bindings are certified by an independent safety organization (for example, TÜV) that tests to make sure they will release with the same force as traditional alpine bindings. This is important to skiers who want that certification.
Match the weight of your bindings and skis: If you have lightweight skis, choose lightweight bindings. If you have heavier duty, downhill-oriented skis, consider heavier, burlier or stronger ski bindings that are able to drive the skis well.
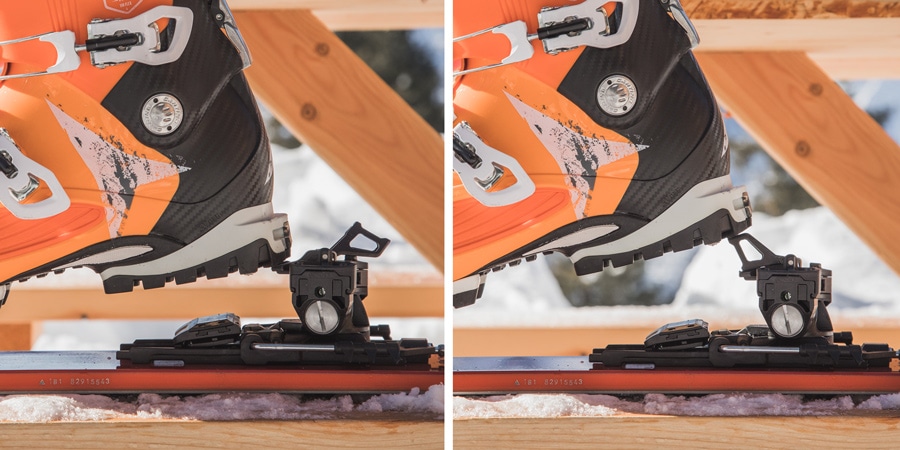
Heel risers: Most alpine touring bindings offer one to three levels of heel risers (or climbing bars) to elevate your heel when you're climbing up a steep hill. The lightest bindings may not have a flat-heel mode.


