What’s better than front suspension? Full suspension, of course. Chris Harris of DirtLabs explains.
Going full squish is a game changer. A rear shock gives your bike more traction, saves your knees and back, and—maybe, just maybe—helps you ride faster.
Think back to all the components described in our previous Anatomy of a Fork post. If you haven’t read that yet, I’ll fill you in quickly: There are a lot. Now, take those bits and pieces, condense them into a tiny package that fits nicely into your frame, and make sure to leave enough room for your water bottle. That is no small feat! Your rear shock has to perform the same amount of work as your fork, but with much less real estate.
Just like a fork, the rear shock has two key elements: a spring (either coil or air) and a damper. Remember, the spring gives your shock its squish and the damper controls how quickly that spring squishes (compression) and un-squishes (rebound).* A major difference is that in your fork, the spring components are in one stanchion and the damping components are in the other. Because space is a luxury that the rear shock lacks, the damper is usually encapsulated by the spring.
*Part one has a more scientific explanation of this, if you’re interested.
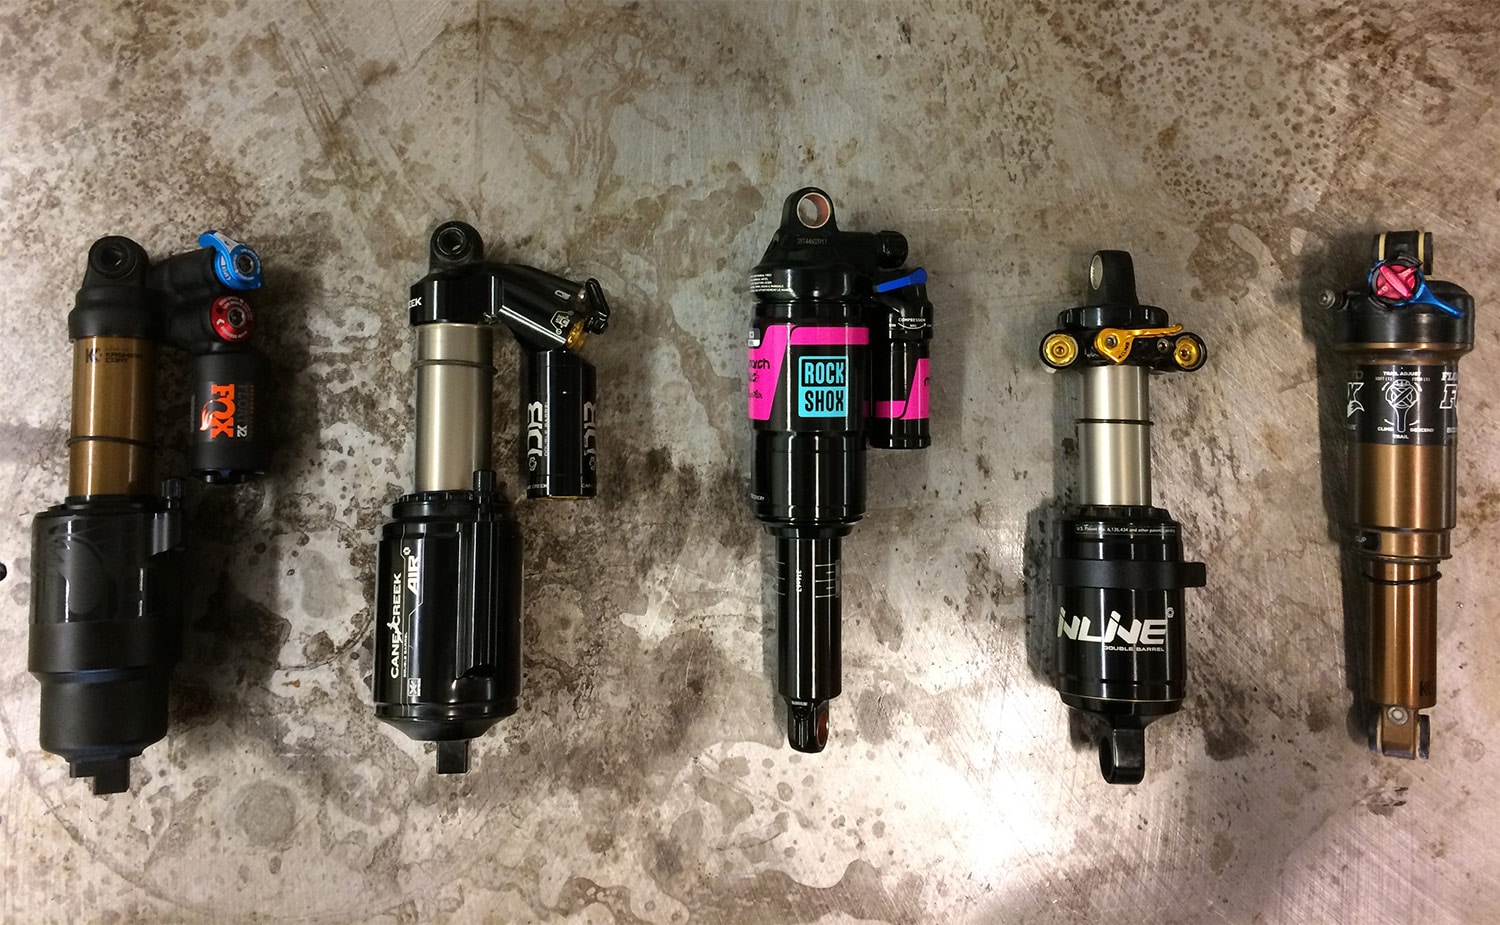
To kick things off, check out this overview of a common air shock (Fox Float), fully dissected.
Airsprings are much more common on XC, trail, and all-mountain bikes, due to their lighter weight and easy tunability (i.e. just add more air for a heavier rider). Coil springs, on the other hand, are more popular among the DH crowd—where weight is less of an issue—because of their unmatched small bump sensitivity and bomb-proof construction.
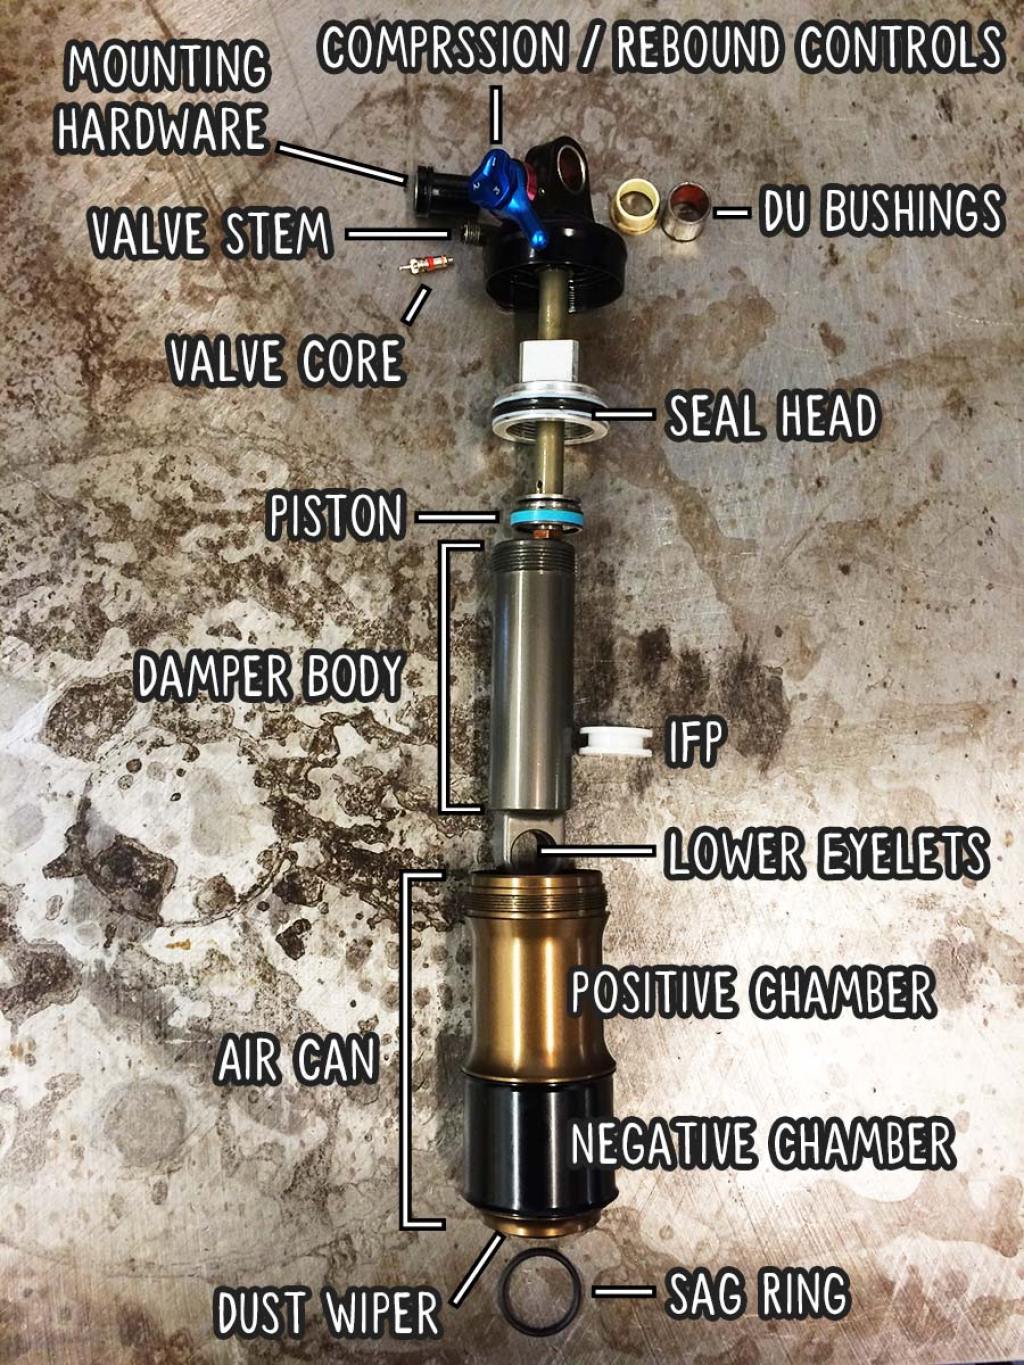
Damper Parts
Your shock’s damper body (sometimes referred to as a stanchion) serves two purposes. First, the external surface of the damper body acts as the seal for your airspring, which is why it is very important to keep this area clean and scratch-free. Second, it internally houses your damper fluid, which is what controls the compression and rebound characteristics.
Here’s a breakdown of what’s going on inside your shock’s damper body.
- Seal Head: The seal head threads onto the damper body, which encloses your damper system and its associated fluid.
- Piston: As your shock compresses and rebounds, the piston moves through the damper fluid. The damping characteristics are controlled by opening or closing ports within the piston, allowing the fluid to flow more or less freely.
- Internal Floating Piston (IFP): The IFP is what separates your nitrogen charge (of up to 500 PSI!) and damper fluid.
These components literally “put a damper” on what would otherwise be an out of control spring and allow for rear wheel traction through the rough stuff. Depending on the type of shock, you can manipulate different aspects of this damping using the controls:
- Compression Controls: These controls allow you to adjust your shock’s compression damping. The type of controls and level of adjustment available vary greatly by brand and type of shock (i.e. CTD switch on Fox Float shocks, Min, Med, Firm on Rock Shox, etc). The bottom line is that adding more compression damping firms up the shock, which is useful for pedaling efficiency.
- Rebound Controls: Usually in the form of a red dial, the rebound controls allow you to add or subtract rebound damping (adding rebound damping slows the shock down while subtracting it lets the shock rebound more quickly). Again, the location of the control and the level of adjustability varies greatly from shock to shock.
Airspring Parts
Air canisters, which have two chambers, come in many different shapes and sizes, and those differences help to control the spring rate of the shock. The air can threads directly into the head of the shock (the part with the controls and valve stem), forming the system’s upper seal.
- Positive Chamber: This is the area inside the air canister that you pressurize with your shock pump. The force created in the positive chamber works to counter the weight of the rider. As your rear wheel moves through its travel, the seal head slides up the piston shaft and compresses the air in the positive chamber, creating the spring.
- Negative Chamber: The seal head isolates the negative chamber from the positive chamber. While the air in the positive chamber works to keep the shock extended, the air in the negative chamber actually pushes gently in the opposite direction, in an attempt to help the shock break into its travel more easily. In recent years, a greater emphasis has been put on the negative air chamber to allow for more small bump compliance. (Check out the enlarged negative chamber on new Fox EVOL air can pictured above.)
Other Bits and Pieces
- Eyelets are the mounting points located at the top and bottom of the shock.
- DU bushings (both old and new styles pictured) are the wearable items that keep your shock’s mounting hardware snug in the eyelets.
- Mounting hardware is frame specific (with almost 50 “standard sizes”) and fills the space between your frame mounting eyelets and the shock itself.
- The valve stem protrudes from the head of the shock and serves as the point at which air is added to or removed from the shock.
- The dust wiper helps keep dust out of your air canister, which is crucial to your shock’s performance. Dust = stiction and wear on internal seals. Pressed into the base of the air can, it hugs your shock’s damper body snugly and skims dust off as your shock compresses.
- Sag ring: This simple o-ring hangs out on the damper body, letting you know how much sag you’re running and if you’re using all of your travel or not.
Suspension Sessions is a series created in partnership with DirtLabs, a Boulder, CO-based tuning and service center. Keep your eyes peeled for tricks and tips to help you set up, maintain, and get the most out of your mountain bike’s squishy bits.