So, you’ve decided to get yourself the funnest camera in the world. I know, funnest isn’t a word, but it’s tons of fun to use—just like the GoPro.
A video camera, a still camera, and the undisputed king of POV footage. Fun galore. So now what do you do?
If there’s any complaint to be made about the GoPro, it’s that there’s too much going on in that little box. What the heck are all those settings? Well, I can assure you, the options are there for good reason. I teamed up with pro riders Ralph Backstrom and Tyler Ceccanti for a day of shredding at Crystal Mountain, Washington, and we made a quick video to help you get the most out of your GoPro on the snow.
That moved pretty fast, so let me break it down a little bit.
Mounts
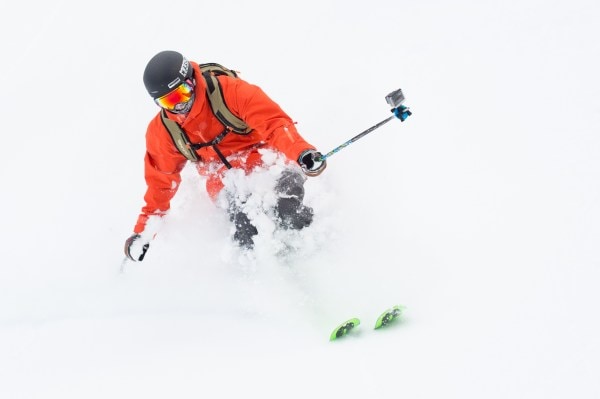
Handlebar Mount: If you’re a skier, you’ve already got a great extension arm on which to mount your camera. Just attach the handlebar mount to the basket-end of your ski pole and aim the camera back at the center of your body before you drop in.
Helmet Mount: The helmet mount provides the most classic POV of them all. There’s no substitute for the helmet mount when you want to show people exactly what you experienced during your moments of glory on the hill. Use the GoPro app to check the camera angle on your smartphone before you start recording. More on that later.
Chest Mount: The chest mount is especially great for skiers because it is stable, points directly downhill and shows the skis and hands, which is a very immersive perspective.
3-Way Handle: If you’re snowboarding, you don’t have a pole already handy so you’ve gotta come up with a different solution. The 3-Way handle is your best option. Not only does it provide a great extension arm, it can also be used as a bombproof handle or even a tripod.
Video Settings
It’s easy to get overwhelmed by all of the video settings, but once you know a couple of the basic guidelines, the decisions get a lot easier.
There are two important numbers in each camera setting; the resolution and the frame rate.
Resolution is how many pixels you’re capturing. We used the following resolutions.
- 720p = 720 x 1280 pixels: The lowest resolution that is still considered HD.
- 1080p = 1920 x 1080 pixels: The most recorded and shared HD resolution.
- 1440p = 1920 x 1440 pixels: Basically a taller version of 1080 resolution.
- 2.7K = 2704 x 1520 pixels: Very high quality HD.
- 4K = 3840 x 2160 pixels: Extremely high quality HD. The highest widely available standard.
Frame rate is how many images your camera is capturing per second. Here’s what we used.
- 24 Frames per second = Standard playback for conventional film and video.
- 48 Frames per second = Twice the capture speed of standard.
- 120 Frames per second = Five times the capture speed of standard.
And now the rule of thumb: The higher the resolution you choose, the lower the frame rate options you’ll have available. Why does the frame rate matter? If you want to play everything in your video in real-time, it doesn’t. Shoot all day at 24fps. But if you want to use the impressive slow-motion capabilities of the GoPro, you’ll want to shoot faster frame rates so that you can slow the footage down during editing and playback.
Here are the settings that we used in the video, and the reasons why.
- 720 at 120fps: All of the super slow-mo scenes were filmed with this setting. This setting gives you amazing slow motion while still maintaining HD resolution.
- 1440 at 48fps: This might be the best all around setting for action. You can slow the footage to 1/2 speed and you also get some vertical crop room in post-production.
- 2.7K Superview at 24fps: Gorgeous high-res footage for real-time playback. When filming at this resolution you can either edit and share the video at 2.7k, or you can create a video at 1080 and use the extra resolution for cropping or to stabilize the footage.
- 4K Superview at 24fps: In the future, this will become the standard HD resolution for recording and playback. Right now, you should consider whether you need this much resolution, as 4k video takes up a lot of space on your card and may slow your computer significantly when editing.
Still Photo Settings
Resolution: You are able to choose a number of resolution settings for still photos, but I recommend always shooting at 12MP Wide. It’s the highest resolution, and all of the photo capture options are available at this resolution.
Capture Modes
Burst: 30 photos in 3 seconds. Use this setting to take action sequences of your friends or aim the camera at yourself and trigger this setting just before hitting the air, dropping the cliff or ripping the pow. Best for moments of peak action.
Interval: 1 photo every 0.5 second. If you want photos of yourself getting rad, the half-second interval is your best friend. It keeps shooting twice a second until you’re done with your run, park lap or yard sale.
Time lapse: 1 photo every 5 seconds. If you’re interested in creating a time-lapse video of the sunset, billowing clouds, snow stacking up during a storm or a bowl getting tracked out, this is for you. Attach the camera to a static object and let ’er run.
Tech Tips
Batteries: If you’re planning on a busy day of shooting on the hill, one battery won’t do the trick. I recommend having 3 batteries, and making sure they’re all topped-off before you get out in the weather. Also, keep your spare batteries close to your body to keep them warm.
Micro SD memory cards: While one battery won’t do the trick, one card often will. If you pick up a 32 or 64 GB card, you likely won’t have to make any card changes while out shredding. If you do have to change your card in the middle of the day, I recommend stepping inside so there’s no chance of dropping the tiny card with all of your footage in the snow.
Anti-fog inserts: I ruined a lot of footage before I discovered these little beauties. Moisture builds up inside your camera housing, and if it’s left unattended, it will create fog over the lens. Be careful about keeping moisture out of the body and let these inserts do the rest. Less fogged footage = more likes on the Internet.

Other Tips
GoPro app: The amazing GoPro app is the best thing to happen to GoPro shooting since the Hero2. Connect your GoPro to your smartphone over WiFi and you can control all of the camera settings, preview your camera’s view, start and stop recording, and even transfer files to your phone for immediate sharing.
Mobile sharing: You’re having the best day of your season and you just captured the clip to prove it. Don’t wait till you get home to your computer. Share it on the lift. Use the GoPro app to get the footage on your device, then share directly to Facebook, Instagram, Vine or wherever you post things to make your Internet friends jealous. Real-time bragging rights trump after-the-fact bragging rights every time.
I hope this gives you everything you need to hit the hills and hit record with confidence this winter. If you’ve got questions or comments, feel free to drop them in the comments below and I’ll do my best to keep the conversation going. Happy shredding!

