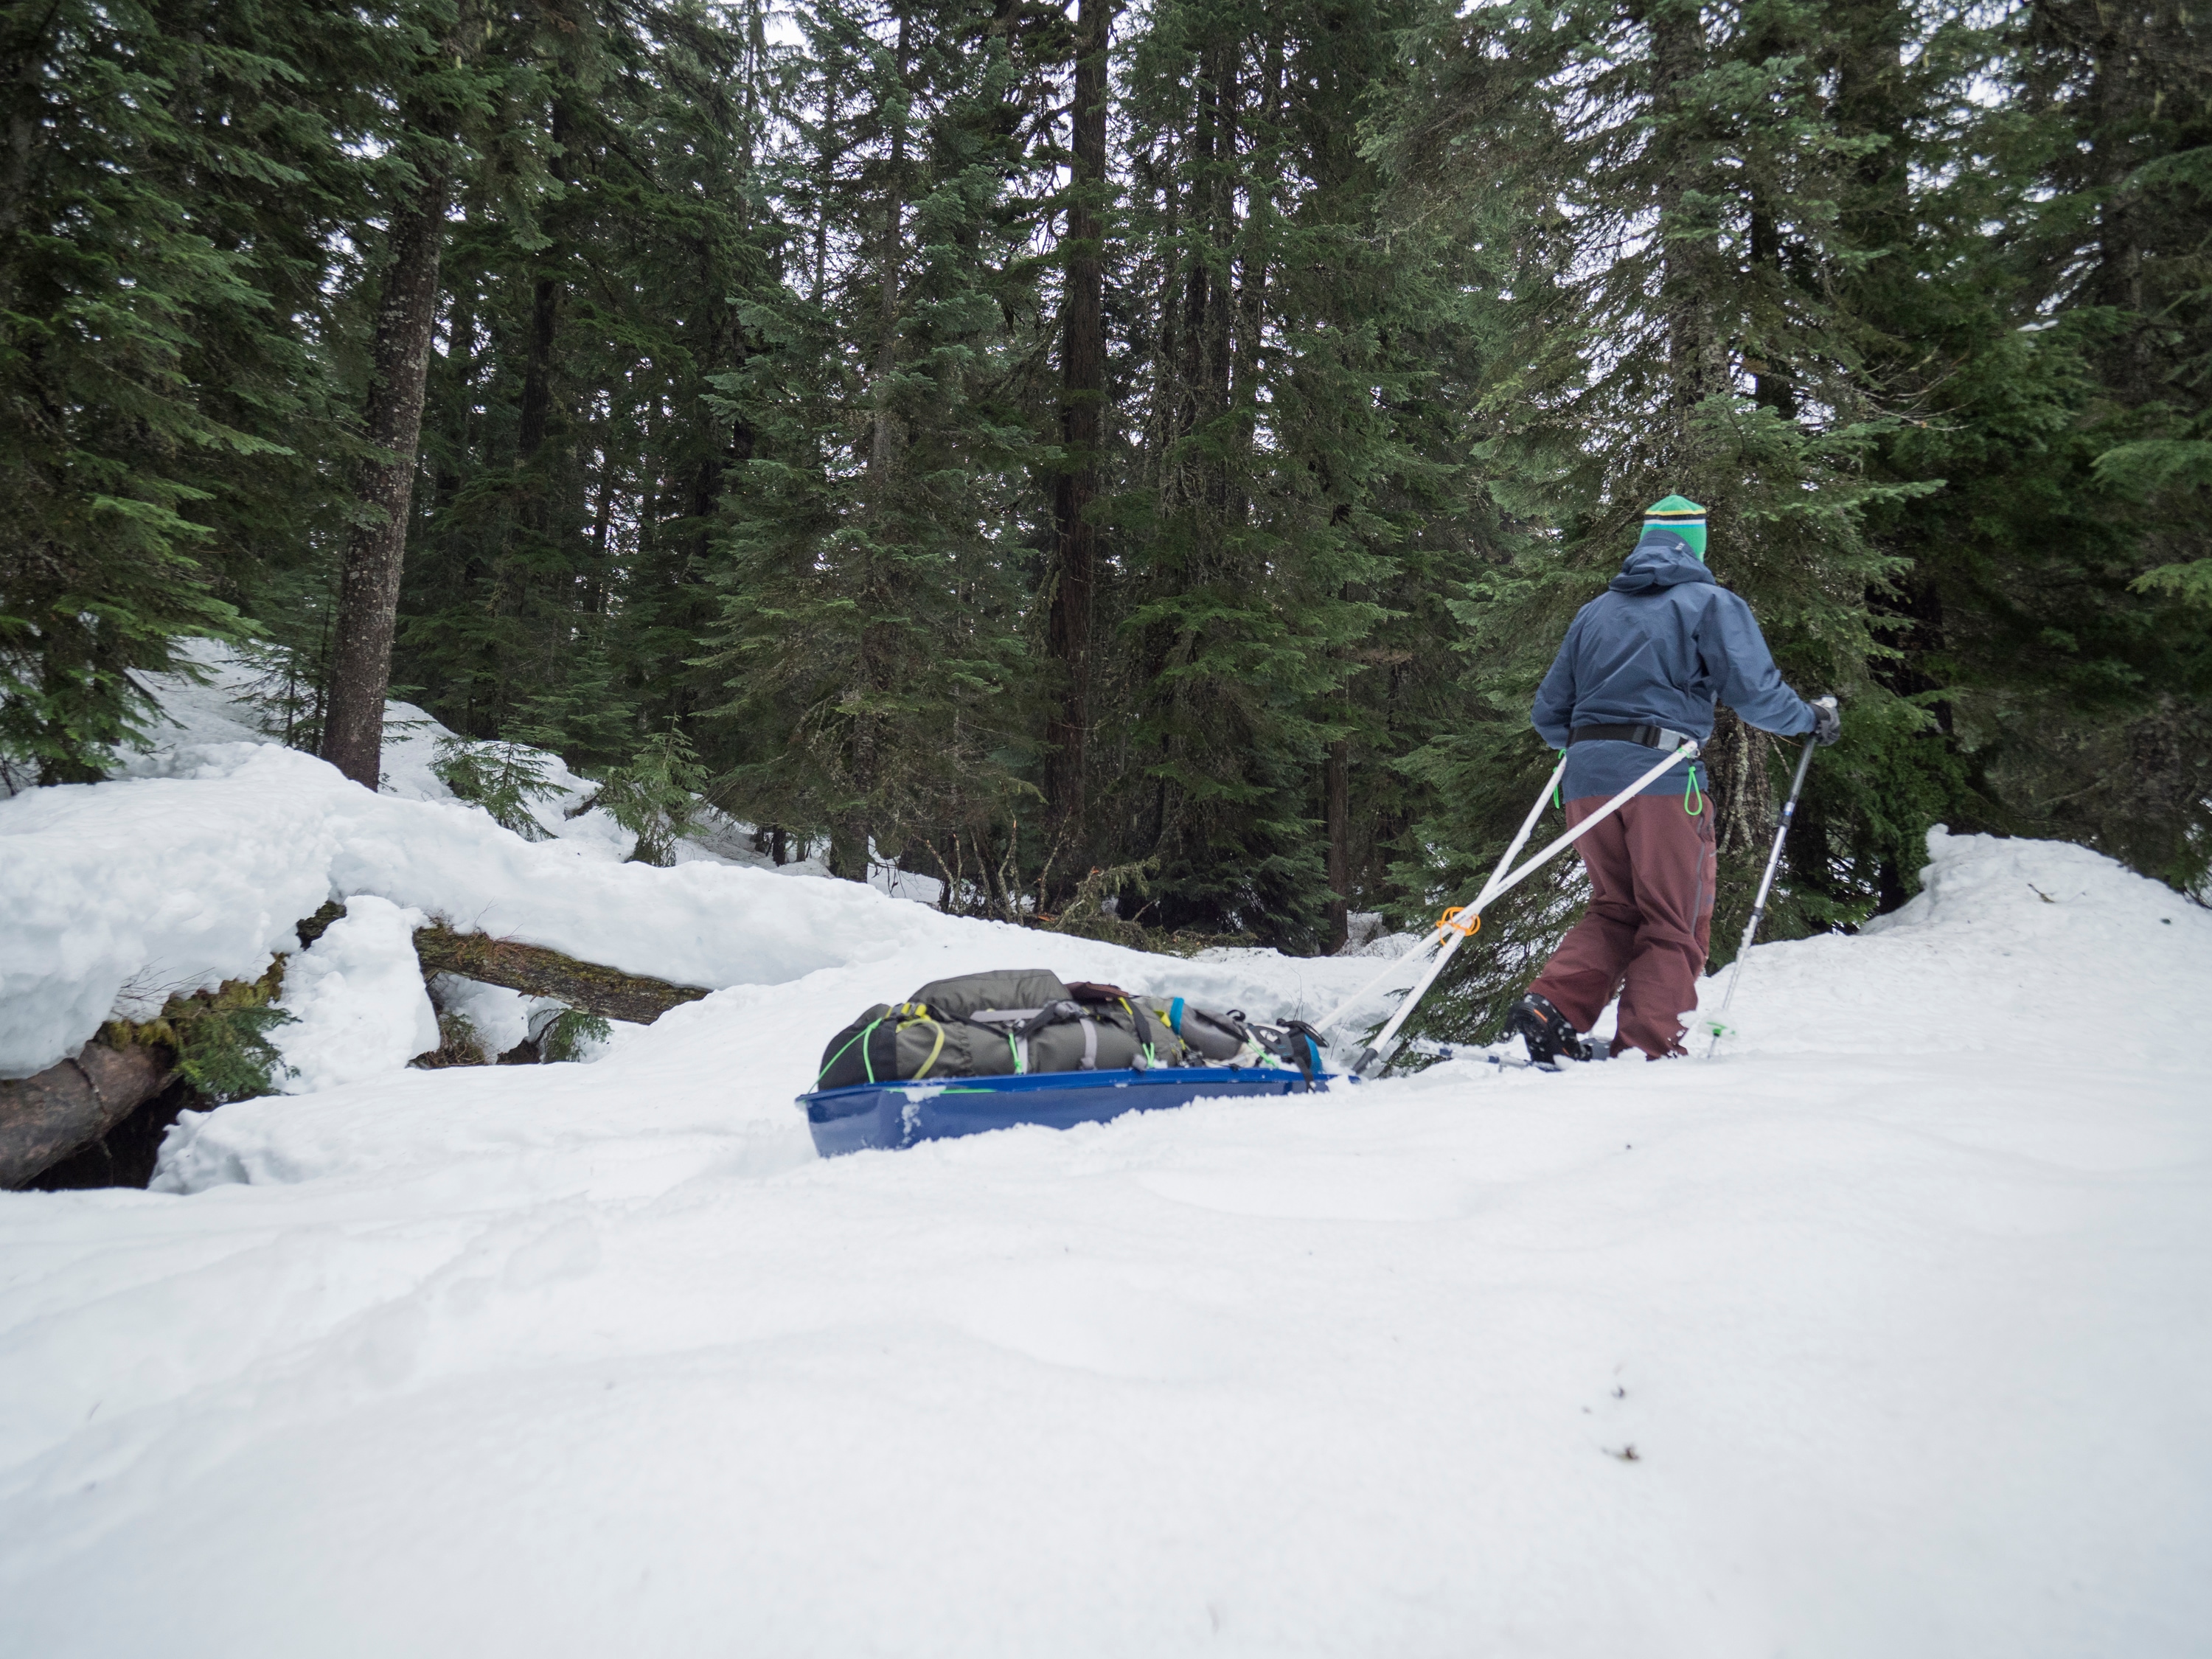
The allure of winter camping is strong. Snow blankets the landscape, creating a quiet and picturesque wonderland and freeing you from the constraints of a trail. With snowshoes or skis you can roam far and wide (make sure you understand the risks of winter travel and avalanche terrain).
But winter camping also comes with its own set of challenges, including the need for additional gear. From a four-season tent to a warmer sleeping bag, the equipment required to enjoy the chilly backcountry can add up, both in bulk and weight. A pulk sled that glides along behind you makes transporting all that extra gear much easier.
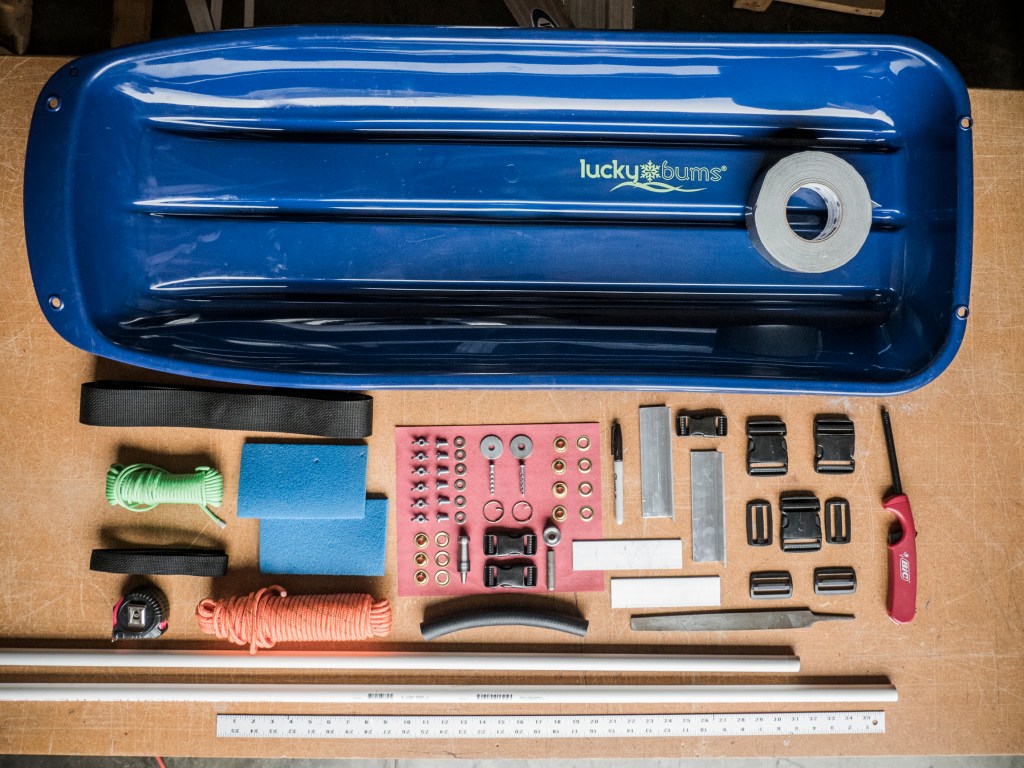
Materials:
- Plastic sled, available at most general retail stores
- 10 feet of ½” schedule 40 PVC tubing (or two 5-foot sections)
- 20 feet of paracord
- 12 inches of ¾” rubber hose, cut in half to two 6-inch pieces
- Eight ¼”-20 flat washers
- Six grommets large enough for your paracord; we used size 2 (3/8″)
- 10 feet of 1″ webbing
- One 1″ plastic buckle
- 6 feet of 2″ webbing (depends on your waist)
- One 2″ plastic buckle
- Two pieces of closed-cell foam, about 4″ x 6″; we cut ours from an old foam sleeping pad
- Duct tape
- Two ¼” x 2″ adjustable clevis pins
- Two key rings
- Two 6″ pieces of 1.5″ angled aluminum (optional)
- Two 6″ pieces of aluminum flat bar (optional)
- Six ¼”-20 bolts with wingnuts (optional)
Tools:
- Tape measure
- Hacksaw
- Sandpaper
- Scissors
- Drill and bits, ¼” and 3/8″
- Lighter
- Grommet tool
- File
Directions:
Part One: The Sled and Poles
1. Choose your sled.
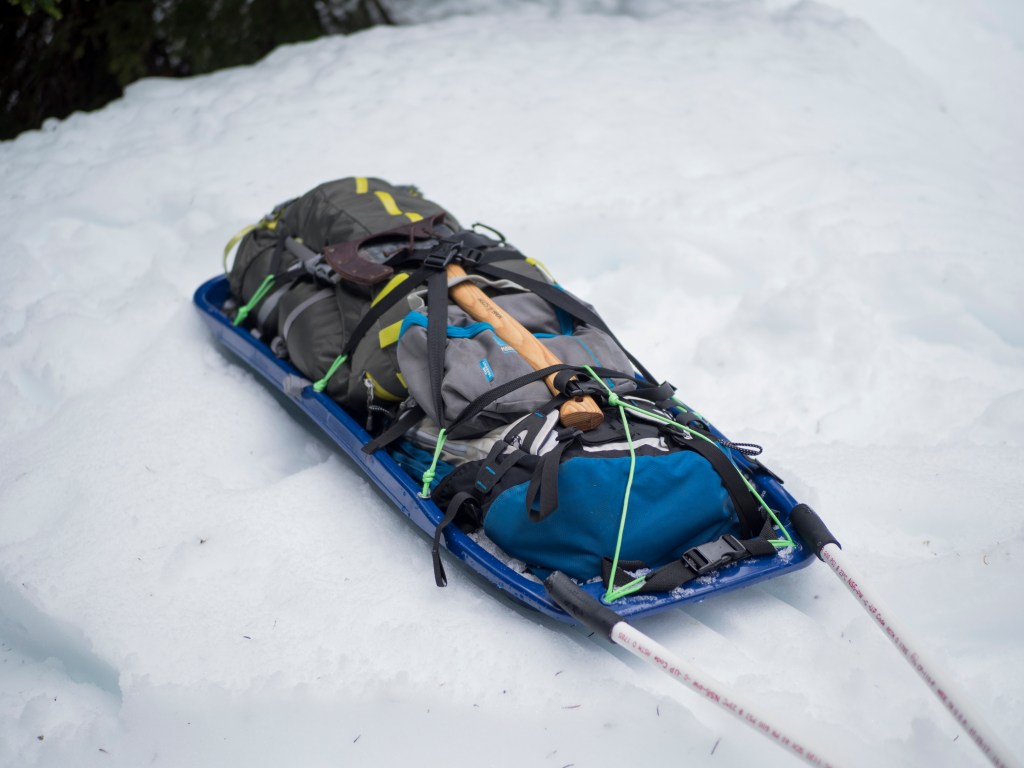
The size and shape of your sled are critical to its performance in the backcountry. It should be at least 5″ to 7″ deep, and have a smooth curved front that will float over snow. Consider how much gear you need to carry when choosing a sled length. Shorter sleds are more maneuverable, but hold less gear. The higher you load gear, the more likely your sled will flip over.
2. Prep PVC poles
The length of your poles—which determines how far the sled rides behind your body—will depend somewhat on the winter activity you are using the sled for. Ski touring requires longer poles to allow for the movement and length of your skis; snowshoeing requires shorter poles to allow for easier cornering. We made our poles 5 feet in length, which is better for snowshoeing. We recommend adding about a foot of length for ski touring poles. Use a hacksaw if you need to cut yours to length.
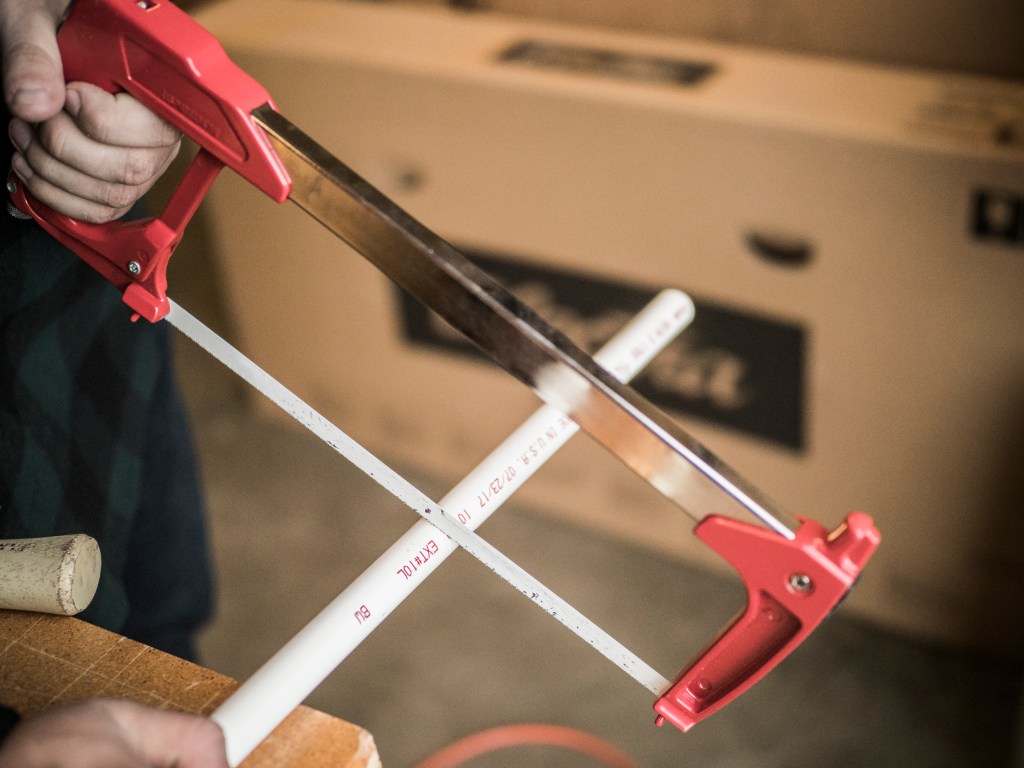
Sand the ends with sandpaper to smooth any sharp edges. Use scissors to trim one end of a 6-inch piece of rubber hose to an angle.
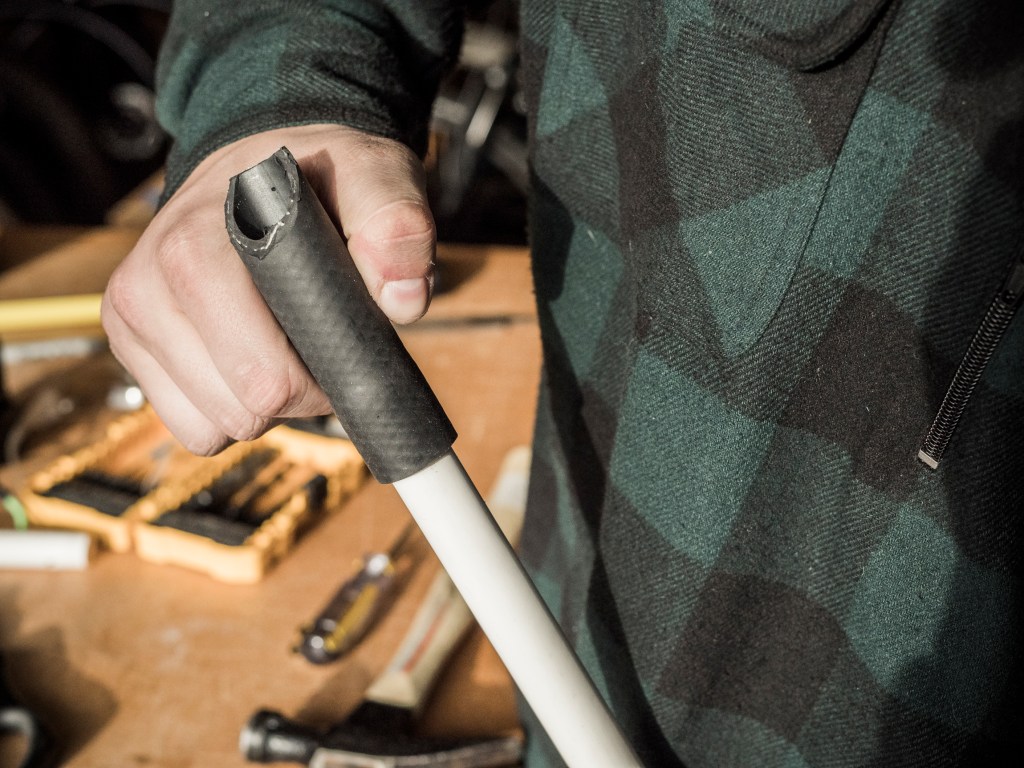
Work the untrimmed end over the end of a piece of PVC. Repeat with the other piece of hose and length of PVC.
Using the ¼” bit, drill one hole through one wall of a PVC pole, 2 inches from the hose-free end. Roll the PVC a quarter turn and drill 1 inch from the end, going all the way through both sides of the pole to create two holes. Repeat on the other pole.
3. Prep cordage
Cut two lengths of paracord to 7 feet and melt the cut ends to prevent fraying. This length gives you extra cord in case you need it for repairs in the field.
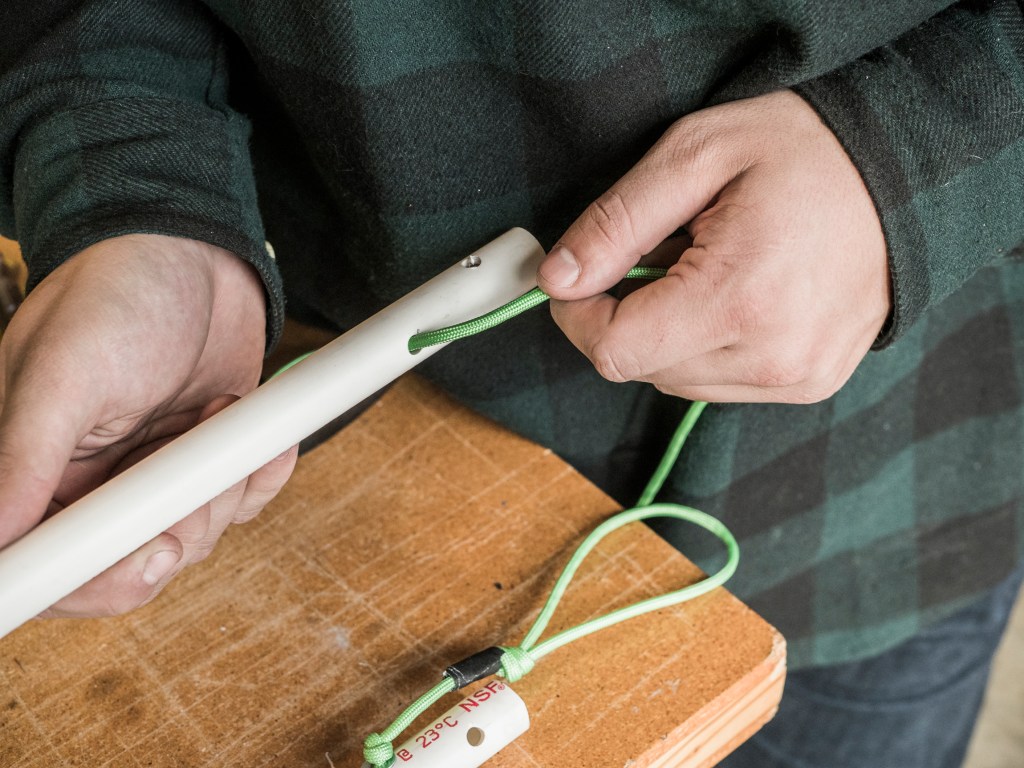
Run one length of cord through a PVC tube, going into the hose end and out the single drilled hole at the other.
Using an overhand knot, tie a large loop at the hose end and secure with electrical or duct tape.
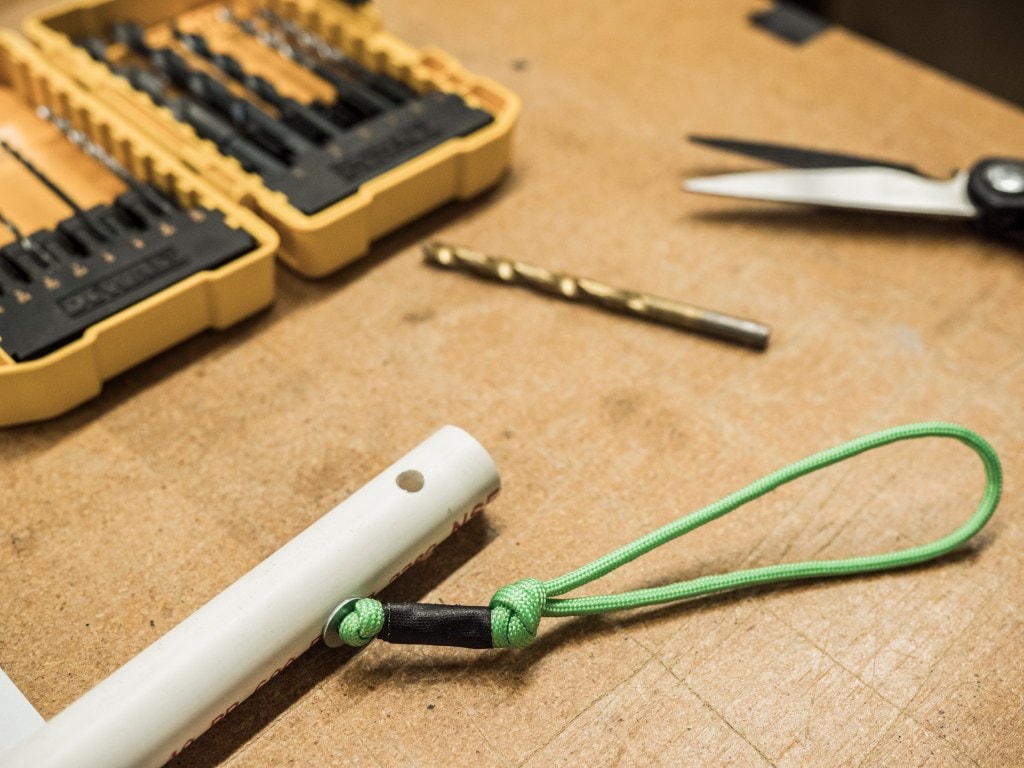
Thread a washer over the other end of the paracord. Leave about a 14″ tail and knot the cord so it holds the washer snug against the drilled hole. Tie a 6″ loop with the tail and secure it with tape.
4. Install grommets on sled front
Using the 3/8″ bit, drill a hole on both front corners of the sled. Our sled had two existing holes which will be used to attach the poles. If your sled does not have these pre-existing holes, drill two additional holes about 2 inches in from the outside drill holes.
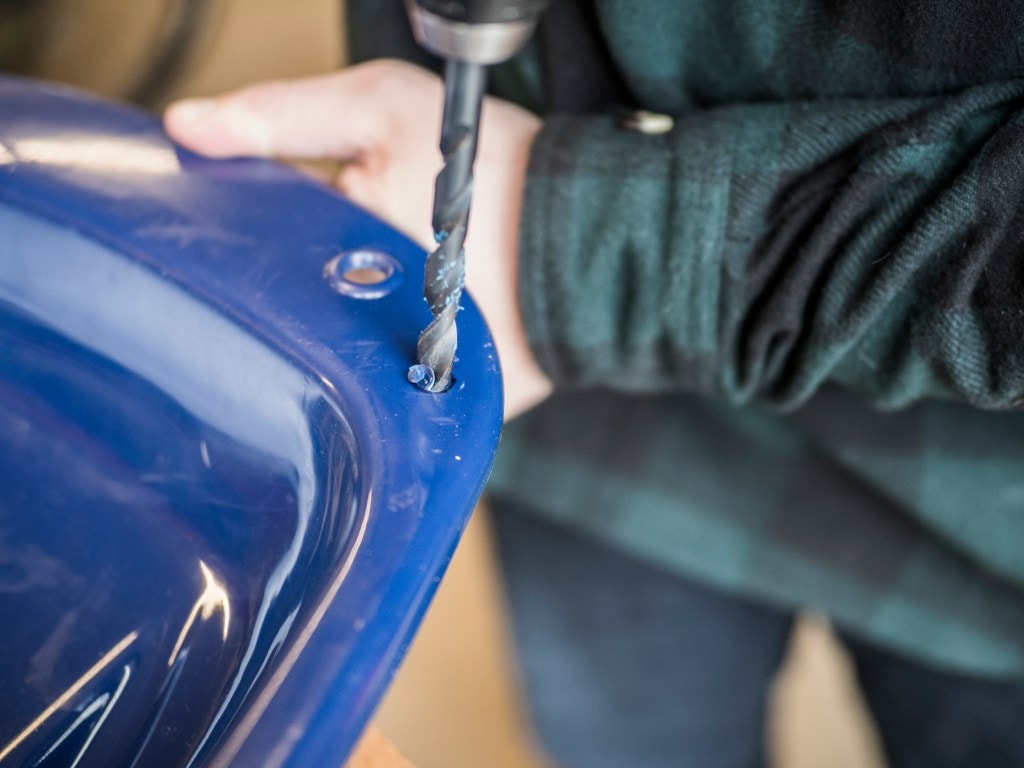
Use the grommet tool to install grommets at each hole, following the instructions on the package.
5. Attach poles to sled
Take the loop at the hose end of a pole and thread it down into the sled’s outer grommet (from the top of the sled) then back up the inner hole. Repeat on the other side.

Cut a piece of 1″ webbing to 24 inches and melt the ends to prevent fraying. Slide one half of a 1″ plastic buckle on either end. Loop the 1″ webbing through both cord loops and clip the buckle closed, tightening to secure the poles close to the sled.

6. Make gear tie downs
Flip the sled over and use a ¼” bit to drill three evenly spaced holes along each long side of the sled and two on the short tail end. Drill an additional hole about 1-2 inches back from the third hole on the left side, for a total of nine holes.
Cut 15 feet of paracord (this may vary depending on the size of your sled), and melt the ends to prevent fraying. Thread one end of the cord up through the additional hole you just drilled, slide on a washer and knot the cord securely to keep it from slipping through.

Run the cord toward the tail of the sled, threading up through the left hole on the tail of the sled. Pull out enough cord to create some slack. Pinch a bight about 3 inches long so that it sits at the center of the tail and secure it with a knot, as pictured above. Continue the cord down through the right hole.
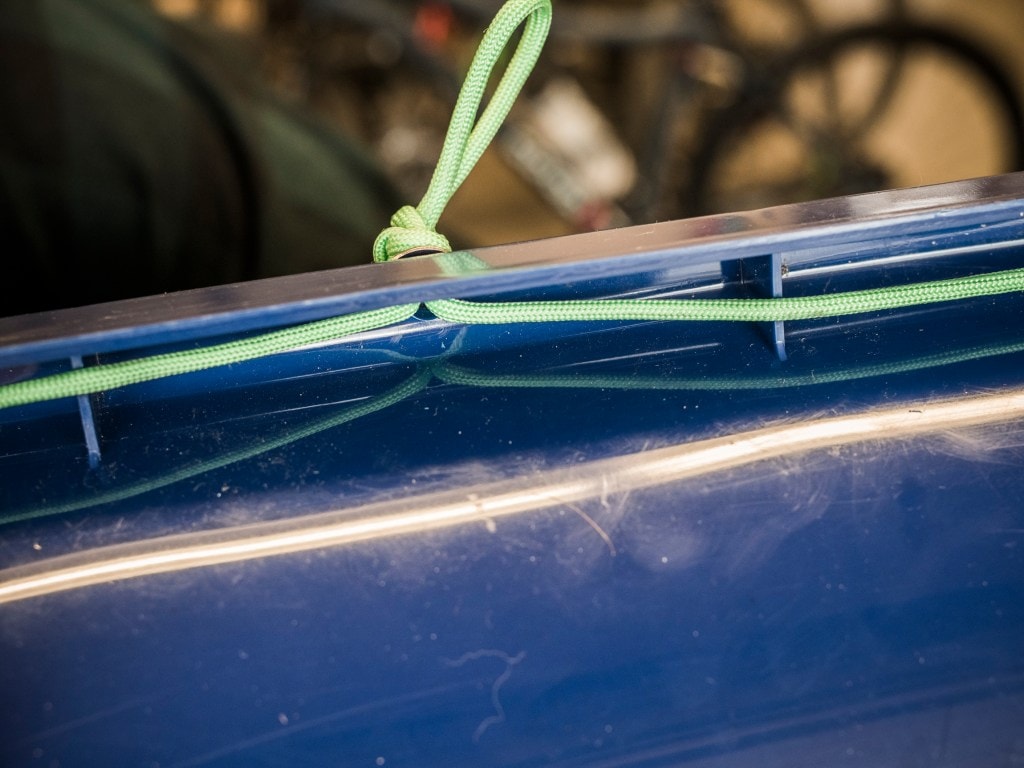
Continue the cord toward the next hole on the right side of the sled. Pinch a 3-inch bight of cord and thread it up through the hole. Thread a washer onto the bight, and knot the loop to secure the washer snug against the sled. Repeat at the next two holes.

When you reach the nose of the sled, thread the cord up through the inner right hole. Pinch a bight about 3 inches long so that it sits at the center of the nose and secure it with a knot, as pictured above. Continue the cord down through the inner left hole.
Continue threading bights through the remaining holes down the length of the left side of the sled, ending with a final bight at the last hole.
Part Two: The Harness

1. Make the hipbelt
Use a tape measure to measure your waist just above your hip bones where you want the harness to sit. Measure a piece of 2″ webbing to this length and add 10 inches for adjustability.

Find the center of the belt webbing, and measure 9 inches in either direction. Use the grommet tool to install a grommet at each 9-inch spot, so the grommets are 18 inches away from each other.
Cut two 12-inch pieces of 2″ webbing. Place one piece of closed-cell foam on top of one the pieces of webbing and wrap the foam and webbing completely in duct tape, securing them together. Repeat with the other piece of webbing and foam.
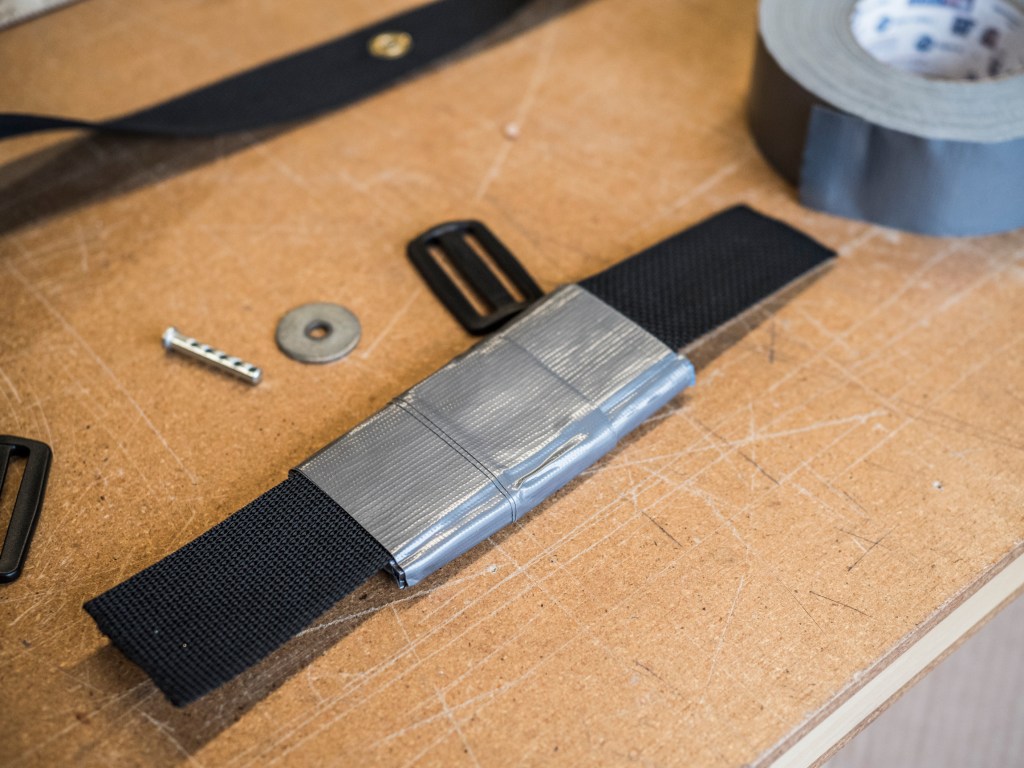
Thread one clevis pin with a washer through a grommet on the hipbelt. Place a taped foam piece behind the grommet and use duct tape to secure the foam to the hipbelt webbing. Repeat on the other side.
2. Attach poles to harness
Slide one of the clevis pins on the hipbelt through the two upper holes in one PVC pole.
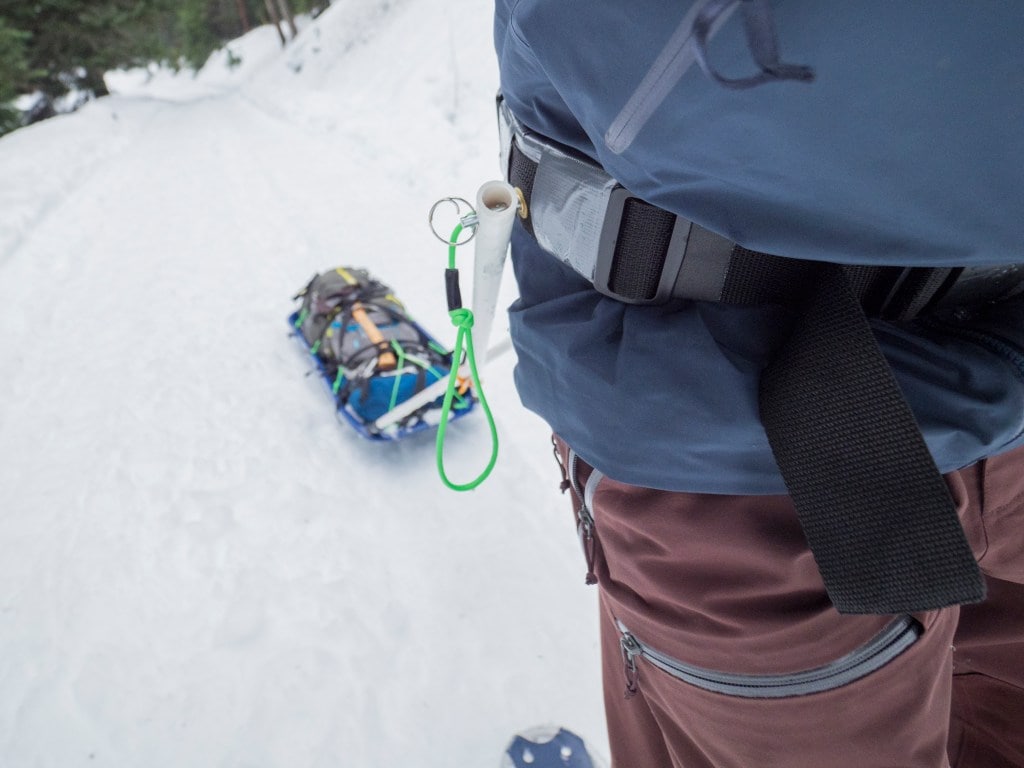
Secure by attaching a key ring to the pin. Repeat on the other side with the second pole.
Part Three: The Snow Fins (optional)
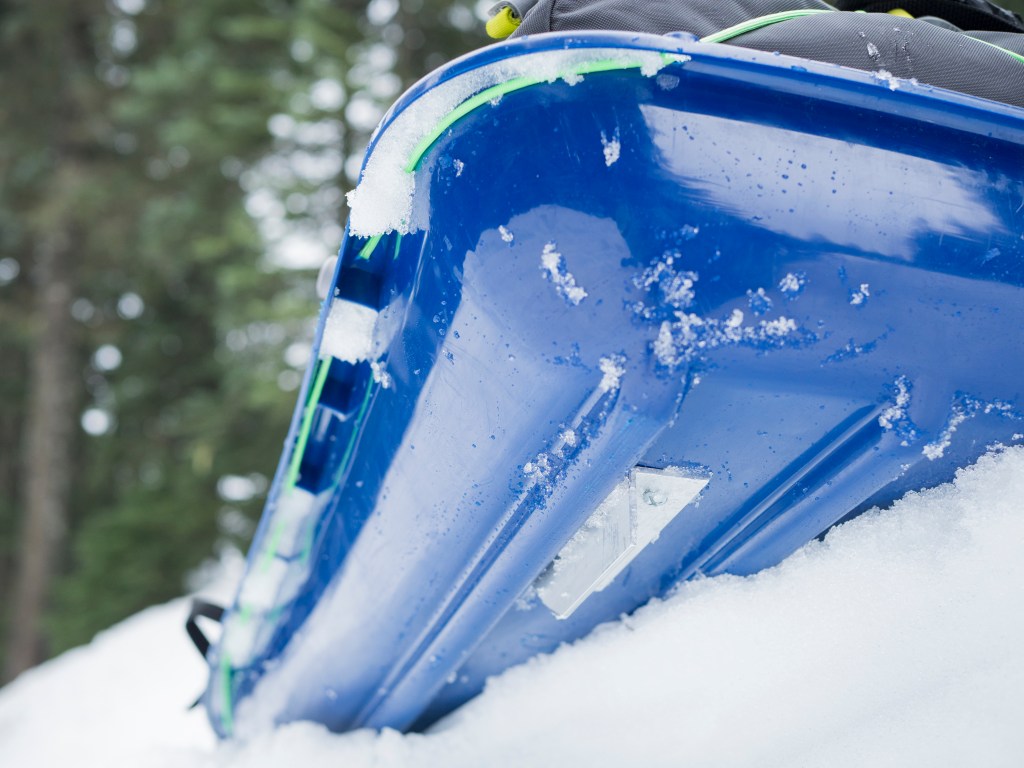
Snow fins are an optional addition to your sled. They make travel on steep slopes or fresh powder much easier, and reduce the chances your sled will slide off-track. However, fins are unnecessary on flatter terrain or more hard-packed snow and can create unwanted drag. The wingnuts in this design make the fins easy to add or remove for use in variable terrain.
1. Shape the fins
Use a straight edge to mark a 45-degree angle from the end center point to an outer edge of a piece of aluminum angle.
Clamp the piece to a work table and use a hacksaw to cut along the mark.
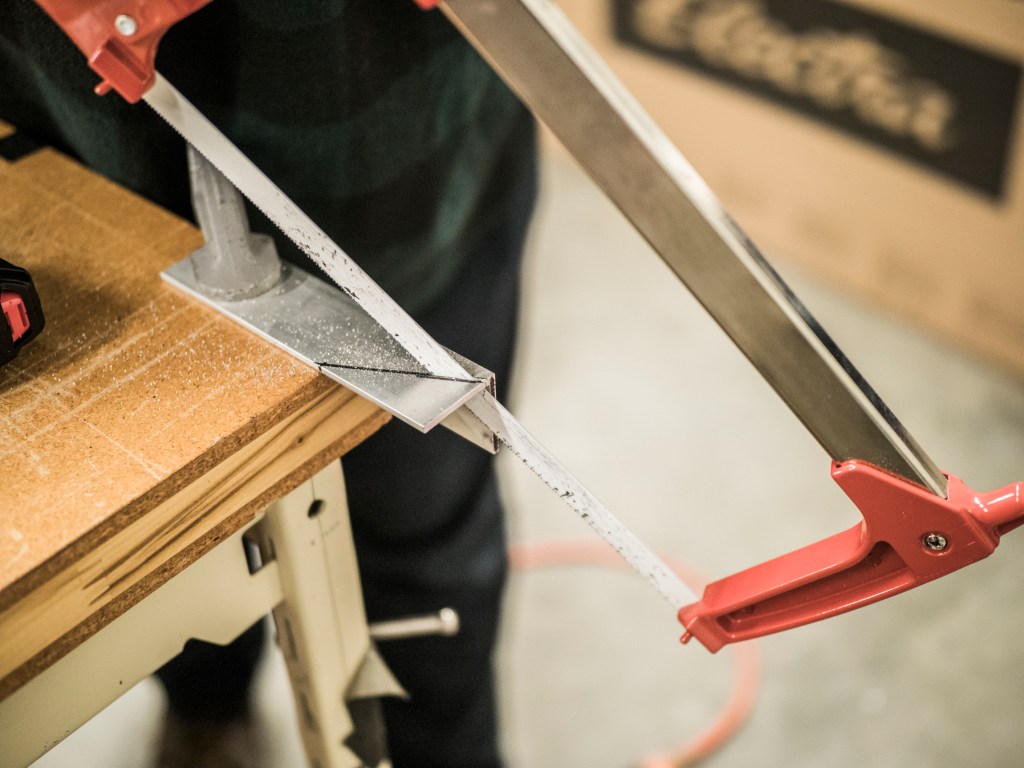
File the edge smooth. Repeat with the other piece of aluminum angle, matching the cut angle from the first piece.
2. Drill holes for hardware
Use the ¼” bit to drill three evenly spaced holes along the length of the uncut side of each piece of aluminum angle.

Place a piece of angle on top of one piece of aluminum flat bar and mark the drill holes. Use the ¼” bit to drill holes in the flat bar at the marks. Repeat with the other piece, ensuring the holes align on each pair of angle and flat bar.
3. Attach the fins
Flip the sled so the bottom is facing up. Place the aluminum angle pieces on either side about three-quarters of the way down from the front of the sled. Mark the three drill holes on each piece on the sled. Use a ¼” bit to drill holes in the sled at the marks.
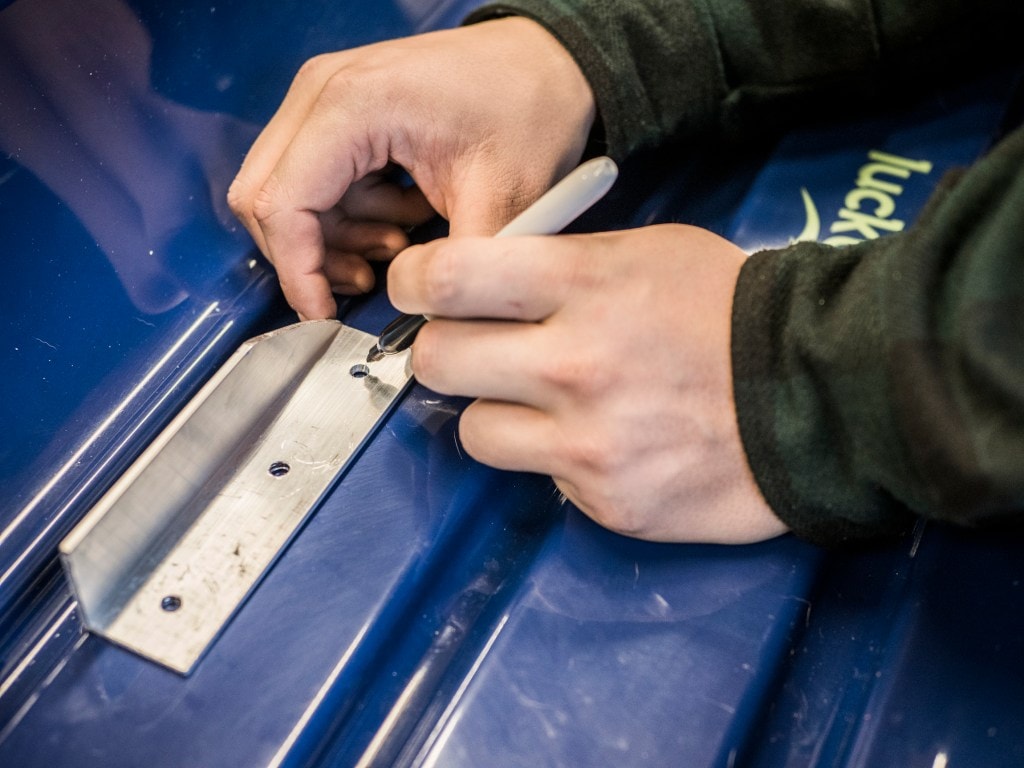
Using ¼”-20 bolts, secure the aluminum angle pieces on the underside of the sled and the flat bar aluminum on the inside of the sled, with the wingnuts screwed snugly onto the flat bar.

Part Four: Go On a Winter Adventure
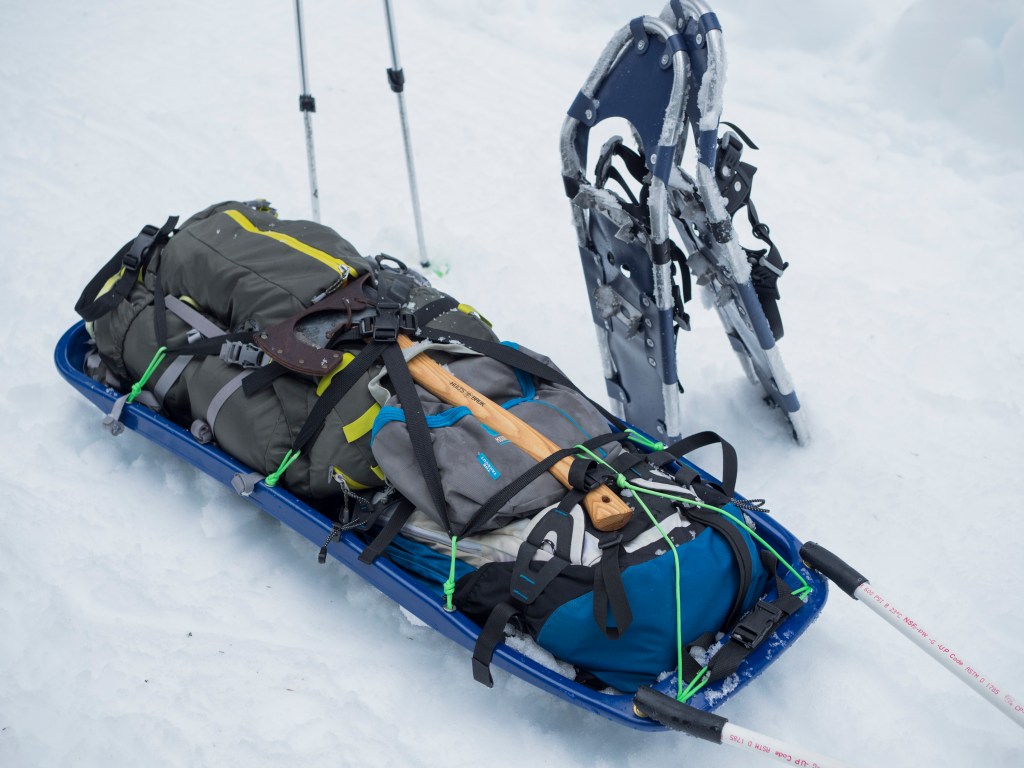
Clip on the hipbelt, adjusting the length as needed. You can attach the poles from the sled to the belt parallel to each other, or you can cross them for additional stability. If you cross them, secure the center point with a bit of cord.
Don’t pile gear too high; keeping the load low helps prevent the sled from capsizing. Place less-waterproof items in the rear of the sled where snow is less likely to accumulate. Finally, secure your load with bungees, straps or a cargo net attached to the tie-down loops and manually roll it to make sure nothing falls out if the sled tips when you’re on the move.
Using your new pulk sled will take a bit of practice, but you’ll soon love the ease of pulling your gear along behind you on the snow.
